Posted in amateur photography, beginner photography, Bullet journaling, education, goal setting, intentional living, learning, lifelong learning, lifestyle, personal development, personal growth, planner lifestyle, reflective journalling, Setting goals and intentions, wellbeing

Monday Matters: Creating a personal curriculum by starting small (with just one topic)

I’ve seen a lot of YouTube vlogs recently about creating your own personal curriculum, and, as I consider myself very much as a lifelong learner, I was eager to give it a go. However, with limited free time, a variety of goals in progress, and a vision board that identifies my priorities for 2026, I wanted to start really small by focusing on just one subject and a particular element I want to learn more about. If, like me, you already have a busy life but want to carve out some time to learn something new (and enjoy benefits such as enhanced brain function, improved emotional and mental wellbeing, personal growth and increased life satisfaction) read on to find out how I designed my personal curriculum for Summer 2026. Also, if you’re not sure what a personal curriculum even is, I’ve also covered this below too.

What is a personal curriculum?

A personal curriculum is a self-designed and self-lead learning plan that enables you to create your own educational journey, developing your skills and knowledge in an area which interests you. Unlike at school, college or university, you play the role of teacher, selecting your own subjects, assignments and, if you wish, learning objectives. You also get to choose how many topics you will cover (I would suggest no more than two or three to get you started), your methods of learning (e.g. books, videos, movies, podcasts, trips, experiences etc.) and the time scale for completion (e.g. one month, one season, one term or one semester). You can also plan study times around other commitments and think about how deep an understanding you wish to have by the end of your ‘module’.

The topics of your personal curriculum can vary greatly but could include academic subjects such as environmental sciences, philosophy, British Classics, Fine Art or Creative writing, hobbies such as baking, photography, knitting or watercolour painting, practical skills such as budgeting, gardening, basic car maintenance or computer literacy, or personal development such as time management, mindfulness, communication skills, learning a new language, emotional resilience or goal setting.

Choosing my focus for my learning plan

I have many, many hobbies an interests which made it difficult to decide where to start and what I wanted to work on. So, I figured that it might be a good idea to make a list of things I enjoy doing in my spare time. These are what came to mind straight away:

  • Creative journalling and memory keeping
  • bullet journalling
  • walking in nature
  • vegan cookery
  • drawing
  • watercolour painting
  • photography
  • blogging
  • fitness related including yoga, Pilates and Zumba

Some of these topics, I feel like I know quite a lot about already and so I’m happy with my current explorations of them and how much time I dedicate to them. Others, I want to learn more about but tend to explore them every now and then when I feel like getting creative (e.g. watercolour painting and drawing. The topic that I decided that I really want to focus on learning about right now was DSLR photography. However, as I’ve done a beginners course focusing on basic techniques and Photoshop, I wanted to explore a very specific type of photography which would uplevel my skills. I know I would love to concentrate on wildlife photography but I’m very aware that suitable zoom lenses and a camera upgrade would be required and I don’t have the finances for this at the moment (if ever!). What I do have though, is a macro lens which I really haven’t got the hang of yet and a love of photographing insects and flowers so I’ve opted for a module on Macro Photography as a good starting point.

What do I want to learn?

I grabbed a piece of paper and brainstormed all of the things I wanted to learn about the topic of macro photography. Then I worked in my bullet journal to made a spread called An Introduction to Macro Photography finalising my ideas by identifying a rough order of action points. I started with the theory behind this style of photography, including tips and tricks, then moved on to practical experiences and opportunities to evaluate my learning and progress. I kept it pretty simple, using stamps and black ink, but if you wanted to, you could set out learning objectives or expected outcomes at each stage and go to town with the decor.

Photo credit: Laura Jones for Keeping It Creative

Finding resources to support my learning

There are plenty of resources online about macro photography so I made the decision to stick with web-based information for the whole of my ‘module’. I don’t want to buy books on my chosen topic as these can quickly become outdated or might involve equipment which I haven’t got (e.g. the newer mirrorless cameras) and, although I could go to the library, I like the idea of dipping in and out of online resources when I have a spare few minutes and don’t want to carry heavy books around with me.

To ensure I (almost) always have access to the wealth of webpages, blog posts and YouTube videos I’ve come across, rather than writing them down in my bullet journal, I’ve opted to paste the links into Notion so I can click on them whenever I want, and as long as I have my phone or my computer accessible (which is pretty much all of the time), I can do some self study. Now, I’m not an expert on Notion, so it’s not a fancy set up with items pertaining to different aspects of my curriculum but the titles in the links are enough for me to gauge what the pages or videos are about helping me to establish when they might be useful, and that’s enough for me!

When choosing your resources, it’s important to firstly establish what type of learner you are. Learners can be broadly categorised into the following (bear in mind that you’re likely to be more than one type):

  • visual learner – prefers images, diagrams and charts
  • auditory learner – learns best through lectures, discussions and audio materials such as podcasts and audiobooks
  • kinesthetic learners – prefers hands on learning through physical experiences and practical activities
  • linguistic learner – excels in reading, writing and verbal communication
  • logical learners – enjoys solving problems and logical reasoning
  • social learners – thrives in group settings and prefers to learn through collaboration
  • solitary learners – prefers to study alone and is self-motivated to learn, keen to independently reflect on own learning

Should I record my learning?

Whether you take notes on what you read or explore is entirely up to you, but for me, writing and journalling is part of the fun, so I absolutely want to do plenty of recording even if it’s just me writing that I spent ages trying to get the perfect shot of a butterfly and just as I fully depressed the shutter it flew off to pastures new and left me feeling a tad frustrated. Also, as a stationery lover, it was the perfect excuse to go notebook shopping! I got three slim notebooks for £3.50 and as long as I ignore (or get over) the fact that the word ‘notes’ is slightly off centre (grrr), I’m sure I’ll enjoy using one of them for my Macro Photography learning!

Photo credit: Laura Jones for Keeping It Creative

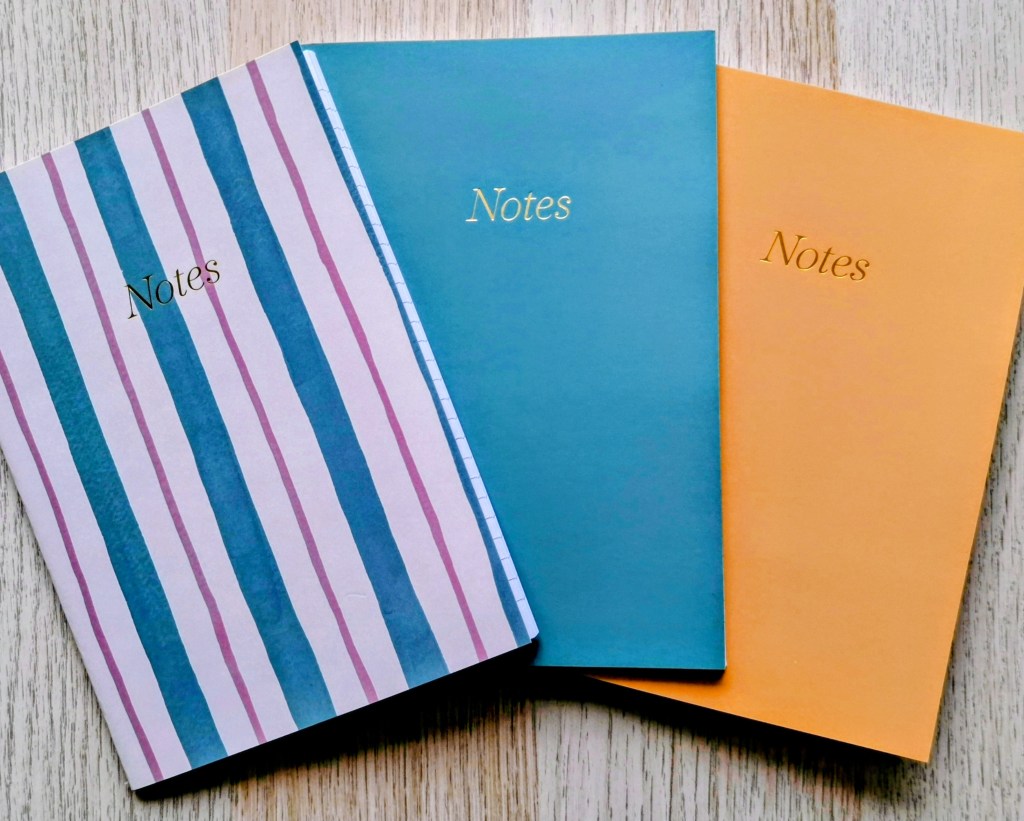
Now I just need to decide which design to use. I’m thinking the bright and sunny yellow colour?

Top tips for keeping it fun and interesting

Now you’re no longer studying at school or college, you get to choose exactly what you focus on and the pace of your learning. To ensure you have fun and maintain interest in your personal curriculum, I have the following suggestions and tips which should help:

embrace fluidity Whether your employed, run your own business, or are currently not working, there will be times when you have lots on your plate, times when you have a lighter schedule, times when you’re full of energy and times when you simply need to rest rather than adding more to your to do list. For your personal curriculum to be successful, I think it’s really important to ‘go with the flow’, accepting that your learning can and should flow with the rhythms of life rather than being a rigid set of actions to be completed at a set time or by a set date.

give yourself grace Similarly, if you do carve out a specific time to do a specific activity such as reading a chapter from a book, watching a video or making notes on your learning, if it doesn’t get done, don’t be hard on yourself, instead, spend time considering and questioning why. Maybe you got distracted by social media. Perhaps a more exciting opportunity presented itself that you didn’t want to miss. Or maybe you had low energy that afternoon and didn’t think it was a good time for you.

release perfectionism Strive to do your best with your personal curriculum study rather than demanding flawless results. When you were at school or college, you had particular grades to aim for and may have felt like other people were placing high expectations on you. However, you were probably also told that ‘as long as you try your best, that is all that matters’. Embrace the present and recognise that you are doing the best you can with the energy and resources you have available and that is totally okay.

avoid comparision The term ‘personal curriculum’ is a bit of a buzz word or phrase at the moment and there seem to be plenty of people talking about developing one and often sharing theirs on social media. I’ve seen examples where individuals have picked about four or five topics in a single month and set around six learning objectives or foci for each. Just the thought of doing this, my part time work, housework and spending time with family and friends (which is also a big priority of mine) stressed me out. But, then I came to realise that, although looking at what others are up to can get your creative juices flowing or give you ideas about the scope for your self study, it can also be pretty dangerous for your own wellbeing to compare yourself to others. If, like me, you want to start slowly and dip your toe into setting yourself a personal curriculum, you could try picking a single topic of study and a small part of what might be a vast and open-ended subject. It’s also worth remembering, that these same people who have been sharing their in depth curriculums, might not have done half of what they set out to do, and might be drowning in their own self-directed learning program behind the scenes and wishing they hadn’t set themselves such lofty goals! Remember, learning in your adulthood should be fun and light-hearted and if it stops being these two things, it might be time to reconsider your choices.

Ultimately, when designing your personal curriculum, ‘you do you’ as the saying goes, choosing your own resources and learning styles rather than adopting ideas from others that you’ve seen on social media. And remember, the beauty of learning as an adult, is that you can always tweak bits along the way or completely miss out parts where you feel like you’re not enjoying yourself or that it’s all getting a bit too academic (or formal) for your liking!

Wishing you lots of happiness in your learning, whatever you choose to do,

Posted in intentional living, journalling, lifestyle, mindset, Planning and journaling, reflective journalling, self care, Setting goals and intentions

Why I’m ditching The Five Minute Journal and what I’m trying now

Photo credit: Laura Jones for Keeping It Creative

For the past couple of years now, I’ve been using The Five Minute Journal consistently as a way of recording what I’m grateful for, thinking about how to make my day as good as possible, selecting a positive affirmation and making a note of the main highlights each evening. There are so many positives about this journalling system, which, as the name suggests, can be filled in very quickly using the prompts given. So, you might wonder why I’ve made the decision to stop using it? Today, I’m going to be sharing my main reasons and also talking about what I’ve started using instead.

Why I’m no longer using The Five Minute Journal

As you can see in the photo above, I’ve worked my way through four of The Five Minute Journals lasting six months each. I’ve mainly enjoyed using this guided journal with daily prompts, but a few months ago, I started to think about trying something else. This was mainly because I felt like my practise was getting a bit stale and repetitive and wanted something that I would really look forward to filling in twice a day. Here’s some of the things which have made me fall out of love with it:

The Gratitude section – I found this first bit really difficult to fill in when half asleep in the early morning. I would have preferred to list what I was thankful for in the evening so I could draw from things which had happened during my day.

The ‘What would make today great?’ section – I liked coming up with things that would make a difference to my day but I also felt like I wanted to explain why and the journal did not allow enough space for this. I think I would have preferred it if the section was a little more flexible so that you could maybe write one thing and provide an explanation or 2 or 3 things without going into detail.

The Daily Affirmation section – I liked choosing an affirmation for the day but I did sometimes struggle with coming up with one and had to resort to looking on the Internet for ideas which kind of made the process take a lot longer than five minutes.

Highlights Of The Day section – I continued to enjoy writing my highlights and often found myself writing a fourth one. I would have liked a bit more room to write in more detail for this part but, this would have taken longer than five minutes to complete if it was longer.

What did I learn today? section – For this part, the idea was to write something that the day had taught you about yourself or your situation, so, for example you could write ‘scrolling the news on my phone makes me feel sad’ or ‘sometimes when I feel hungry, I’m actually thirsty and should try drinking water before turning to a snack’. Often, I found this difficult and would end up writing something general that I’d learnt that day such as a new piece of knowledge or some advice that I’d come across. However, I felt that these ‘learnings’ were not really what the section was getting at. I felt like this became a drag and something I dreaded trying to fill in which isn’t how I wanted to feel as filling in the journal is meant to be a positive experience.

Weekly Challenges – these were something I looked forward to, but, I didn’t always have time on the particular day it was presented on and I often ended up forgetting about it when really, it would have been better to do it on an alternative date. Also, I think I would have preferred it if there was a menu of options at the back of the book and you could choose one which suited you at that time.

Despite me not wanting to purchase another ‘The Five Minute Journal’, what I didn’t want to do was abandon journalling altogether. And, luckily, I found an alternative journal in a garden centre whilst I was visiting family. My new journal is beautiful to look at, great to write in (much better quality paper) and allows more flexibility with what you can write about. I create a morning and evening entry and I would say it takes me no longer than ten minutes in the morning and no longer than fifteen in the evening. It’s helped me to fall in love with journalling again and I’m really enjoying filling it in. It also has an extra little prompt each day which changes regularly and, every now and then, it has something different on the next page which you can choose to fill in at some point during your day.

My New Journal

Below, is the journal that I’ve just started using partway through this month. I picked it up at Easter time and was really looking forward to getting going with it. I’ve also photographed some pages to give you an idea about the morning and evening prompts and also some of the extra challenges that are dotted throughout the book. You’ll also see that it has some gorgeous illustrations too which definitely adds to the appeal!

Photo credit: Laura Jones for Keeping It Creative

Final words…

Any regular practice in life can sometimes get a little boring and become hard to maintain interest in, so it can really help to shake things up every now and then. I’m interested to know if other journallers have ditched a particular form of journalling and tried something new. Sometimes change can be scary but often, it can also be invigorating too. I would love to hear what you think of my new journal and if it appeals to you too so let me know in the comments.

Posted in creativity, journalling, lifestyle, memory keeping, Planning and journaling, reflective journalling, TN journaling, Traveler's Notebook, Traveler's Notebook Spreads

How I journal about my holidays: creative ways to record travel adventures

(N.B. image heavy post this time)

Last month, we spent a lovely week in Faro, the capital of the Algarve region of Portugal. Whilst I usually do a double page traveler’s notebook spread each month, documenting the main highlights, when we go on holiday somewhere new, I will dedicate a whole notebook to the trip which includes journalling, lots of photographs, ephemera and general momentoes which can be stuck in. Today, I’m sharing how I prepare for my journal before I go and whilst away and I’m also including examples of double page spreads showing the different creative ways I document my holiday.

What I do prior to and whilst I’m away

So, let’s start with my preparations so that working on and completing my journal is much easier when I get back home. These are key to ensuring I have all the information and need and key details that I might otherwise have forgotten.

Before I head off on my holiday

Before I go, I make the journal itself. I create a TN wide size insert choosing colours, patterns or images on the scrapbooking paper which suit my coming trip. So, for example, this time, I opted for a bright and cheerful flamingo, flower and leaf themed paper from the Paradise Crush collection of 12×12 papers (200gsm heavyweight cardstock even though referred to as paper). This was because I had read that there are flamingoes to be seen in the lagoon (Ria Formosa). I love selecting the cover paper myself and then hand-stitching blank white paper for the inside. I choose quite thin white paper so the journal doesn’t get so thick that it won’t close properly when I add to my pages.

Photo credit: Laura Jones for Keeping It Creative

Shortly before travel, I add a small notebook to my handbag and make sure I have a pen too. This is useful for writing details during my holiday so I don’t forget things when I return. Just a word of warning if you’re going on a flight though – be sure to select your pen carefully as the liquid ink in my V5 Pilot Hi-Tecpoint pen must have expanded whilst in the air and when I got it out to write with on arrival the pen came apart and I got covered in ink! Luckily, it was just my hands that got ink all over them, not my clothes.

The final thing I take with me is something to store ephemera (collectable bits and pieces) in. This time, I took a popper wallet and it came in very useful for keeping papers flat. I do wish I’d opted for a slightly bigger folder though as I had some bigger things that I had to fold up to ensure they fit.

During my holiday

Notetaking Throughout the holiday, I make notes and reflect on my day. This is easy to do in the little notebook I mentioned earlier which comes with me wherever I go. This could include the name of a place we visited, my menu choices in a restaurant or cafe, timings of events during the day, a funny anecdote or how I felt in a particular place.

Taking photographs I take lots and lots of photographs whilst we’re away – better to have too many than not enough, right? However, for me, it’s not just about taking photos of each other and things my husband and I see or do, it’s also very much an aide memoire of various elements of our trip too. For example, when in Faro and on our day trips, I took photos of menus from the various eateries we went to, a screenshot of the weather for the week, close up shots of cocktail descriptions, shop fronts where I made my souvenir purchases and screenshots of locations of places we planned to go later on in the week. Also, talking of photos, I took my selfie stick so that we could take shots of the pair of us together rather than having to ask other tourists to take them for us.

Collecting ephemera In the traditional sense of memory keeping journalling, ephemera usually refers to stickers and die cut paper and card images which can be glue or stuck into the journal pages. However, for me, it means anything and everything which could be stuck in as a memory of our holiday. On our trip to Portugal, I collected and saved business cards for cafes and restaurants, maps picked up at the Tourist Information places, leaflets such as the one advertising our boat trip so I could cut out letters for titles, small images or bits of information, receipts from shops and eateries, paper tickets (e.g. entry to the cathedral and for our train ride to Albufeira), samples from paper bags we were given to house our souvenirs in and even the cup cover for our glasses in our hotel room. Some of the things I didn’t end up using but at least I was well prepared with paper goodies I did want to add. I also only used parts of my items sometimes, so, for example, I trimmed a large map down to fit on a double page spread and I cut the logo from a business card of a place called Veganbox we ate in a few times.

Creating my travel journal

It’s up to you how you do your journalling and the elements you include within the pages but here’s some ideas:

  • travel information including modes of transport and tickets
  • the weather whilst you’re away
  • places of special interest you visited
  • photos of the accommodation you stayed in
  • maps of the place you stayed and other areas that you visited
  • meals, snacks and drinks enjoyed plus related ephemera
  • photos of scenes, selfies, family, food and drinks enjoyed etc
  • souvenirs and why you chose them
  • information about any traditions of the place / country you went to
  • an explanation of something new that you learned whilst you were there
  • activities you did and what you did to relax

Supplies that I find useful and you might too:

  • roller glue – I use tonnes of this stuff and have two rollers – permanent (to ensure things stick really well and removeable (for when I might want to reposition elements on a page)
  • stickers – from a variety of larger and small businesses online (purchased from Amazon or businesses such as Papermaze, or Etsy to support small UK sellers), or made myself in Cricut Design Space and printed and cut
  • We R Memory Keepers 1,2,3 punch board – for making the mini envelopes I included
  • Washi tapes – I have collected so many of these over the years and use them in my memory keeping as well as my bullet journal planner
  • Die cuts – I didn’t use any this time but small ones of these are useful as decor on pages
  • Pens – biros or gel ink and possibly coloured pens for writing straight into the journal

I’ll let the photos of my pages do the talking now but if you have any questions, feel free to get in touch with me.

Photo credit: Laura Jones for Keeping It Creative

Final words…

Times are certainly changing with creative journalling and memory keeping. A few years ago (maybe a few more!), everything used to be paper based, but now, many things that I would usually stick in to my journal, such as flight information, boarding passes, entry tickets to places and for excursions and so on are often completely digital. To make sure I can still include at least some of these, my husband has to screenshot the e-tickets on his phone and then forward the images to me in WhatsApp so I can print them off. It’s not the same, but at least it provides some sort of record and adds to the memories stored within my travel journals.

I hope you’ve enjoyed reading about my travel journalling process and seeing photos of my actual pages. There’s quite a lot of work involved in the journals I produce, but you could cut down the time involved by just adding photos and short captions. You could also choose to draw elements of what you see and do on your travels and this would be another lovely way to make the process both creative and therapeutic too.

Thanks for reading and I hope I’ve inspired you to create your own travel journal to document holidays (A.K.A. vacations),

Posted in Blogging, crafting, intentional living, journalling, lifestyle, memory keeping, reflective journalling

Currently… Life update March 2025

It feels like it’s quite a while since I did a life update and with signs of spring emerging, including the sunshine which is currently streaming through my craft room window, I thought I’d do another one to share what’s going on for me right now. Before I start my next paragraph, I’m going to open a new window (on my computer rather than in my room as it’s still pretty chilly today) and look back at my last similar post to see how things have changed.

Currently reading…

…a family mystery called The Midnight Hour by Eve Chase. The book, which is mainly set in Notting Hill, London, swaps between two timelines – (one in the late 1990s and the other, the present day, twenty years later) and tells the story of Maggie and her little brother Kit. It’s the second book I’ve read by this author, and, although it’s not a total page turner like my usual murder mystery and police procedural books generally are, there are a few twists and turns and the storyline is holding my interest well. Unfortunately, it’s taking me a good while to finish any of my books at the moment as when I clamber into bed at around 10.30pm, I’m usually so tired that I can barely keep my eyes open to read a couple of chapters.

This year, I’ve got into audio books and although I haven’t purchased the above one on Audible, the next novel I have lined up was only £1.99 on Kindle and then £2.99 for the accompanying audiobook so good for my tight budget. Plus, it’s set in the USA, so I figured it would be nice to hear some of it read in an American accent. For my first audio book, Geneva by Richard Armitage, I read the whole thing on Kindle and then listened to the audiobook, whereas for my second read, I alternated between reading bits and listening to bits and I think I’ll probably do this for my next read too.

Currently loving…

…addictive word games. I’m a real fan of any kind of word game and a couple of months ago, I was introduced to Wordle and have loved playing ever since. The app, which I have on my mini tablet, features a web based word game where you are given six chances to guess a five letter word. Each time you guess a letter correctly, it turns yellow if it’s in the word but in the wrong location or green if it’s in the correct place within the word. There’s a daily puzzle which I enjoy doing straight after my breakfast to get my brain going and I also regularly compete against other players to be the first to get 25 points by guessing in as small a number of tries as possible. A good understanding of word patterns is put to use as you play and I find it great fun, particularly if I manage to guess the word within a couple of attempts.

Currently making…

…infusible ink projects to get more use out of my Cricut EasyPress 2. One of my goals for this year is to make a number of infusible ink and iron of projects using Cricut Design Space, my JoyXtra and my Easypress 2 medium. I’ve had a blank tote bag for a while now and also bought a set of 3 cosmetic bags in different sizes. I made a little bag for my niece last year but I wanted to do some designs for myself. This week, I’ve added a design to the tote bag using a gorgeous deep purple galaxy infusible ink paper. It didn’t turn out perfect as the ink didn’t completely transfer properly the first time, so I had to re-do it by trying to line the sheet up again, but it’s okay and I love the positivity of the sentiment.

I’m not sure that the photo shows off the colours and the sparkles too well but I experimented with hanging the bag in different locations and this was the best I could do without resorting to using my DSLR camera and Photoshop.

Photo credit: Laura Jones for Keeping It Creative

Currently working on…

… completing the initial chapter of my Marie Kondo Tidying Companion workbook. This was one of my goals for February but I didn’t realise how time consuming it would be. At the moment, I’m taking lots of photos of the storage we have upstairs and downstairs in out home, plus lots of snaps of the before of our home. My final task, when I’ve cropped and stuck in all of the photographs, is to pencil in a tidying timeline, set some intentions and record how I’m currently feeling about the process of decluttering my home.

Currently planning…

…a big garden tidy up, setting seeds, chitting our seed potatoes ready for planting and adding some more spring colour to our beds. I put my back out doing some (supposedly helpful) stretches in bed last week and it’s just starting to get back to normal after having to take co-codamol regularly for a number of days. Next week, my husband and I are hoping to schedule in some time to do some gardening jobs including clearing up brown and shrivelled leaves from the beds, mowing the lawn (which disgustingly is currently covered in bird poo from visiting woodpigeons) and cutting back various dead bits of plants. The council will soon be starting brown garden waste bin collections so we want to make the most of our payment for this service. I also want to get some new primulas to add a bit more bright colour as some of ours got killed off last year (who knows why!).

Final words…

I hope you’ve enjoyed reading my mini life update and it has inspired you to reflect on all of the things that you have going on right now. If you don’t have your own blog on which to share your “currently…” you could maybe try make a few notes in a journal under your own headings that you can look back on in the future to see how your life changes over time and with the seasons.

Wishing you a wonderful springtime,

Posted in creativity, journalling, memory keeping, reflective journalling

Creating my February highlights pages in my new journal

Over the years, I’ve tried lots of different ways of creative journalling in Traveler’s Notebook inserts that I’ve purchased or made myself. I’ve loved completing different pages and layouts but I’ve often found myself trying to record too many different things in far too much depth. This has meant many collections of photos and ephemera in various bits and pieces of storage which never got journalled about (I didn’t even get started on them), half finished pages (often with photos and decor stuck in with spaces to journal about events and experiences and numerous blank pages (where I’ve penciled in what is to go on there) left to fill in later. It’s also been the case in the past that, during periods of bipolar illness, I’ve struggled to get motivated to do any journalling when depressed or taken on too much when I’m high, leading to tonnes of half finished or barely started creative projects.

Although my bipolar disorder is better managed now, and my mood is much more stable, I still wanted to find a way to record things whilst at the same time ensuring that journalling does not become too onerous a task. I think I’ve now found a method that works and I’m excited to share what this looked like for February this year.

In January, I started a new TN wide journal insert as a memory keeping project for 2025 (and if it continues to work for me, beyond this). Each month, I intend to create a double page spread with the main highlights on including events, trips out, purchases and general happenings. I set up the pages at the beginning of the month with a background paper and the title and then work on filling it in just after the particular month has ended. Today I’m sharing my pages for February which I’ve just finished this week and a little explanation of how I set about doing them.

Monthly Highlights Journalling

The idea of doing monthly journalling came from Kelseyleigh over at My Abiding Journal on YouTube. She’s been doing summary spreads of each month for quite a few years now and I’ve picked up lots of tips and ideas from watching her videos so I definitely recommend subscribing to her channel and watching some from the archives as well as tuning in to the livestream of her process which offers so many ideas and the opportunity to purchase stickers to use if you join her on Patreon.

Personally, I’ve not joined Kelseyleigh’s paid tiers as I like to make my own stickers and ephemera using my Cricut machine. However, she has some lovely ideas for each month of the year and I think her members get to suggest ‘bucket list’ items for inclusion on her sheets.

A few tips for success

As well as picking up some tips from Kelseyleigh, I’ve also developed my own systems for collecting bits and pieces, photographs and ephemera. As a Canva Pro and Cricut Design Space user, I’ve also got into the habit of designing a set of stickers each month too. Here’s what I’ve learnt so far and what is working for me:

  • If you want to have a background to your pages like I have, it helps to choose a simple patterned paper and adhere it prior to doing your journalling. I’ve also found that adding the letters of the month using small stickers that I create using Cricut Design Space helps in seeing how much space you have to work with. If you don’t have alpha stickers, you could try hand lettering a title, stamping the letters or use a letter stencil, depending on your craft supplies and how you want your pages to look.
  • As you engage in different activities during the month, think about photos you could take (or source) which would provide a good record in your journal. For example, I’ve screenshot and then cropped online images of items I’ve purchased if I want to include a very small photograph of a product that I’ve been excited to buy. I’ve also tried to consider photos that I could take which aren’t too busy so as to be able to shrink them enough to add as part of multiple photos on my dedicated two page spread.
  • Throughout the month, consider items that you could stick into your journal (tip ins) for example a business card, parts of some packaging, your menu choices when you go out for a meal, a section of a leaflet or map etc.
  • Use a small envelope to collect mini photographs, patterned paper, tip ins (e.g. maps, business cards, packaging labels as mentioned above), stickers and ephemera for the month and store it in the back pocket of your BuJo or other planner.
  • Create a notes page in your journal or on your phone to store information about events and happenings you want to record, ideas for captions, stickers you want to add to fill spaces on your pages and any other creative thoughts you have during the month.
  • Create a folder on your phone to add any photos you want to use in your journalling. This means you don’t have to spend ages searching your photos, screenshots, downloads, uploads and other resources when the time comes to work on your pages.
  • Use Canva or the PicCollage app to add small photographs that can fit together to create a single image to print. I have a 4×6 and 6×4 inch template on Canva for this purpose as that’s the size that my Canon Selphy prints at.
  • Consider purchasing an instant photo printer such as a Selphy, Instax or Sprocket so you can easily add to your photo collection and make mini versions of images you want to include. Check online reviews for the pros and cons and different price points so you can choose the right one to suit your needs and budget. I have a Canon Selphy which I’ve been using for years but you might prefer photographs that have a sticky back so you can put them straight in to your journal without needing to cut them out and add adhesive.

My February highlights pages

As I’m currently trying out the monthly recording system, I’ve picked out a notebook that I had already made and which fits in to my Carpe Diem Traveler’s Notebook that I’ve been using for journalling for a few years. So far, I’ve found that not everything I want to record will fit into the double page spread in my TN wide insert but I want to trial using this size for the full year to see if I always have too much stuff to include. It’s helping me to decide which are the main highlights and is good at making me condense things down or just let a photo do the talking (wholeheartedly embracing the saying that a picture is worth a thousand words). I may, in future use a larger blank notebook but I need to make sure that I’m still able to fit in the time at the beginning of the next month to create the pages.

Photo credit: Laura Jones for Keeping It Creative

Final thoughts…

One of the main problems I’ve found with creative journalling is wanting to document all of my life in detail using photos captions and lengthy bits of writing. Although I love working on my pages, it’s impossible to cover everything and trying to can lead to lots of overwhelm and feeling like you can’t keep on top of it. Creative journalling should be an enjoyable experience and if it starts to stress you out, I think it’s really important to do some self reflection on why. Although I’ve only done January and February so far, the pages were a pleasure to work on and only took a few hours to finish. My only issue now is you decide which highlights to include and which to miss out.

If you’re struggling to keep up with your creative journalling and feel like you’re always behind and desperately trying to get up to date, monthly highlight journalling might be a good way forward. Also, there’s nothing to stop you doing an extra couple of pages if you want to document something like a wedding, birthday, holiday or other special event in more depth before returning to a double page per month.

I hope you’ve found today’s post useful and it has helped you to see the benefits of doing a monthly summary if you have minimal time to work on your spreads. If you would like me to share future finished pages please do let me know in the comments.