Posted in intentional living, journalling, lifestyle, mindset, Planning and journaling, reflective journalling, self care, Setting goals and intentions

Why I’m ditching The Five Minute Journal and what I’m trying now

Photo credit: Laura Jones for Keeping It Creative

For the past couple of years now, I’ve been using The Five Minute Journal consistently as a way of recording what I’m grateful for, thinking about how to make my day as good as possible, selecting a positive affirmation and making a note of the main highlights each evening. There are so many positives about this journalling system, which, as the name suggests, can be filled in very quickly using the prompts given. So, you might wonder why I’ve made the decision to stop using it? Today, I’m going to be sharing my main reasons and also talking about what I’ve started using instead.

Why I’m no longer using The Five Minute Journal

As you can see in the photo above, I’ve worked my way through four of The Five Minute Journals lasting six months each. I’ve mainly enjoyed using this guided journal with daily prompts, but a few months ago, I started to think about trying something else. This was mainly because I felt like my practise was getting a bit stale and repetitive and wanted something that I would really look forward to filling in twice a day. Here’s some of the things which have made me fall out of love with it:

The Gratitude section – I found this first bit really difficult to fill in when half asleep in the early morning. I would have preferred to list what I was thankful for in the evening so I could draw from things which had happened during my day.

The ‘What would make today great?’ section – I liked coming up with things that would make a difference to my day but I also felt like I wanted to explain why and the journal did not allow enough space for this. I think I would have preferred it if the section was a little more flexible so that you could maybe write one thing and provide an explanation or 2 or 3 things without going into detail.

The Daily Affirmation section – I liked choosing an affirmation for the day but I did sometimes struggle with coming up with one and had to resort to looking on the Internet for ideas which kind of made the process take a lot longer than five minutes.

Highlights Of The Day section – I continued to enjoy writing my highlights and often found myself writing a fourth one. I would have liked a bit more room to write in more detail for this part but, this would have taken longer than five minutes to complete if it was longer.

What did I learn today? section – For this part, the idea was to write something that the day had taught you about yourself or your situation, so, for example you could write ‘scrolling the news on my phone makes me feel sad’ or ‘sometimes when I feel hungry, I’m actually thirsty and should try drinking water before turning to a snack’. Often, I found this difficult and would end up writing something general that I’d learnt that day such as a new piece of knowledge or some advice that I’d come across. However, I felt that these ‘learnings’ were not really what the section was getting at. I felt like this became a drag and something I dreaded trying to fill in which isn’t how I wanted to feel as filling in the journal is meant to be a positive experience.

Weekly Challenges – these were something I looked forward to, but, I didn’t always have time on the particular day it was presented on and I often ended up forgetting about it when really, it would have been better to do it on an alternative date. Also, I think I would have preferred it if there was a menu of options at the back of the book and you could choose one which suited you at that time.

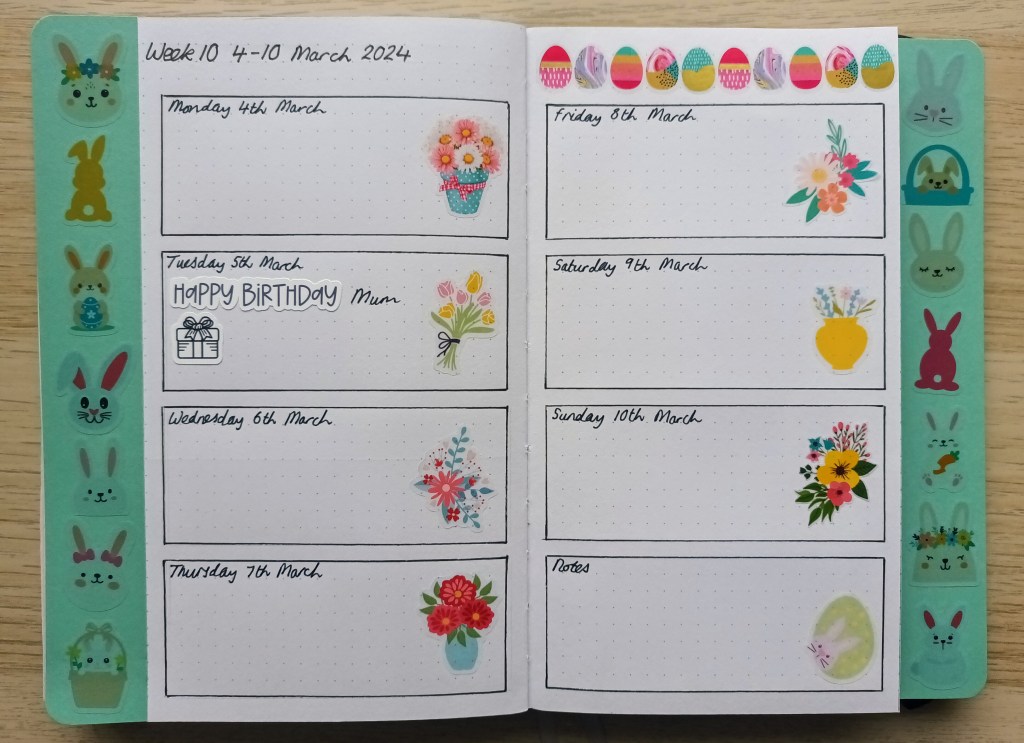
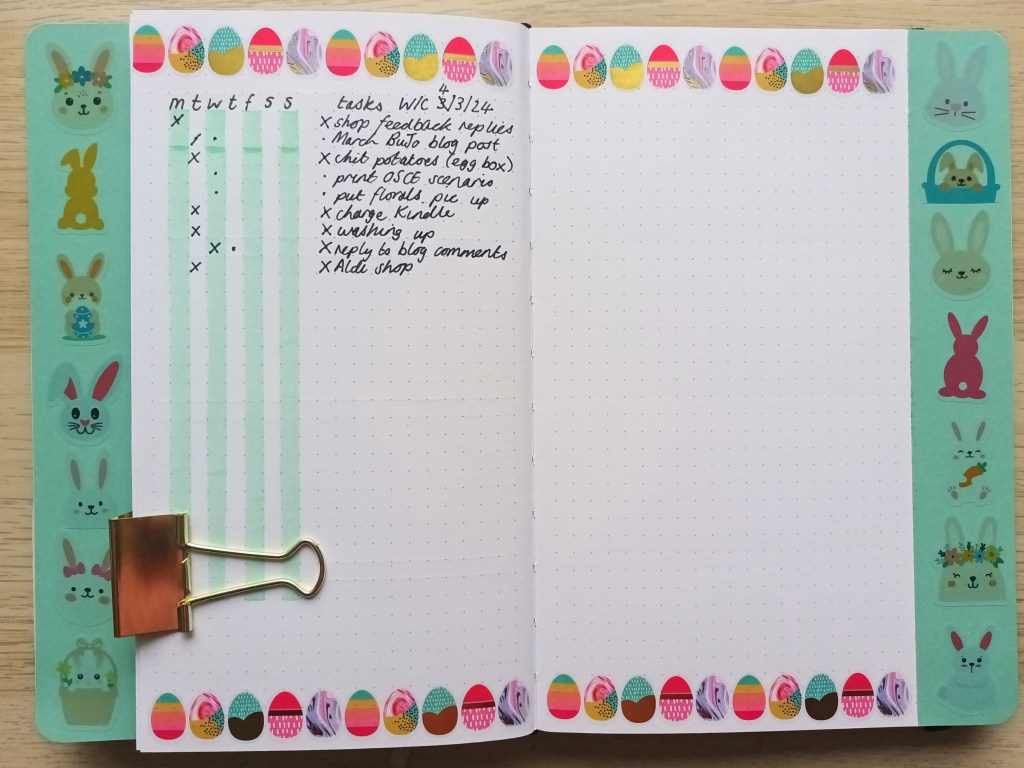
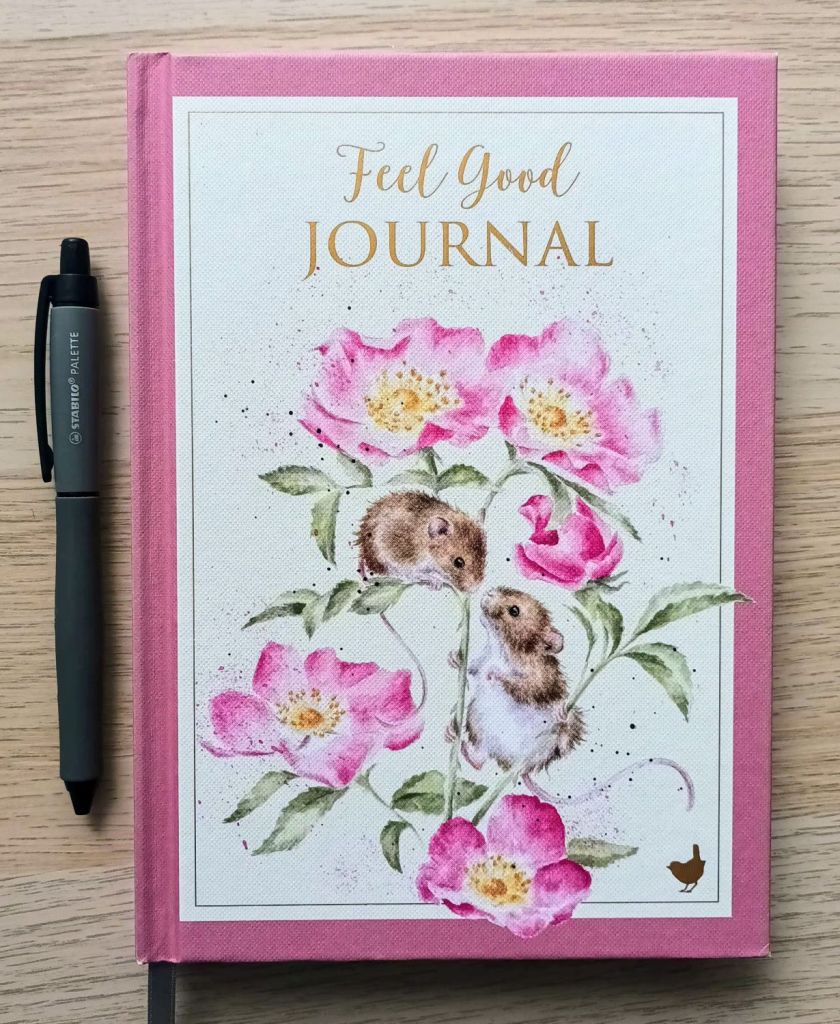
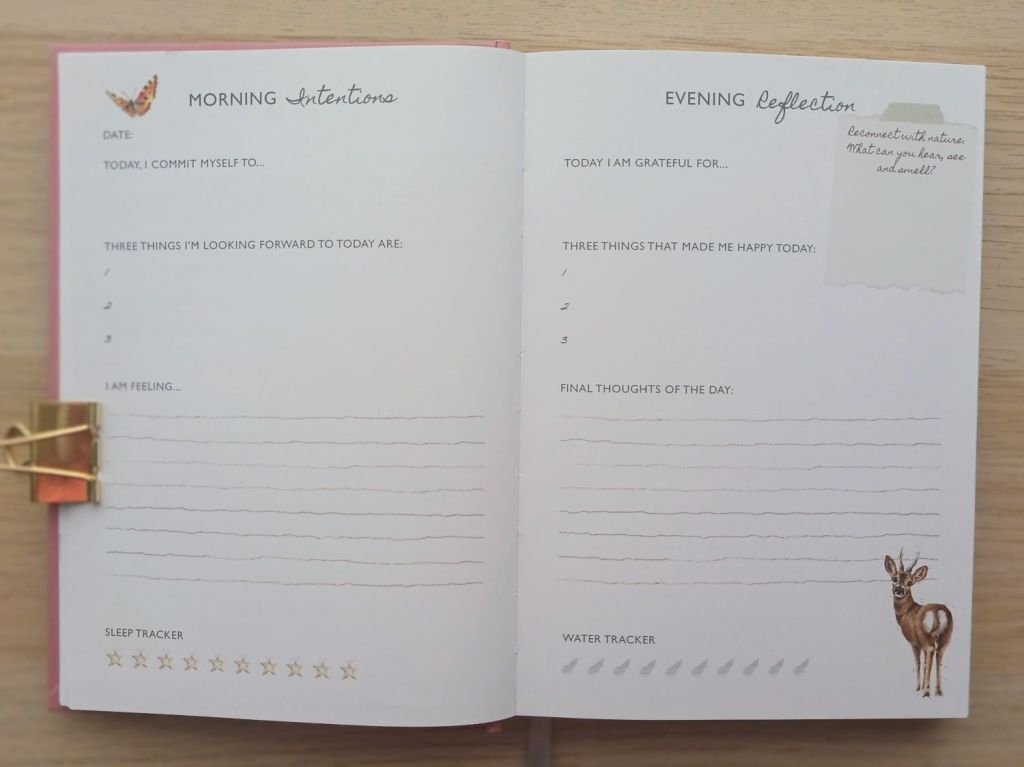
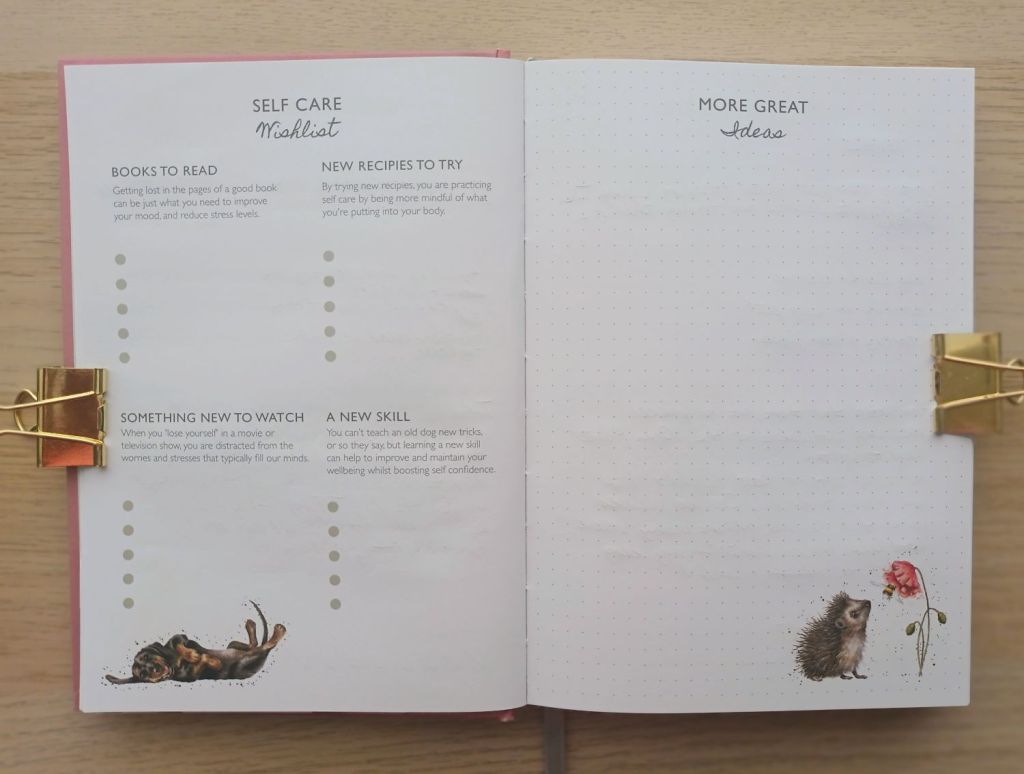
Despite me not wanting to purchase another ‘The Five Minute Journal’, what I didn’t want to do was abandon journalling altogether. And, luckily, I found an alternative journal in a garden centre whilst I was visiting family. My new journal is beautiful to look at, great to write in (much better quality paper) and allows more flexibility with what you can write about. I create a morning and evening entry and I would say it takes me no longer than ten minutes in the morning and no longer than fifteen in the evening. It’s helped me to fall in love with journalling again and I’m really enjoying filling it in. It also has an extra little prompt each day which changes regularly and, every now and then, it has something different on the next page which you can choose to fill in at some point during your day.

My New Journal

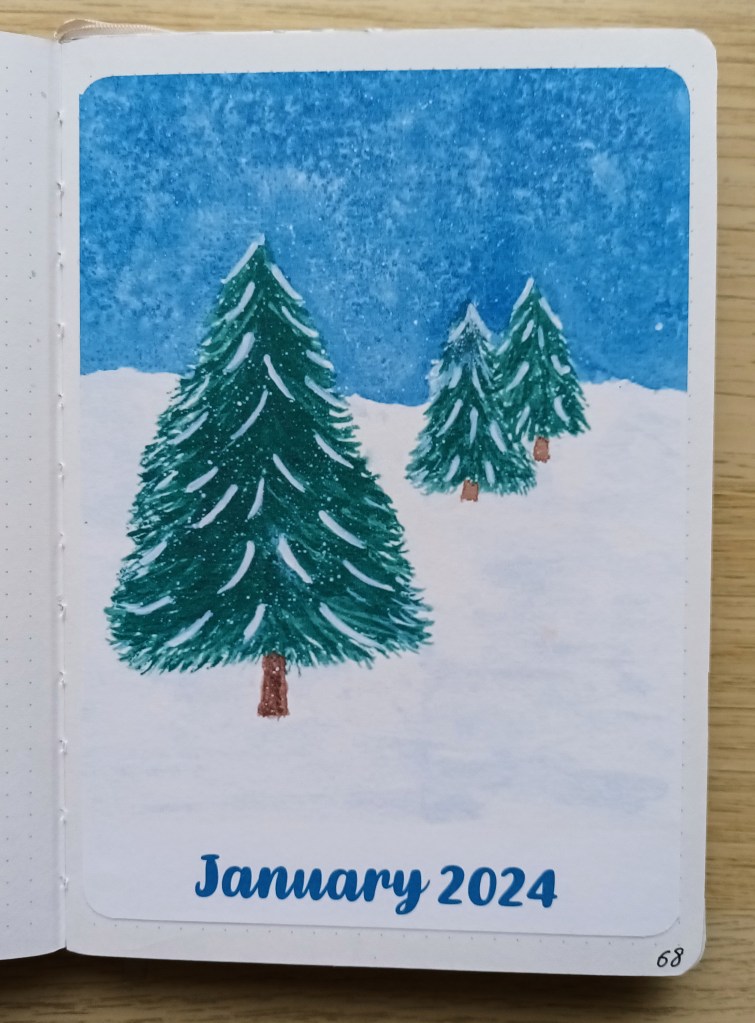
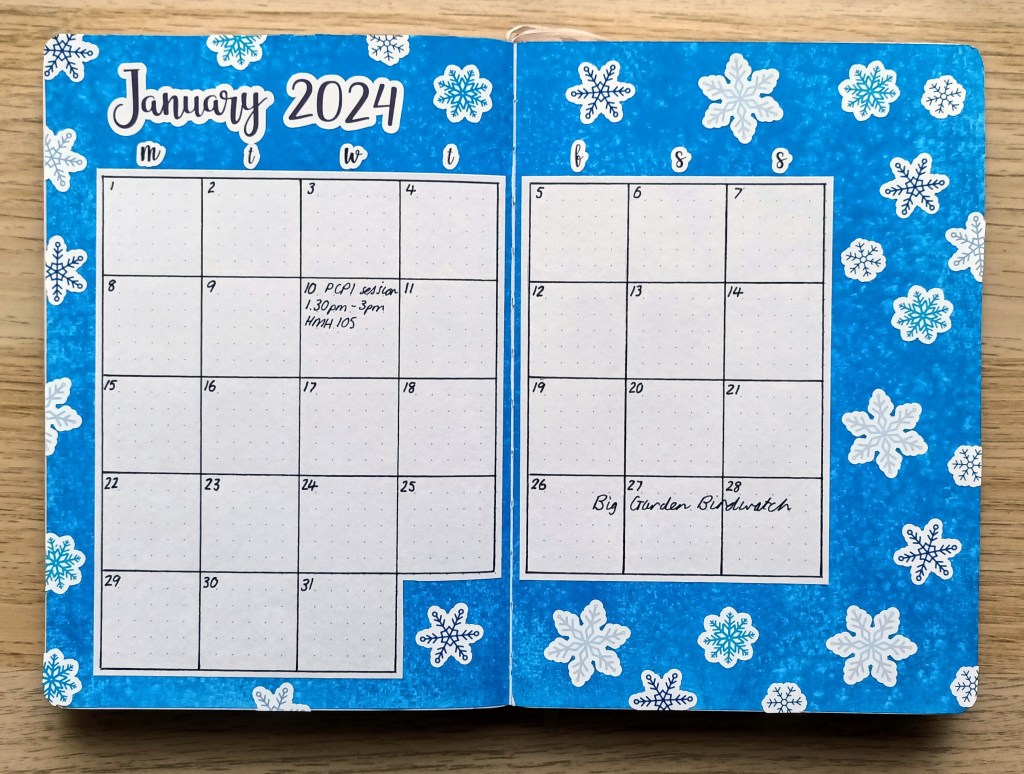
Below, is the journal that I’ve just started using partway through this month. I picked it up at Easter time and was really looking forward to getting going with it. I’ve also photographed some pages to give you an idea about the morning and evening prompts and also some of the extra challenges that are dotted throughout the book. You’ll also see that it has some gorgeous illustrations too which definitely adds to the appeal!

Photo credit: Laura Jones for Keeping It Creative

Final words…

Any regular practice in life can sometimes get a little boring and become hard to maintain interest in, so it can really help to shake things up every now and then. I’m interested to know if other journallers have ditched a particular form of journalling and tried something new. Sometimes change can be scary but often, it can also be invigorating too. I would love to hear what you think of my new journal and if it appeals to you too so let me know in the comments.

Posted in creativity, journalling, lifestyle, memory keeping, Planning and journaling, reflective journalling, TN journaling, Traveler's Notebook, Traveler's Notebook Spreads

How I journal about my holidays: creative ways to record travel adventures

(N.B. image heavy post this time)

Last month, we spent a lovely week in Faro, the capital of the Algarve region of Portugal. Whilst I usually do a double page traveler’s notebook spread each month, documenting the main highlights, when we go on holiday somewhere new, I will dedicate a whole notebook to the trip which includes journalling, lots of photographs, ephemera and general momentoes which can be stuck in. Today, I’m sharing how I prepare for my journal before I go and whilst away and I’m also including examples of double page spreads showing the different creative ways I document my holiday.

What I do prior to and whilst I’m away

So, let’s start with my preparations so that working on and completing my journal is much easier when I get back home. These are key to ensuring I have all the information and need and key details that I might otherwise have forgotten.

Before I head off on my holiday

Before I go, I make the journal itself. I create a TN wide size insert choosing colours, patterns or images on the scrapbooking paper which suit my coming trip. So, for example, this time, I opted for a bright and cheerful flamingo, flower and leaf themed paper from the Paradise Crush collection of 12×12 papers (200gsm heavyweight cardstock even though referred to as paper). This was because I had read that there are flamingoes to be seen in the lagoon (Ria Formosa). I love selecting the cover paper myself and then hand-stitching blank white paper for the inside. I choose quite thin white paper so the journal doesn’t get so thick that it won’t close properly when I add to my pages.

Photo credit: Laura Jones for Keeping It Creative

Shortly before travel, I add a small notebook to my handbag and make sure I have a pen too. This is useful for writing details during my holiday so I don’t forget things when I return. Just a word of warning if you’re going on a flight though – be sure to select your pen carefully as the liquid ink in my V5 Pilot Hi-Tecpoint pen must have expanded whilst in the air and when I got it out to write with on arrival the pen came apart and I got covered in ink! Luckily, it was just my hands that got ink all over them, not my clothes.

The final thing I take with me is something to store ephemera (collectable bits and pieces) in. This time, I took a popper wallet and it came in very useful for keeping papers flat. I do wish I’d opted for a slightly bigger folder though as I had some bigger things that I had to fold up to ensure they fit.

During my holiday

Notetaking Throughout the holiday, I make notes and reflect on my day. This is easy to do in the little notebook I mentioned earlier which comes with me wherever I go. This could include the name of a place we visited, my menu choices in a restaurant or cafe, timings of events during the day, a funny anecdote or how I felt in a particular place.

Taking photographs I take lots and lots of photographs whilst we’re away – better to have too many than not enough, right? However, for me, it’s not just about taking photos of each other and things my husband and I see or do, it’s also very much an aide memoire of various elements of our trip too. For example, when in Faro and on our day trips, I took photos of menus from the various eateries we went to, a screenshot of the weather for the week, close up shots of cocktail descriptions, shop fronts where I made my souvenir purchases and screenshots of locations of places we planned to go later on in the week. Also, talking of photos, I took my selfie stick so that we could take shots of the pair of us together rather than having to ask other tourists to take them for us.

Collecting ephemera In the traditional sense of memory keeping journalling, ephemera usually refers to stickers and die cut paper and card images which can be glue or stuck into the journal pages. However, for me, it means anything and everything which could be stuck in as a memory of our holiday. On our trip to Portugal, I collected and saved business cards for cafes and restaurants, maps picked up at the Tourist Information places, leaflets such as the one advertising our boat trip so I could cut out letters for titles, small images or bits of information, receipts from shops and eateries, paper tickets (e.g. entry to the cathedral and for our train ride to Albufeira), samples from paper bags we were given to house our souvenirs in and even the cup cover for our glasses in our hotel room. Some of the things I didn’t end up using but at least I was well prepared with paper goodies I did want to add. I also only used parts of my items sometimes, so, for example, I trimmed a large map down to fit on a double page spread and I cut the logo from a business card of a place called Veganbox we ate in a few times.

Creating my travel journal

It’s up to you how you do your journalling and the elements you include within the pages but here’s some ideas:

  • travel information including modes of transport and tickets
  • the weather whilst you’re away
  • places of special interest you visited
  • photos of the accommodation you stayed in
  • maps of the place you stayed and other areas that you visited
  • meals, snacks and drinks enjoyed plus related ephemera
  • photos of scenes, selfies, family, food and drinks enjoyed etc
  • souvenirs and why you chose them
  • information about any traditions of the place / country you went to
  • an explanation of something new that you learned whilst you were there
  • activities you did and what you did to relax

Supplies that I find useful and you might too:

  • roller glue – I use tonnes of this stuff and have two rollers – permanent (to ensure things stick really well and removeable (for when I might want to reposition elements on a page)
  • stickers – from a variety of larger and small businesses online (purchased from Amazon or businesses such as Papermaze, or Etsy to support small UK sellers), or made myself in Cricut Design Space and printed and cut
  • We R Memory Keepers 1,2,3 punch board – for making the mini envelopes I included
  • Washi tapes – I have collected so many of these over the years and use them in my memory keeping as well as my bullet journal planner
  • Die cuts – I didn’t use any this time but small ones of these are useful as decor on pages
  • Pens – biros or gel ink and possibly coloured pens for writing straight into the journal

I’ll let the photos of my pages do the talking now but if you have any questions, feel free to get in touch with me.

Photo credit: Laura Jones for Keeping It Creative

Final words…

Times are certainly changing with creative journalling and memory keeping. A few years ago (maybe a few more!), everything used to be paper based, but now, many things that I would usually stick in to my journal, such as flight information, boarding passes, entry tickets to places and for excursions and so on are often completely digital. To make sure I can still include at least some of these, my husband has to screenshot the e-tickets on his phone and then forward the images to me in WhatsApp so I can print them off. It’s not the same, but at least it provides some sort of record and adds to the memories stored within my travel journals.

I hope you’ve enjoyed reading about my travel journalling process and seeing photos of my actual pages. There’s quite a lot of work involved in the journals I produce, but you could cut down the time involved by just adding photos and short captions. You could also choose to draw elements of what you see and do on your travels and this would be another lovely way to make the process both creative and therapeutic too.

Thanks for reading and I hope I’ve inspired you to create your own travel journal to document holidays (A.K.A. vacations),

Posted in bullet journal, Bullet journaling, Christmas, planner girl, planner lifestyle, Planning and journaling, watercolour painting

Setting up my Bullet Journal for December 2024: Winter foliage theme

This month, rather than doing a full on Christmas theme, I’ve taken inspiration from an artist whose content I follow on YouTube. In a recent video, she shared some easy watercolour cards featuring winter foliage, and one of the designs was a bauble shape decorated with red berries, leaf stems and pine branches. I had a go at creating my own on watercolour paper and loved how it turned out so I used it for my front cover (even gluing in the thick paper directly into my notebook). For the rest of my spreads I used felt tip pens and foliage stickers using designs found on Cricut Design Space, plus gold paint to create shine. I can’t wait to share the results with you.

Front cover

Usually, I scan and print my watercolour designs but, on this occasion, the finished result was so disappointing that I decided to stick the original straight in. It’s made my journal super bulky, and I’m only on my second month, but I’m so happy with how it looks. I added some gold sparkly paper behind it and I think it makes it really festive (unfortunately, it doesn’t show up too well in the photograph).

Photo credit: Laura Jones for Keeping It Creative

Monthly calendar

This is my usual calendar with leafy sprigs, berries and pine pieces created using an array of pens including my Tombow dual tips, Papermate flairs, Pentel brush pens and a couple of American Craft precision pens. Rather than sketching the designs, I went straight in with the colour and I think the pages turned out okay. The December title is backed with another glitter paper, this time in a lovely green colour.

Photo credit: Laura Jones for Keeping It Creative

Finances

For some reason, the camera on my phone has made the grid appear a horrible yellowy colour, but it is, in fact and a pale green with just a hint of yellow to it. I would love to know how to correct this so if anyone has any ideas, please let me know in the comments. I might have a play with the photograph settings and see if I can improve it at all.

Photo credit: Laura Jones for Keeping It Creative

Monthly goals

Most of my goals for this month are taken directly from my winter bucket list and relate to Christmas. The stickers were made in Cricut Design Space and I used vinyl sticker paper which really easily ripped so I had to be super careful.

Photo credit: Laura Jones for Keeping It Creative

Christmas related pages

I created pages like these last Christmas and found them really useful so I’ve done the same again this year. Now that I’ve shared them on here, I can start filling them in!

Photo credit: Laura Jones for Keeping It Creative

I also have a Christmas packing list page to set up nearer to the time too.

My first weekly plan

Photo credit: Laura Jones for Keeping It Creative

Final words…

Thank you for visiting my blog to look at my Christmas bullet journal pages, I would love to know what you think to them, especially the front cover which I had great fun painting. If you like playing with watercolour, I would definitely recommend checking out the YouTube video that I drew inspiration from.

Wishing you a wonderful Christmas time and all the best for 2025,

Posted in bullet journal, Bullet journaling, creativity, Cricut, Planning and journaling, sticker making

Setting up my Bullet Journal for March 2024: Spring / Easter theme

As Easter falls at the end of March this year, I decided to do an Easter theme for my bullet journal with some Spring elements. I made a list of words associated with both (decorated eggs, chicks, bunnies, tulips, daffodils etc.) and then searched for images on Design Space which I could use to decorate my spreads. I added lots of images to my canvas and used the sticker making function to create a set of kiss cut stickers on a transparent background. I hope you like my pages as much as I do.

Cover page

As I was searching Cricut Design Space for Easter bunnies to use as stickers, I found this cute cut file of a yellow rabbit with flowers and leaves cut from the body. I had some bright yellow cardstock which was perfect as it was relatively thin and wouldn’t add too much bulk in my BuJo. It took me four attempts to get it to work out well as it was quite delicate but I got there in the end! When I placed it on the page, I felt like something was missing so I experimented with placing different coloured papers behind the image and thought this pink colour created a nice contrast.

Photo credit: Laura Jones for Keeping It Creative

The calendar pages

I had great fun making tons of stickers in Cricut Design Space but, unfortunately had lots of issues with the program printing a black line around each of the images. It was so frustrating and I ended up having to bin lots of transparent sticker papers which was costly and such a waste. I resorted to contacting Cricut about it who were very helpful but the problem hasn’t been fixed properly yet.

Anyway, I persevered and I love how the stickers and my pages turned out.

Photo credit: Laura Jones for Keeping It Creative

Finances pages

This is my usual income and expenditure record set up with a cute bit of decoration at the bottom. I’m enjoying using the transparent sticker paper but I have a feeling that Cricut are no longer making it as many of the branches of Hobbycraft are out of stock.

Photo credit: Laura Jones for Keeping It Creative

Weekly plans

Again, I’ve used a simple Dutch Door set up for my weeklies this month. I couldn’t resist adding more stickers to the days though! The decorative eggs along the top are actually a roll of sticker tape from Hobbycraft. Some of them have gold foil on them but the camera hasn’t picked it up.

Photo credit: Laura Jones for Keeping It Creative

I haven’t finished setting up the last two weeklies but I have added the stickers and used Easter chicks for the third week (some real photograph style and others cartoon style) and Easter baskets and Spring blooms for the final week.

Weekly running task list

I’m not sure if I’ve shared my running task lists before but it something I use each week. I add to the list daily and assign tasks to a day of the week or multiple days for longer tasks. This month, I’ve put all of the weekly calendars together and the task lists afterwards but sometimes I’ll put them together. I use the two ribbon bookmarks to mark the pages for easy access.

Photo credit: Laura Jones for Keeping It Creative

Final words…

That’s all of my pages for this month and I’m super happy with how they turned out. I’ve just signed up for another free trial of Canva Pro so I can’t wait to make more stickers using images on there. Although Cricut Design Space has some lovely images, there are some even nicer ones on Canva Pro.

Wishing you a wonderful March filled with lots of lovely Springtime activities,

Posted in art, bullet journal, Bullet journaling, creativity, lifestyle, Planning and journaling, watercolour painting

Setting up my Bullet Journal for January 2024: Watercolour winter scene and snowflakes theme

Happy New Year everyone! I hope you’re all having a good 2024 so far. I’m very late sharing my bullet journal spreads for this month for several reasons – one, we were away for Christmas and so I didn’t get out my paints until NYE, and two, the print and cut hack for making stickers using the Cricut Joy doesn’t work anymore and so I’ve resorted to purchasing the Cricut Xtra which is due to arrive today, the 4th January, with a view to creating some text stickers for my spreads.

Anyway, I hope you like the theme and the watercolour bits and pieces which I had great fun creating. On to the pages…

Front cover

Having chosen the theme, I did a bit of Googling, looking for winter scene watercolour painting and I found this gorgeous design on a blog post from way back in 2014. This inspired my front cover but I changed the colours up a bit. The trees were painted first using Intense Green (AKA phthalo green) mixed with a small amount of Payne’s Grey and Vandyke brown and a tiny bit of grey. When that was completely dry, I created the snowy ground using very watered down grey. Then, after drying, I mixed a range of blues for the sky. Whilst still wet, I used coarse salt sprinkles to create the snowy effect. Finally, I used white gouache for the snow on the trees and then paint flicks to give the idea of falling snow.

Photo credit: Laura Jones for Keeping It Creative

The original watercolour was then scanned in using my printer and I pasted it into an MS Publisher A5 page and added the January 2024 title. The colours never look the same as the original, but I’m still happy with how it turned out.

Photo credit: Laura Jones for Keeping It Creative

The calendar

My husband and I had a go at creating a blue background with salt sprinkles on New Years Eve! We enjoyed experimenting, and it was a great, relaxing activity to do in the evening and helped us to stay awake to see in the new year. Again, the piece was scanned in and this time, it was used to cover the whole page. I then cut out the calendar shape using some dot grid paper which I then positioned in a location on the pages which was close to where it would have been if I could see the dot grid. The titles were created using Cricut Design Space and printed when my machine eventually arrived!

When I’d finished it, I felt like something was missing so I used Design Space again to make lots of snowflake stickers in different sizes. I’ve done a snowflake theme in January previously, but this one looks very different so I don’t feel like I’m repeating designs.

Photo credit: Laura Jones for Keeping It Creative

Finances spread

My finances record is still working really well so I’ve kept to the same layout but changed the decor to go with my theme for January. I love the little watercolour scene I found on Design Space to make into a sticker!

Photo credit: Laura Jones for Keeping It Creative

TV watched record

I create one of these every quarter or so to record the series that I’ve watched on TV. This time, I’ve added a date column so I can see, at a glance, when we started watching each series. There’s already some great stuff on TV for January and we’re loving the black comedy / drama of season 2 of The Tourist. The genres are taken from IMDB.

Photo credit: Laura Jones for Keeping It Creative

Weekly Plans

I went for another Dutch door layout this month and used a second print out of my watercolour background to create page borders to either side. I couldn’t resist adding some more snowflake stickers.

Photo credit: Laura Jones for Keeping It Creative

Veganuary meal planning

My husband and I have been doing Veganuary, where you go vegan for the month of January for quite a few years now. We try to create a meal plan each week as this helps when we go shopping. We also try to do more homemade meals which are packed with nutritious veggies.

Photo credit: Laura Jones for Keeping It Creative

Final words…

I hope you’ve enjoyed looking at my spreads for this month. At the moment, January is proving to be more wet than snowy and our little garden is looking a bit soggy and flooded. I must say, I love pretty winter scenes with snow and sparkling frost but it’s not so much fun trying to drive in such conditions so I have mixed feelings about the weather at this time of year.

Wishing you a fantastic 2024,