Blog

Posted in Bullet journaling, coloured pencil, goal setting, line drawing, planner girl, planner lifestyle, Planning and journaling

Setting up my Bullet Journal for March 2025: Birds and blossom theme

Last April, when I picked out a new Notebook Therapy journal to use as my BuJo from May 2024, I also checked out their sticker collections so that I could add to my order to qualify for free delivery. I couldn’t resist the #08: Into the Song set which is… ‘inspired by the tranquil melodies of springtime songbirds and blossoming florals… just as the birdsong fills the air with melody and the blossoms paint the landscape with vibrant hues, our collection brings forth the delicate beauty and timeless charm of nature’s symphony…’. Anyone who follows my blog will know that I love all kinds of birds but particularly tiny woodland species such as wrens, robins, sparrows, tits and finches. And nothing says Spring to me like bird song and blossom. So, for March, I’ve chosen to incorporate the sticker set, but also create a life-like line drawing of a sparrow perched on a blossom covered branch and then shade in the illustration with my various coloured pencil sets (of which I have many!) to add to my monthly cover.

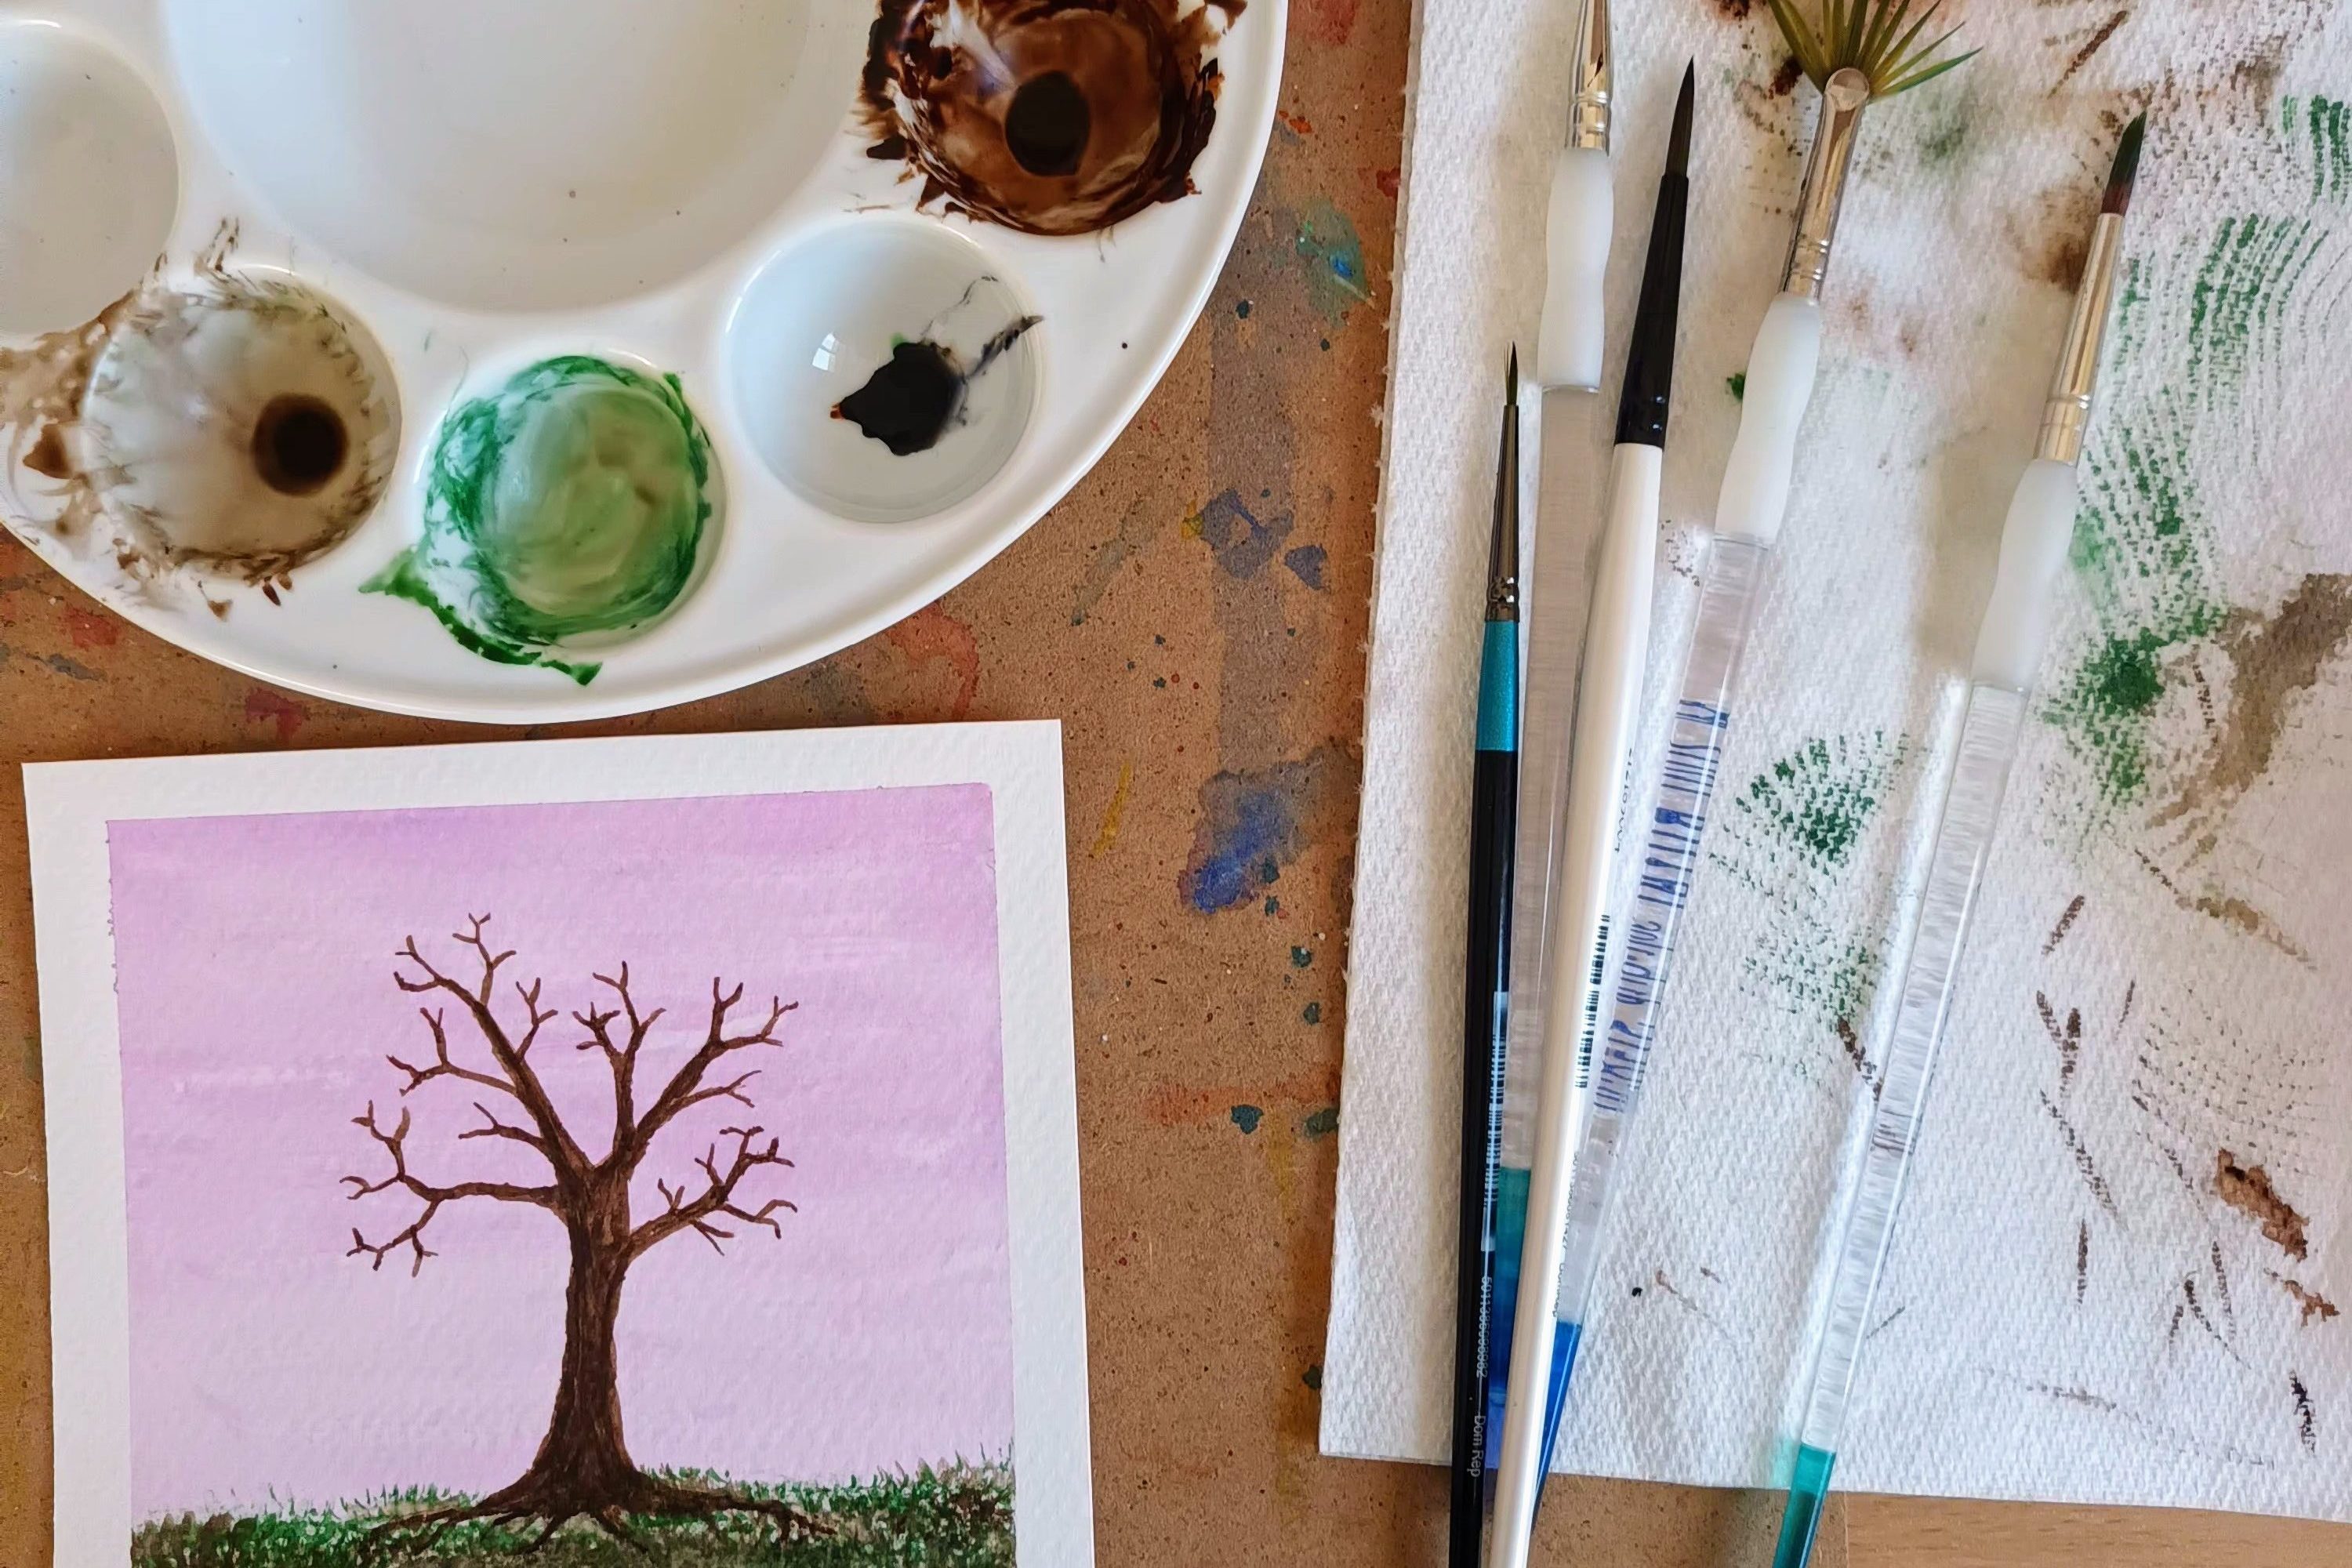
I didn’t want to add much more bulk to my already overstuffed bullet journal, so the Notebook Therapy transfers were perfect. As I’d stuck in a sheet of music as background on the cover page, I opted to do my sketch on quite thin drawing paper and then stick it in. I used a Winsor & Newton fixative spray to stop the colour transferring onto the opposite page. This month, I was also excited to try out a different colour palette which mainly consisted of pinks and browns and it felt good to try something completely new. Plus, I had plenty of pinks and pale browns in my marker collection.

The front cover

I actually found this mock vintage sheet of music as a free download and thought it would look good as a background to my bird sketch. I have no idea what the music is or whether or not it’s an actual song but I like the look it has created and it fit nicely with my colour scheme.

Photo credit: Laura Jones for Keeping It Creative

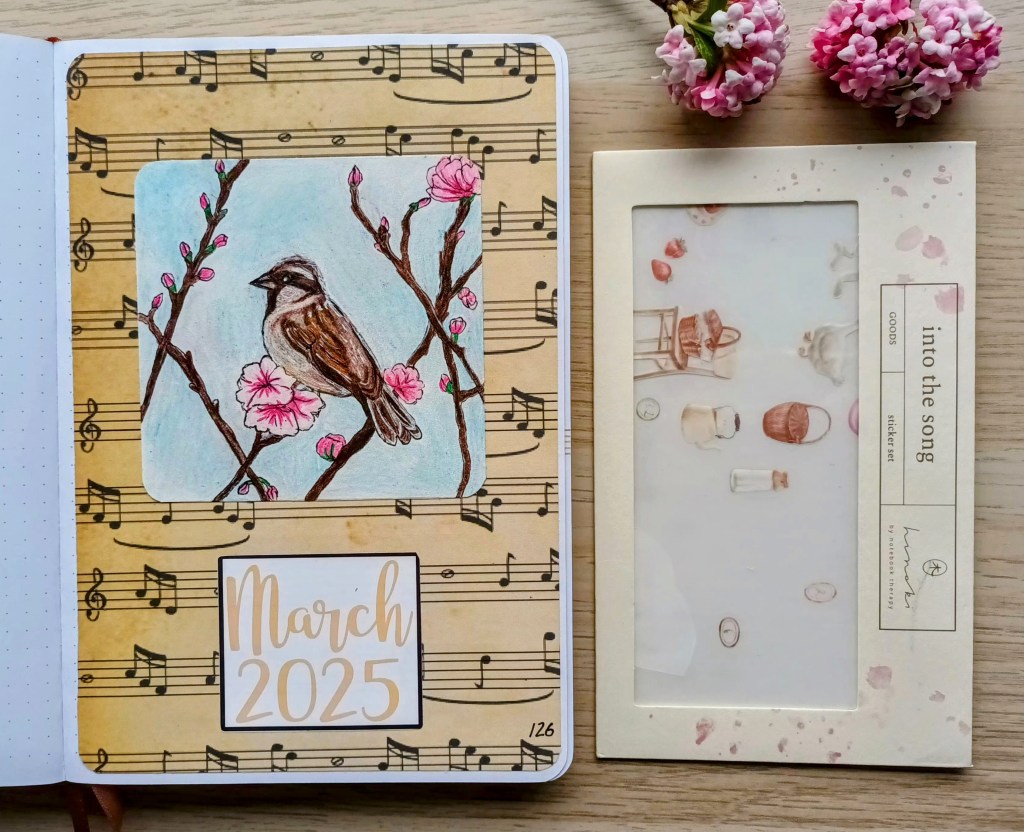
The sparrow drawing is based on a photograph I found online and I used quite a few of the compositional elements in the original image. I spent a while debating which woodland bird to choose and then Googled ‘birds and blossom’ to find examples. I’m really pleased with the finished picture and it didn’t take me as long as I thought it might. I did a basic sketch with pencil and then used a very thin (005) Pigma Micron to draw on the main elements including the branches, buds, open blossom and, of course, the male sparrow. I then went in with the coloured pencils on the branches, blossom and the bird. I created a few highlights using a white gel pen and also used a blending pencil to smudge some of the harsher lines. Rather than adding a blurry background, like the photograph, I just use a single pale blue colour and blur isn’t easy to achieve with coloured pencils. When I was happy with my finished picture, I sprayed it straightaway with fixative as this meant that I couldn’t go back and start altering bits of it as I’m prone to do!

Monthly calendar

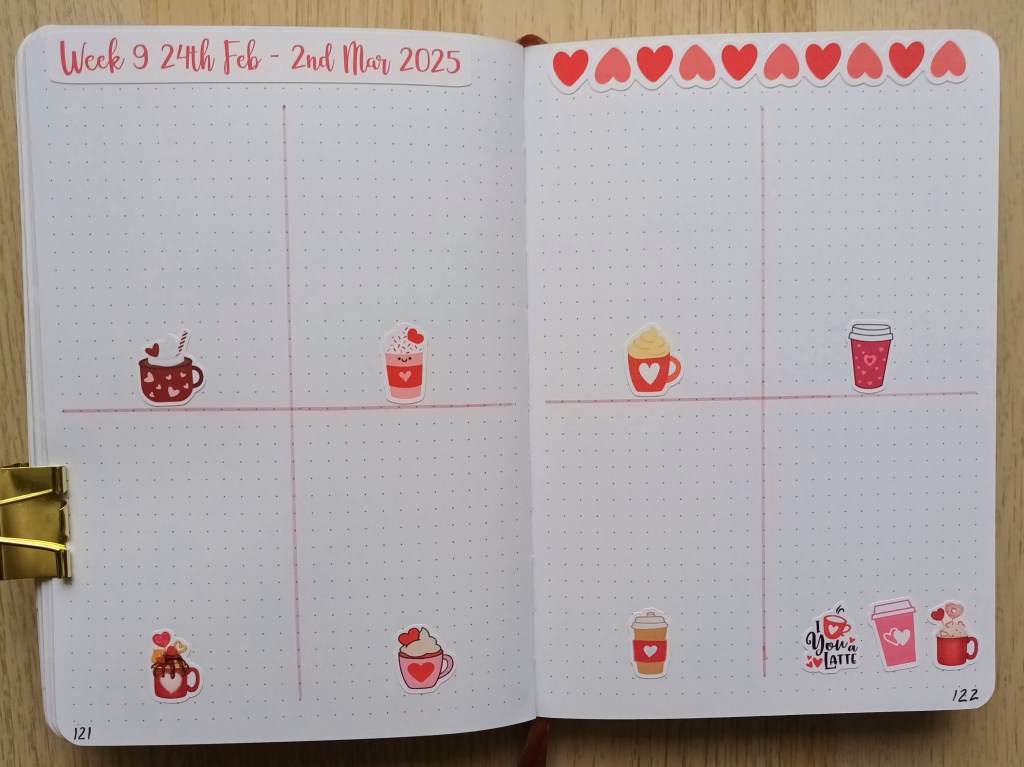
I mainly loved decorating my usual calendar style with the transfers but, at times, they were a little bit frustrating. If I pressed one of the other stickers or a bit of the backing whilst rubbing the desired image, there was some transferal of parts of the other image or the backing stuck to a previously transferred image and it pulled it off the page. I started cutting each image out individually but that became too time consuming so I stopped and had to be super careful. I’ve managed to get the hang of it now but I did ruin a few of the pictures. Also, occasionally, there were small bits that didn’t rub on properly which I struggled to correct.

Photo credit: Laura Jones for Keeping It Creative

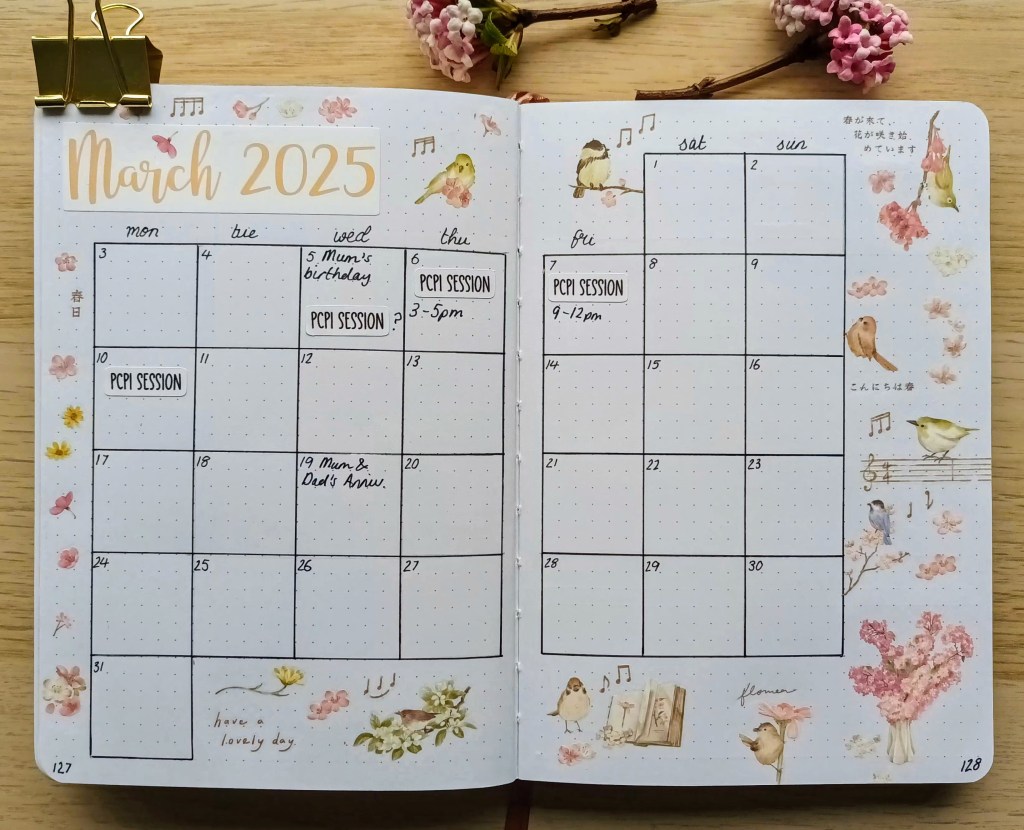
Overall, I would say the transfers look really nice but they definitely take practise and for over £12 for three small sheets, each mistake was quite costly in my opinion! I’ve definitely got the hang of transferring the images now though and would probably buy some more if I see some in the Notebook Therapy collections.
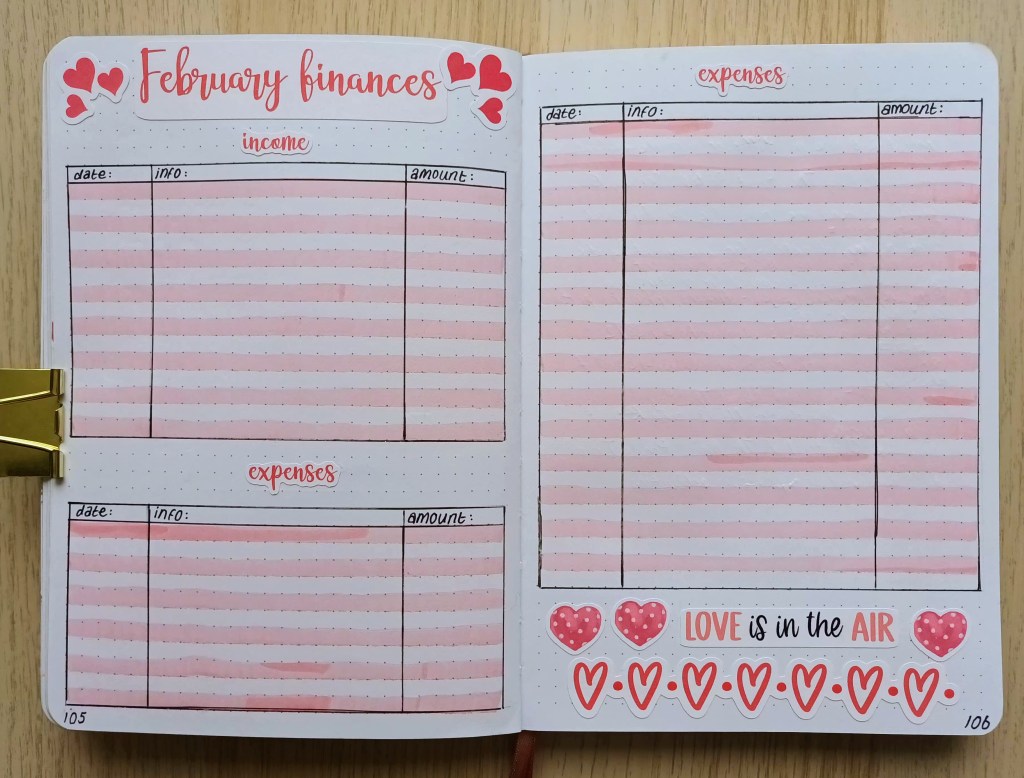
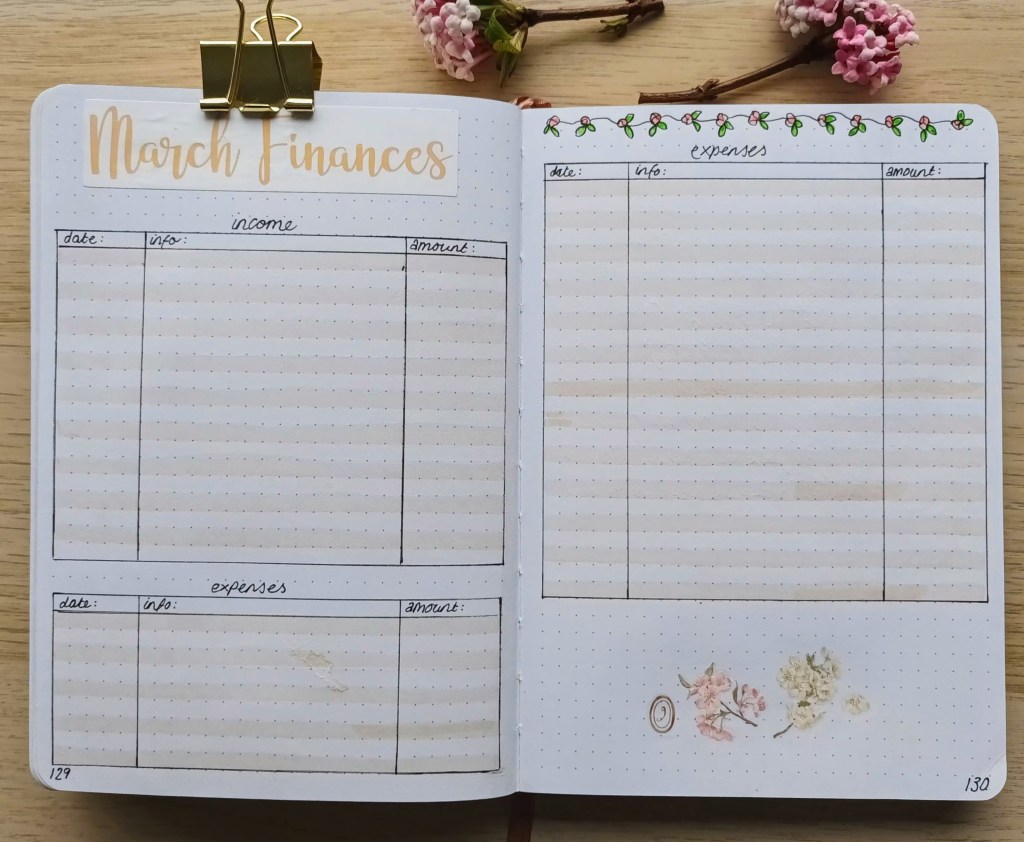
March finances

My usual set up with more transfers and a lovely pale sand Tombow. I added a blossom pattern at the top of the second page but I kind of regret doing it because it doesn’t really go with the delicate transfers. I could have covered it with a border strip sticker but I opted to leave it as it is.

Photo credit: Laura Jones for Keeping It Creative

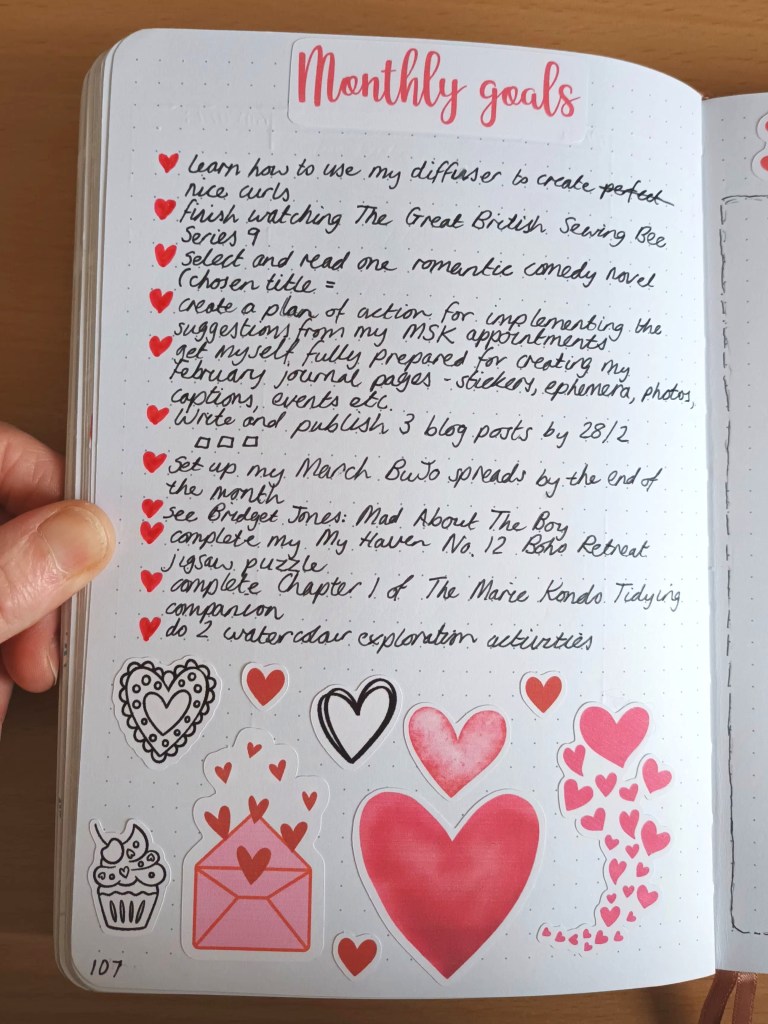
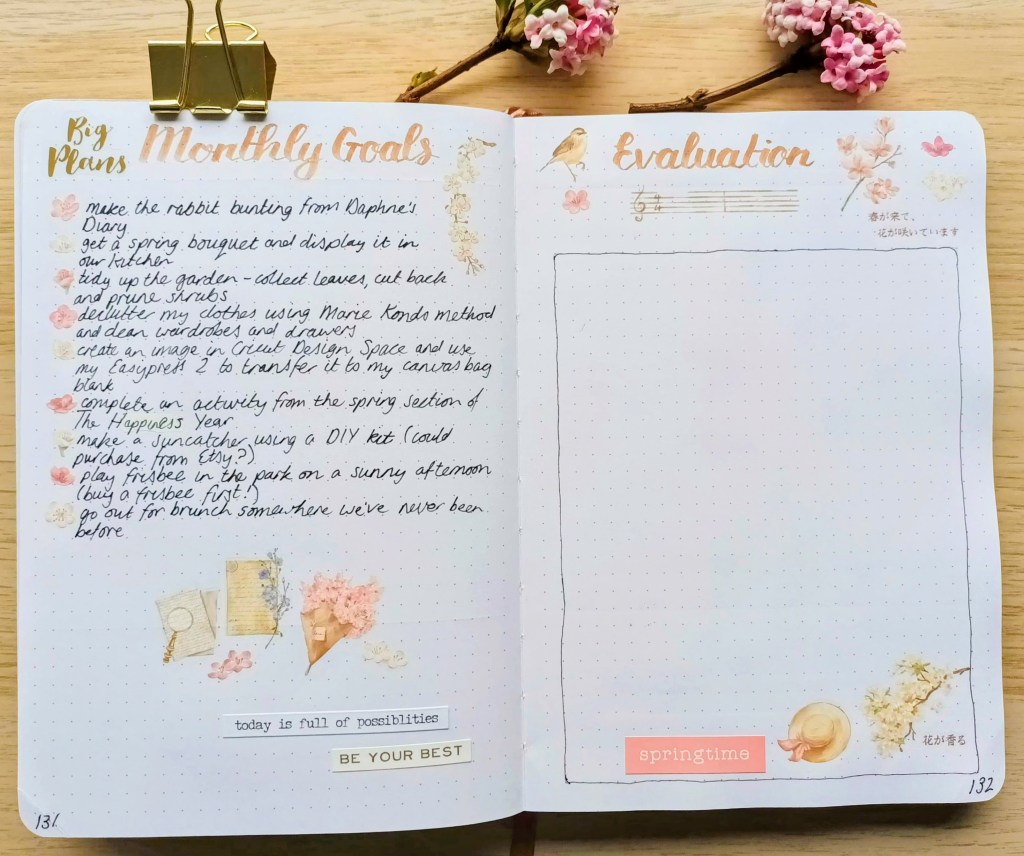
March Goals and Evaluation

I tried to stick with a small number of goals for March as I found I didn’t meet quite a few of those I set for February and with only a few days of the month left, I’m not going to get them done. I’ve also picked some goals which are not so time consuming too. A combination of transfers and stickers finish off the pages nicely and I loved using the tiny blossom images as bullet points for my list.

Photo credit: Laura Jones for Keeping It Creative

Spring Goals

In preparation for next month, I’ve also created a double page spread with my Spring 2025 Bucket list items on. I’ll be sharing this in one of my blog posts for March so keep a look out for it if that is something that you would be interested in seeing and reading about.

Final words…

I hope you’ve enjoyed seeing my pages for March and you like the theme I’ve chosen. I can now tick off one of my February goals which was ‘write and publish three blog posts’ as this is my final one of those!

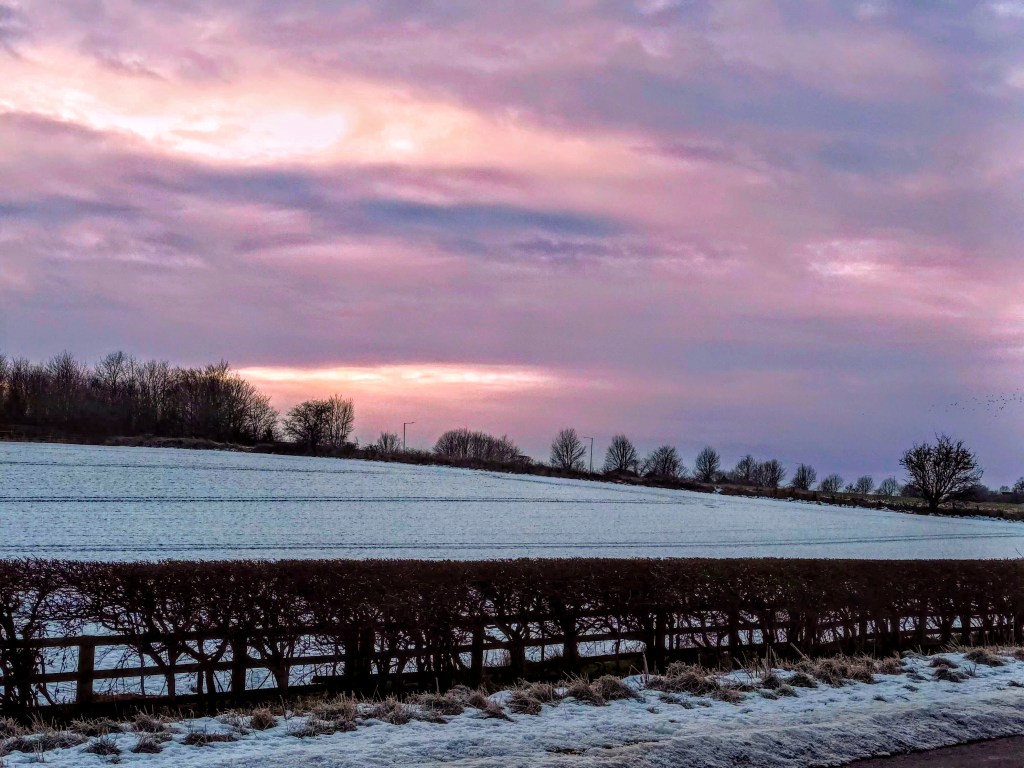
Although it’s rainy today, we’ve had a few nice days this week showing us that Spring is definitely on its way. We have a host of miniature iris, crocuses and even a couple of daffodils popping out and there are also plenty of chunky tulip stems in our garden too. Whatever the weather brings, my husband and I try to make the most of our days but nothing beats a bit of sunshine to brighten the mood.

Wishing you an amazing March and a wonderful Spring 2025,

Posted in Habit formation, life hacks

Monday Matters: Utilising habit stacking to establish consistency in forming new routines and instilling habits

I’ve been using habit stacking for years, and I find it extremely successful in ensuring consistency whilst I work on adding a new, positive habit to my daily, weekly or even monthly routine. Today, I’m sharing some definitions of the terms habit, a quick introduction to habit stacking, plus explaining why habit stacking is so helpful, and, of course, providing a few examples of the technique in action within my own life.

When I Googled ‘habit definition’ and checked the items related to the noun (as oppose to the traditional item of religious clothing worn by nuns!), I came across a number of different examples and thought it would be pertinent to share some of them here:

Cambridge Dictionary: something that you do often and regularly, sometimes without knowing you are doing it

Oxford Languages Dictionary: a settled or regular tendency or practice, especially one that is hard to give up

Merriam-Webster Dictionary: an acquired mode of behavior that has become nearly or completely involuntary

Collins Dictionary: established custom, usual practice, etc

So, the above explain what a habit is, but what’s habit stacking?

There have been a whole host of non-fiction books on the art of habit stacking but the idea was originally coined by James Clear in his best selling book Atomic Habits. In brief, it’s the practice of attaching a new action that you want to become a regular habit, to one or more habits which are already deeply ingrained in your current daily life. The idea is that the old and well-established habit will provide a cue for performing the new action which you want to add to your current number of habits. So, for example, if you wanted to start flossing your teeth each evening, you could attach this action to your nightly routine of brushing your teeth, maybe by getting the floss out when you pick up your toothpaste and brush from wherever they reside in your bathroom, and then flossing your teeth prior to brushing them. Over time, you would start to automatically get your floss out at the same time as your other teeth cleaning tools and the habit of flossing would (hopefully) be instilled.

The habit you choose to stack your new action with would depend on such things as how often you want to engage in the action (daily, weekly, monthly etc.), when you want to do it (morning, evening, night time etc), where you want to perform it (in bed, in the car, on the sofa whilst watching TV, in the kitchen whilst waiting for the kettle to boil etc.) and, of course, when and where would be most appropriate. You should also consider if there’s time available before or after the established habit in your routine as this will of course, increase the likelihood of success in habit formation.

How I’m currently using habit stacking

I’m not sure if I’ve mentioned this before on here, but back in September 2024, I headed for the coast with my DSLR camera and long range lens and walked along the beach at low tide to the rock pools to take lots of photos of wading birds. To cut a long story short, I got some lovely bird photos but heading back along the sand, I slipped over, presumably on a large smooth stone and fell forward. As I had my camera, I wrapped my arm around it and twisted, landing on my flattened right wrist. My wrist has now been very painful for months and I recently sought advice from an MSK (Musculoskeletal) specialist. The clinician gave me some physio exercises and advised me to do them each day so I’ve been deciding when to fit them in and how I can be sure I do them regularly. As this is something that needs to become a habit that I do daily, I’ve used habit stacking to increase the likelihood of this being achieved.

I decided that I would like to do the given exercises morning and evening and I’ve also thought about how many reps I want to do each time. For the morning repetitions, I decided to stack the exercises with my The Five Minute Journal writing habit. So now, I fill in the day time prompts in my journal and then I remove my book from the arm of the sofa and do my exercises. Finishing my writing reminds me that it’s time to do my physio session for my wrist and so far, I’ve consistently remembered to do them. The second set of exercises is performed straight after filling in my journal evening prompts. This routine is proving to be more difficult to establish as I’m tired and ready for bed! However, as I perform the first set consistently in the morning after journalling in the same book, I’m hoping that it will be enough of a prompt eventually. The other thought I’ve had is that doing them once a day is better than not doing them at all so I’d be happy if I just developed the morning habit.

The second new action that I’ve just started to implement is completing a double page journalling spread as a summary of what happened each month throughout the year. This project, which I hope to do for the whole of 2025, but, if I enjoy it, continue with beyond this year, involves collecting appropriate resources throughout the month for my pages and working on the spread in a single session at the beginning of the next month. I only started the journal in January so it’s definitely not a habit yet, but I don’t want to get behind with creating the spreads or collecting ideas and bits and pieces for them.

I chose to do this monthly journalling project as I was trying to keep up with journalling about all kinds of experiences such as purchases, days out, holidays, nights out etc and it was becoming very overwhelming and half of my spreads were staying barely completed or barely started as their creation was far too time consuming. Doing two pages each month will be much more manageable, and, if there’s anything I want to do a little more documenting on, I can still do this whilst only creating between 2 and 4 pages a month. This is my reason why I want to instill this particular habit and you can probably see how it would help me to document my life but at the same time, not go overboard with the journalling and accompanying spreads.

So, with that all said, how am I going to make collecting resources and doing the actual journalling a habit? Here’s my initial ideas for habit formation:

  • closely follow the YouTube channel and Patreon pages of KelseyLeigh @ MyAbidingJournal who introduced me to the idea of monthly summary journalling pages.
  • make notes of effective ways she’s found of collecting materials and memories
  • schedule times for collection of resources and ideas
  • schedule a time each month for creating and finishing my pages

For this, I needed to attach the new actions to existing habits, one which occurs weekly and one which already occurs monthly. I decided that the collection of resources and ideas to include would take place on a Sunday evening when I set up next week in my bullet journal. This typically happens around 7pm although if something prevents me doing it at this time, I always schedule time early Monday morning to fill in my double page spread. As this process could potentially take up to an hour – half an hour for filling in my weekly and half an hour to gather supplies and record ideas, I would need to time block the event to be sure it gets done. However, because filling out my planner is essential for me to know what’s happening that week, I believe that stacking my journalling prep session would be a good fit.

With regard to me creating my journal spread, I have stacked this with my habit of filling in the evaluation of my monthly goals. Realistically, the process for both can take me up to 3 hours and again I would need to make use of time blocking and section off a big enough section of time to ensure everything got finished. Obviously, this requires a big commitment but as it’s something I really want to establish as a habit, I’m hoping that the filled in pages with look so great that I’ll be so excited by the finished product that I’ll want to do it time and time again!

This brings me on to another question which you may have…

Does habit stacking always work?

In my opinion, habit stacking can be really useful in helping you to develop a routine for performing a desired action or routine but you still need to apply motivation and discipline if it is to work. Going back to my wrist exercises, if I didn’t believe that doing them was going to help me get better by improving my muscle strength, I might consider it a waste of time doing them. In that case, I would be unlikely to keep up with the habit, even if I did stack it with my morning and evening journalling work. Also, if I didn’t make time in my schedule to perform the exercises, I could still end up skipping them or only doing them on less busy days which wouldn’t help me to develop better strength and less pain in my wrist.

Final words…

In summary, habit stacking, the process of attaching a new action that you hope to make a habit to one or more of your long established habits, is a great way of ensuring consistency in developing new routines. However, you still need to have the motivation and disciple to perform the action, so it’s worth spending some time thinking about how this brand new intention and would be habit would make a difference to your life or your day. Personally, I think doing a little bit of reflective journalling on the subject can be a really useful way of establishing your why or reasons for.

I hope you’ve found today’s Monday Matters useful and it has helped you see how using habit stacking would fit into your life when creating new habits. Let me know in the comments one thing you are working on at the moment and which current habit you plan on attaching it to so you can successfully embed it into your routines, or if you’re struggling to develop a habit, why not reply to today’s blog post and hopefully either myself or one of my readers can offer some useful advice.

If you particularly enjoyed today’s topic, you might be interested in reading one of my previous posts on forming positive habits.

Posted in goal setting, mindset, personal development, planner girl, productivity, Setting goals and intentions

Monday Matters: Taking simple goals and turning them into SMART goals for the month – a mini guide with real life examples

For the last five months, I have been setting a number of monthly goals which I aim to have met by the end of the month. Today, I thought I’d share my process using my actual list for this month as an example. I also want to explain how I make sure that each of them are SMART, even if the original goal is rather loose and unspecific.

Before I share my goals for February, here’s a quick reminder of what the letters of the acronym SMART stand for.

S – Specific

M – Measurable

A – Achievable

R – Relevant

T – Time bound

Now, obviously, all of my goals are time bound as I aim to have achieved them by the end of the month, but how do I make sure my goals meet the rest of the criteria? Well, here’s an image showing my simple goals laid out in my bullet journal and I’ll pick out two of them to consider in detail so you can see my thought process and actions I take to prepare.

My actual goals for February 2025

Image credit: Laura Jones for Keeping It Creative

Let’s take the first one:

Learn how to use my diffuser to create perfect nice curls.

I’ve made this goal specific by explaining exactly what I hope to achieve by learning to use my diffuser. I haven’t just said ‘learn how to use my diffuser attachment’, I’ve also stated what I want to use it for.

My goal can be measurable as I’m currently clueless on how to use the diffuser correctly, whereas when I’ve achieved my goal I should be able to use it to create nice looking curls. I’ll deem them to be nice enough if I would be happy to leave the house for the day with them looking like they do!

The goal is achievable as I have the resources required to work towards it, i.e. I own a diffuser attachment for my hairdryer and I can select video tutorials on YouTube to watch to learn the techniques involved. And, you’ll notice I’ve crossed out the word ‘perfect’ – this was intentional as I’m saying that the curls don’t need to look as perfect as they would when I step out of the hairdressers, but need to look nice enough to show them off with confidence.

The goal is a particularly relevant one for me as my hairdresser has been curling my hair with with a wand or straighteners and, although they look beautiful at first, I’m always frustrated with the way they drop out in less than an hour so, I’ve armed myself with curling gel which should help to hold the curl better. Also, I’ve always wanted to be able to create bouncy curls so this is a good objective.

Now, I know I said earlier that the goal is time bound, but, for me, saying I’m going to get all of the above goals ticked off by the end of February leaves too much opportunity for failure, so, I like to get super specific and dedicate a block of time to each project, activity or task involved in my monthly plan. For example, I might decide that on Wednesday 12th February in the morning, I’ll watch a couple of tutorials on YouTube that have been liked by lots of viewers (more likely to be good quality) and then have a go at curling my hair in the afternoon. I’ll also dedicate another 2 or 3 hours to perfecting my new skill until the curls look nice enough to go out with.

I also want to talk about the very last goal in my list:

‘Do two watercolour exploration exercises’.

I’ve picked this one to explain about, because I had something similar for one of my January goals, but I didn’t achieve it. In fact, I didn’t achieve a single part of it because I wrote ‘Do some watercolour exploration each week, using ideas from Painting Calm’ and, although I did a small amount of watercolouring just before the end of January, it wasn’t using ideas from my new book (which I have barely looked at yet) and it certainly didn’t happen every week!

To be completely honest, my goal was far too ambitious as it demanded a lot of time, something that I didn’t have enough of, especially with all of the other goals I’d set for that month. Therefore, it didn’t fit the achievable element of a SMART goal. So, this time, I’ve reduced what is expected of me, and I’m going to write into my monthly BuJo calendar, exactly when my watercolouring sessions will take place. I’ll also pre-pick the ‘watercolour explorations’ I’ll be doing so I can get prepared before I start. They can also be activities from my new book or ones I see in social media if I fancy trying them instead (they’re specific but not too ridged).

So, for my final goal (i.e. the one at the bottom of my list), although ‘Do 2 watercolour explorations’ might seem a bit vague, it can easily be developed as a SMART goal. It is specific as it states the kind of art I want to do and explains that they’re explorations so basically just me trying out a couple of techniques. It’s measurable as I’ll be able to see the evidence of two exploration style activities on watercolour paper or in a sketch book. It seems to be much more achievable – as long as I don’t get COVID again! It’s relevant, as exploring with watercolour is on my vision board for 2025 and it’s time bound as I plan to do both activities before the end of the month with my sessions identified on specific days (recorded in my BuJo) and time blocks drawn up on the actual day, based on how long I would like to spend doing them.

Final words…

I hope today’s post has been helpful for you and will assist you in turning your simple goals into SMART goals to increase your chance of achieving them. I see so many examples of incredibly unspecific goals when people share their monthly spreads and then, when they come to review their progress, they talk about how they only achieved a small number of them or, more often than not, had forgotten what they had said they wanted to do! As well as making your goals SMART, you should also remember to check back in with them on a regular basis. This way, you can pick out two or three for each week of the month and then outline your plans, first in your monthly set up, and then in your weekly.

I would wish you the best of luck with your goals, but really, what’s required is hard work and paying attention to what matters to you so I’ll just say I hope you’re ready for action and are focused on what you want! Go get em!

Posted in art, bullet journal, Bullet journaling, Cricut Design Space, Cricut Joy Xtra, planner girl, planner lifestyle, Planning and journaling, watercolour painting

Setting up my Bullet Journal for February 2025: Valentine’s love hearts theme

I tend to do some kind of love theme for February’s theme and this year is no exception. I already knew I wanted to use my watercolours for my cover page, but I also decided to opt for stickers to decorate the rest of the spreads to make it quicker to set up. I’m really pleased with how my pages turned out and I hope you like them too. The photos aren’t wonderful as it was another dreary day here in Sunderland, so I apologise for that but I hope they inspire you anyway.

For this month’s front cover, I opted to use the watercolour bleeds technique with a range of red, pink and purple hearts. I watched some tutorials on YouTube to remind myself of the basic techniques and discovered that one of my favourite watercolour artists, Emma Lefebvre had just shared a video called ‘easy Valentine’s ANYONE can paint’. And she was right, her techniques were all super simple and totally do-able. Also, one of the techniques was watercolour heart bleeds – such a good find! I’d already filled my palette with reds, pinks and purples, but in her tutorial, Emma used gold paint as well. I didn’t really need an excuse to get out my metallic paints, although I knew they wouldn’t show up properly on the scanned version that I could stick in my BuJo. Anyway, it turned out okay but I couldn’t fully saturate the colours as it ended up printing with a strange blue background tone which looked just awful! I wish someone would invent a watercolour paper which is super thin but works just as well as the high GSM ones that are available now.

February front cover

Here’s my original watercolour piece as a flat lay and raised to, hopefully, show the metallic gold, followed by my front cover. I again turned the digitized watercolour image into a sticker with an offset. This was easy to do in Cricut Design Space and means that the image looks nicer than it does on standard printer paper.

Photo credit: Laura Jones for Keeping it Creative

Photo credit: Laura Jones for Keeping it Creative

Monthly calendar

Photo credit: Laura Jones for Keeping it Creative

February finances

My usual set up, this time with some pink Tombow to add another colour element. I made the Love is in the air sticker design myself using fonts found in Cricut Design Space. I really like how it turned out!

February goals page

I intend to create a blog post for next week on how I go about choosing goals and how I make them ‘SMART’, so to actually read those, you’ll have to visit by site again! I’ll attach the link here when it’s written so it’s easy to navigate to.

Photo credit: Laura Jones for Keeping it Creative

Weekly plans

I spent a long while perusing images on Cricut Design Space and came up with 4 different subtopics for the 4 weeks – mini wreaths, cupcakes, postage stamps and Valentine’s drinks. And look at all the hearty content I found!

Final words…

Thank you for visiting my blog to look at my February Bullet Journal set up for 2025. I hope you enjoyed seeing my pages. Many of the sticker images could easily to drawn directly onto the page using black waterproof fineliners and coloured markers. I know some people choose to create watercolour images straight into their bullet journal pages but I find that the paper in Notebook Therapy journals does not take this medium well. The paper is plenty thick enough to hold watercolour with minimum buckling but the paint just doesn’t behave in the same way as it does on proper cold pressed paper designed specifically with that in mind. Perhaps with a better scanner and printer, you can get a printout which looks the same as the original, but I can’t afford to buy a more expensive one and the true cost really comes from the very pricy cartridges. Despite this, I will continue to explore the medium of watercolour as much as I can in the future, but I might not use my art to decorate the pages of my bullet journal as regularly.

Have a wonderful February and I’ll see you back here with more BuJo content next month (which, at the time of writing, starts tomorrow!).

Posted in bullet journal, Bullet journaling, creativity, goal setting, Home cooking, intentional living, planner girl, planner lifestyle, Planning and journaling, productivity, watercolour painting

Setting up my Bullet Journal for January 2025: Bare winter trees theme

Following on from my winter foliage theme for December, I continued taking inspiration from nature and chose winter trees as the focus for my January spreads. With being ill at the beginning of the month, I simply drew up the basics of my layouts and added the decoration later when I was feeling much better.

So, although January is nearly over, I thought I would do this post to show how my spreads turned out and some of the ways in which I use them. Obviously some of the information needs to remain private so I’ve covered a few bits up.

Front cover

As I enjoyed doing my watercolour painting so much last month, I thought I’d give it a go with my front cover for this month. Again, I used cold-pressed watercolour paper but this time, it was from a new paper pad I picked up in Hobbycraft which has quite a pronounced grain to it. As my BuJo is getting very bulky, I needed to scan and print my finished art, but, although it doesn’t look exactly the same as the painted piece, it’s quite close, with the tree looking slightly paler. I also like the fact that you can see some of the grain in the sky. My inspiration for the background was from a photograph which I took early in the month, although I wish I’d had the photo in front of me when I did the sky as mine looks a bit bland in comparison! I opted for a dark brown tree and created a muddy grass ground effect using my fan brush, rather than painting snow.

Gorgeous winter sky. Photo credit: Laura Jones
Photo credit: Laura Jones for Keeping it Creative

Monthly calendar

I wanted to create a watercolour background effect again for some mini tree images to surround my calendar, so I selected some relatively thin paper from my stash and did some trials with it. I also had a go at painting mini backgrounds in the back of my bullet journal but I didn’t like the effect with the coated paper of my Notebook Therapy journal. The paper I opted for was a cream coloured drawing paper which the paint sat nicely on and didn’t cause buckling. When my simple backgrounds were complete, I used four sizes of Pigma Microns in 0.4, 0.2, 0.1 and 0.05 to create different tree shapes. I’d watched various online tutorials on You Tube and the key teaching points were to create lots of y shapes and make the branches thinner the further you went out and up from the trunk. I’m really pleased with the different effects that I achieved. They’re not based on particular species of trees but I did spend a lot of time this month looking at bare trees on my various walks (okay, it turned into a kind of mini obsession ha ha!).

Photo credit: Laura Jones for Keeping it Creative

January finances

I kept these pages really simple because I wanted to spend time on other things. Obviously, I’m not sharing information about my income and expenses.

Photo credit: Laura Jones for Keeping it Creative

Monthly goals

I tried to create heart stickers in Cricut Design Space but the cutting was so off that I ended up having to spend hours talking to a representative from Cricut to get it sorted. I found these mini hearts in my stash and used tweezers to try to get them relatively straight!

Photo credit: Laura Jones for Keeping it Creative

If you want to see my evaluation for the month, let me know in the comments and I’ll do a quick blog post about it.

Weekly plans

The first week of my weekly plans is a bit sparse and I couldn’t resist making some feeling like poo stickers to show why the first half of the week is pretty much blank. Some of my dailies are more busy than others and sometimes I run out of room. I also usually do a rolling weekly for general, none day specific tasks.

Meal planning

My husband and I have now got into the habit of doing one of these each week. We peruse our cookbooks, recipe files and magazine cuttings as well as looking online. Then, I write up the plan whilst my husband makes a shopping list and checks ingredient availability in our cupboards. It takes quite a while, but it’s well worth it.

Photo credit: Laura Jones for Keeping it Creative

Final words…

I hope you’ve enjoyed seeing my January spreads, including how I fill them out. I’ve almost finished my pages for February now so I will no doubt be sharing them very soon, hopefully before the end of the month.

Until next time,