Posted in art, bullet journal, Bullet journaling, creativity, Planning and journaling

Setting up my Bullet Journal for April 2023: Kite theme

Photo credit: Laura Jones for Keeping It Creative

This week, as my craft room is very chaotic due to my decluttering, I decided to bring my laptop downstairs and work at the dining table. This has given me the chance to open the patio doors on warmer days and listen to the birds in the garden. As well as it being milder, we’ve also had sun and rain creating rainbows and quite a few windy days. Just outside, we have a bright windmill stuck in a plant pot and it’s currently spinning round so fast the colours are merging! Although the wind here tends to be cold, at the moment, it’s not too bad – making me think that it’s perfect weather for kite flying. It’s this thought that gave me inspiration for my bullet journal theme for April. I’m excited to share my pages super early – it was certainly time consuming to create them so I hope you like them!

My cover page

Before designing my spreads, I like to have a look on Pinterest, YouTube and Google to see if my chosen theme has been done before. I found relatively few examples but my pages were inspired by the beautiful work of Claudia Joseph and her set up video. I’ve made it my own by choosing a different colour palette of primary and secondary colours, an alternative combination of art supplies and a number of pages which I know I’ll make use of next month.

I had the idea of creating a mixed media cover page with a pale watercolour wash and inked kites filled in with felt tip pens. For this, I decided to use my masking fluid on the kite shapes and then create a pale blue using cerulean blue and chinese white watercolour. Ask I hadn’t used masking fluid in my bullet journal before, I decided to test it out in the back of my notebook. I’m glad I did, as, although the watercolour itself looked good, the masking fluid pulled the coating off my page in several places and looked a mess. I also tried using my Tombows to colour in the kites and wasn’t happy with the results of that either!

In the end, I decided not to colour the background as sky and settled for ink and coloured pencils for the kites. I had used them in the past in my bullet journal to good effect with the only problem being colour transfer to the opposite page when completing later spreads. In an attempt to solve this, I popped to The Range and picked up a small can of Winsor & Newton Fixative to spray on my pages. This seems to have worked well and although it has an awfully strong chemical smell to it which permeates the air, I’m glad I purchased it.

Here’s the result using Staedtler Ergosoft Coloured Pencils, a Derwent colourless blending pencil, a 0.1 Pigma Micron (which broke on me halfway through but luckily I had a spare in my stash), a grey Zebra mildliner and the small tipped end of a Tombow dual pen for the writing.

Photo credit: Laura Jones for Keeping It Creative

To make sure my kites were neat and symmetrical, I folded a piece of thick paper and cut out designs in different sizes. I then drew around the stencils lightly in a 2H pencil. I’ve always used a HB to sketch out my designs but a 2H is much lighter – you just have to make sure you don’t press on too hard and it easily dents the paper (I’ve realised to my cost!).

My double page calendar page

I decided to try out a slightly different set up for my calendar boxes this month with individual 5×5 squares. I drew it up lightly in pencil first and then used the bullet pointed end of some of my Tombows. Creating the squares was made much easier by using a Helix metric squares template which I remembered I had as part of my supplies. I mostly love how the double page has turned out – it’s so bright and colourful and I think it will be a joy to see each day. The only thing that’s annoying me about it is that I pressed on a little too hard with the colouring in on front cover and it has dented the paper and caused it to be raised on the left hand side of the spread. I tried ironing it flat but it didn’t work as the paper has been stretched. Looking at it positively, I’ve certainly learnt something and hopefully I’ll remember this next time.

Photo credit: Laura Jones for Keeping It Creative

Finances for April

If you’re a regular here on my blog, you might notice that I’ve made the expenses section shorter for April. This is because I’ve had very little work at the university in March so my income will be a lot less. For this reason, I hope to have a low spend month. This has also meant that I had some space to do a little more decoration.
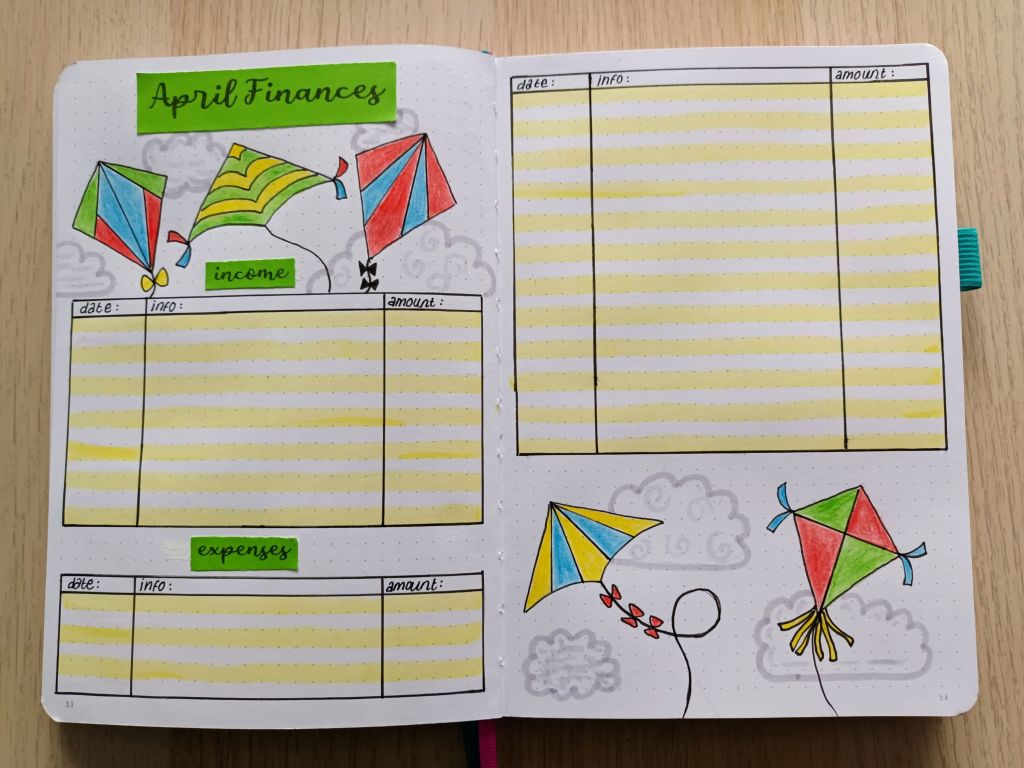
Photo credit: Laura Jones for Keeping It Creative

Final words…

Just like watercolour painting, drawing and colouring in is are great mindful and meditative activities and both provide a wonderful way to relax and de-stress. Although the pages for April were quite time consuming, it was nice to try something a little different and I like the way they’ve turned out. I might even use the bright coloured Tombows to draw out my weekly plan for the first full week of the month, rather than the usual fineliner.

I hope you’ve enjoyed seeing my spreads and I look forward to seeing the work of other bullet journalists on social media over the next week or so.

Wishing you all a wonderful April,

Posted in art, bullet journal, Bullet journaling, creativity, Gouache painting, Planning and journaling

Setting up my Bullet Journal for February 2023: Valentine’s Love Heart theme

January seems to have flown by and we’re now into February. I’ve only just got my spreads for the month finished as I’ve been busy setting up my new STM notebook and have also had quite a few sessions at the university this year so far. I did a hearts theme before (back in Feb 2021) and I enjoyed using my watercolours to mixing various shades of red and pink so I thought I’d give it another go but this time I used gouache for a more opaque finish. The design for the front cover was inspired by a Caroline Gardner mirror compact that I got for Christmas which features heart outlines.

My pretty compact mirror from Caroline Gardner

The front cover

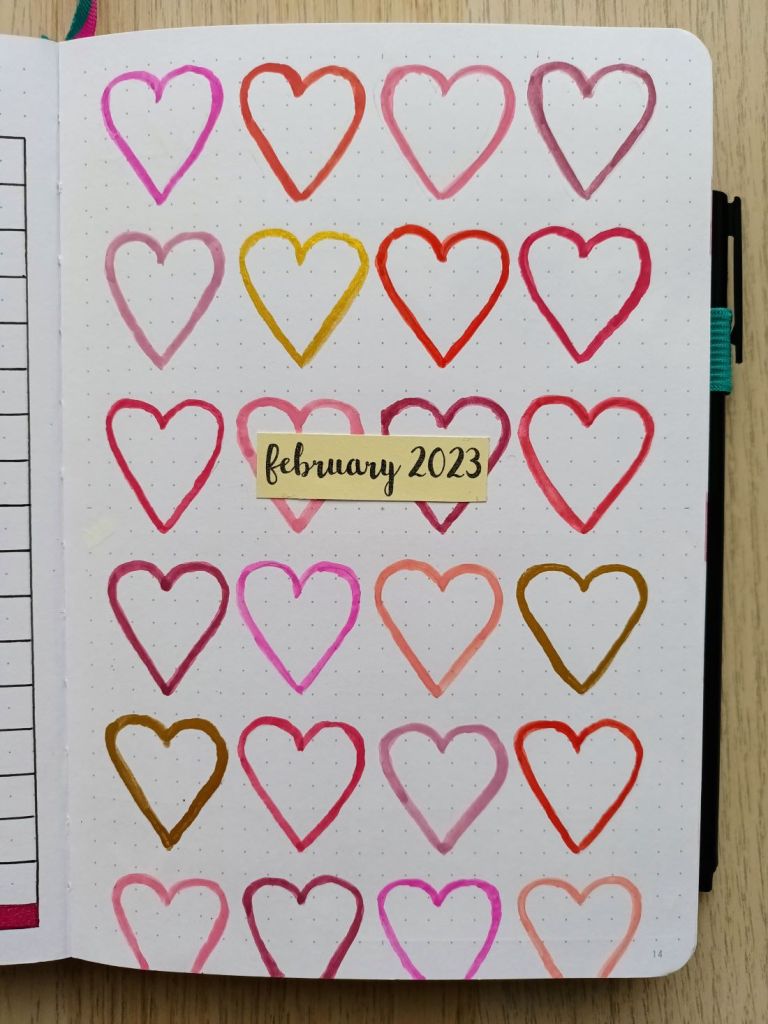
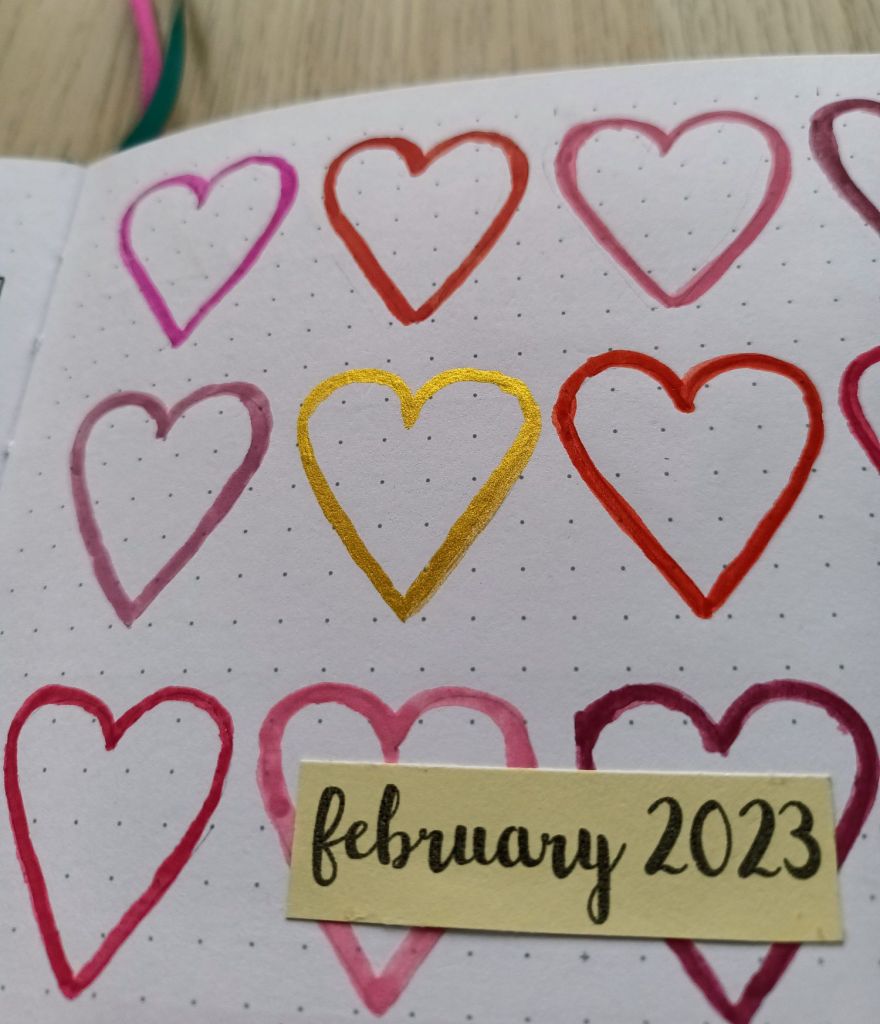
After practicing painting heart shapes in the back of my old bullet journal, I created a template and lightly sketched the outlines with a pencil. I then mixed a shade of pink and then used a number 2 round brush to paint a small number of hearts. I repeated the process with various reds and pinks and also added 3 gold hearts using my Finetec metallic watercolour paints. After leaving the paint to dry thoroughly, I created a small cream label for the month and the year using a gorgeous brush letter font which I recently downloaded called Northern Lights Script.

Photo credit: Laura Jones for Keeping It Creative

Calendar page

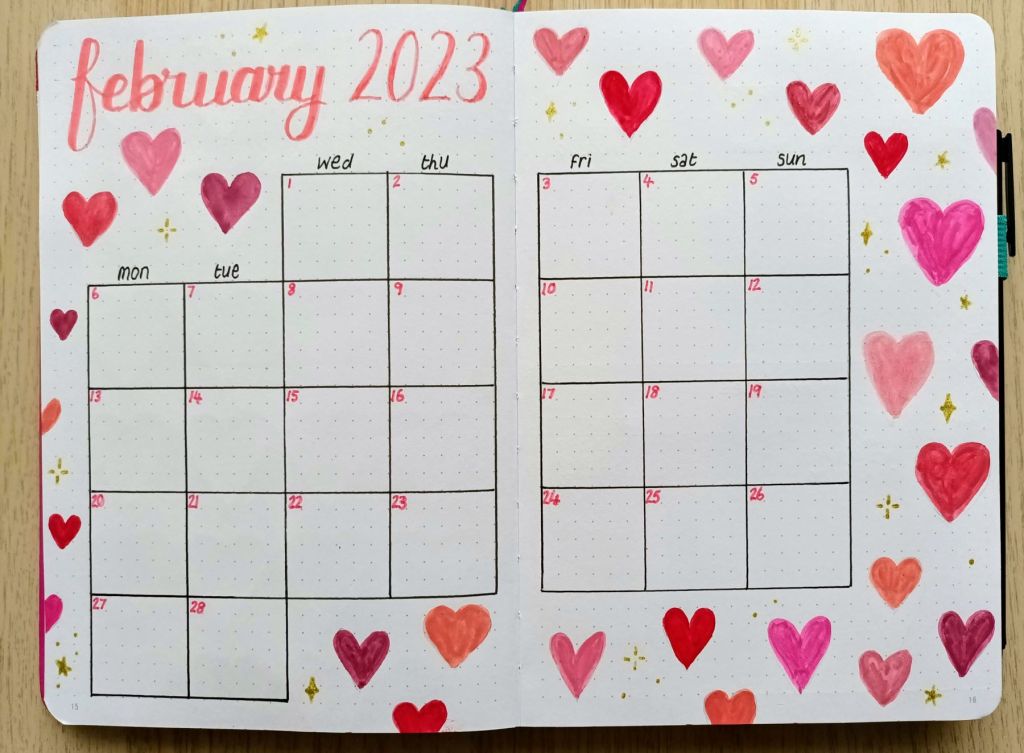
For the month on two pages calendar, I mixed similar colours and painted a range of filled hearts in different sizes. This time I used a size 0 round brush as the shapes were smaller. This time I very lightly hand sketched the heart shapes with a 2H pencil. When I’d finished, I realised that I hadn’t done any gold hearts so I decided to add some sparkle using a Uniball Signo gold gel pen creating dots, stars and curved diamond shapes.

Photo credit: Laura Jones for Keeping It Creative

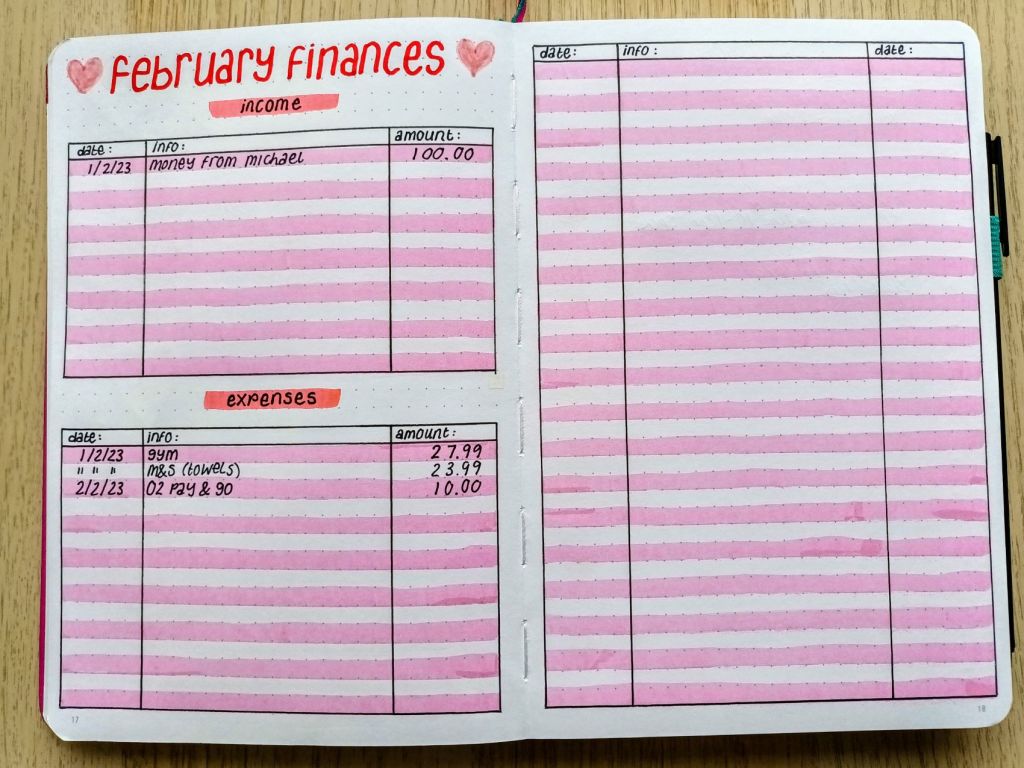
Finances

I’ve been enjoying using this format of financial tracker for a while now and I just change up the colours each month.

Photo credit: Laura Jones for Keeping It Creative

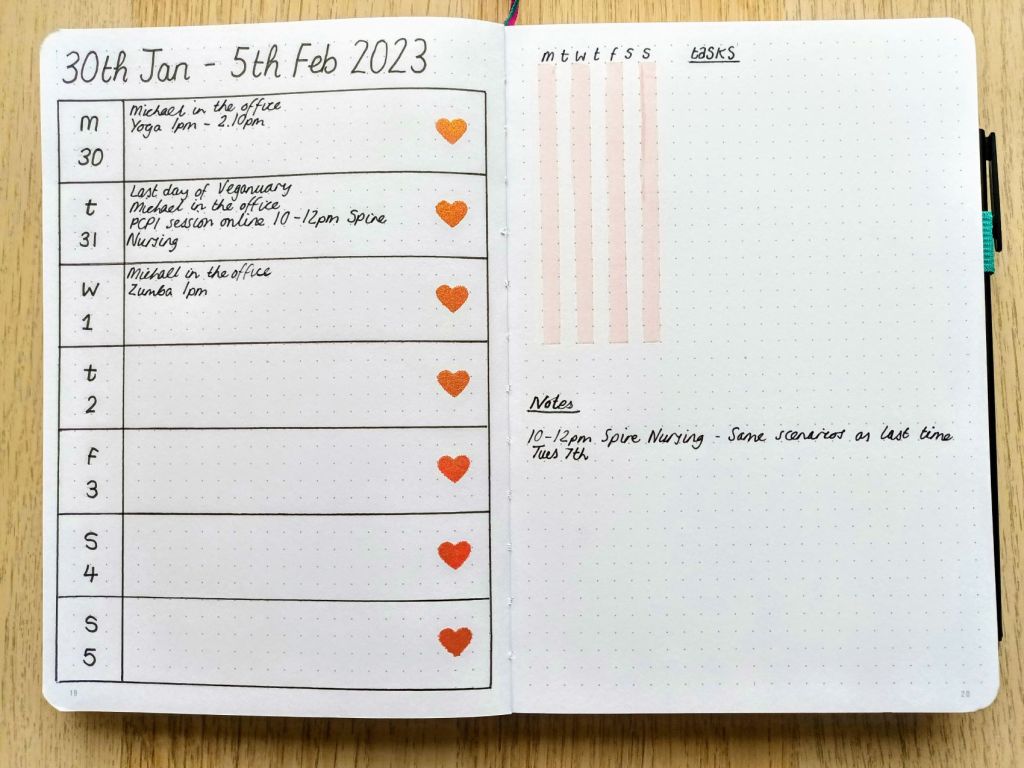
Weekly plan and rolling weekly

This is the first time I’ve done a week-on-one-page spread but now I do a rolling task list for the week I don’t need as much room as I’m only recording events, gym sessions and days out. The hearts for each day were inked using a heart outline (made using a punch), a gorgeous red/gold ink and a mini finger sponge. You can’t really see the iridescence in the photo but it looks really pretty when the hearts catch the light.

Photo credit: Laura Jones for Keeping It Creative

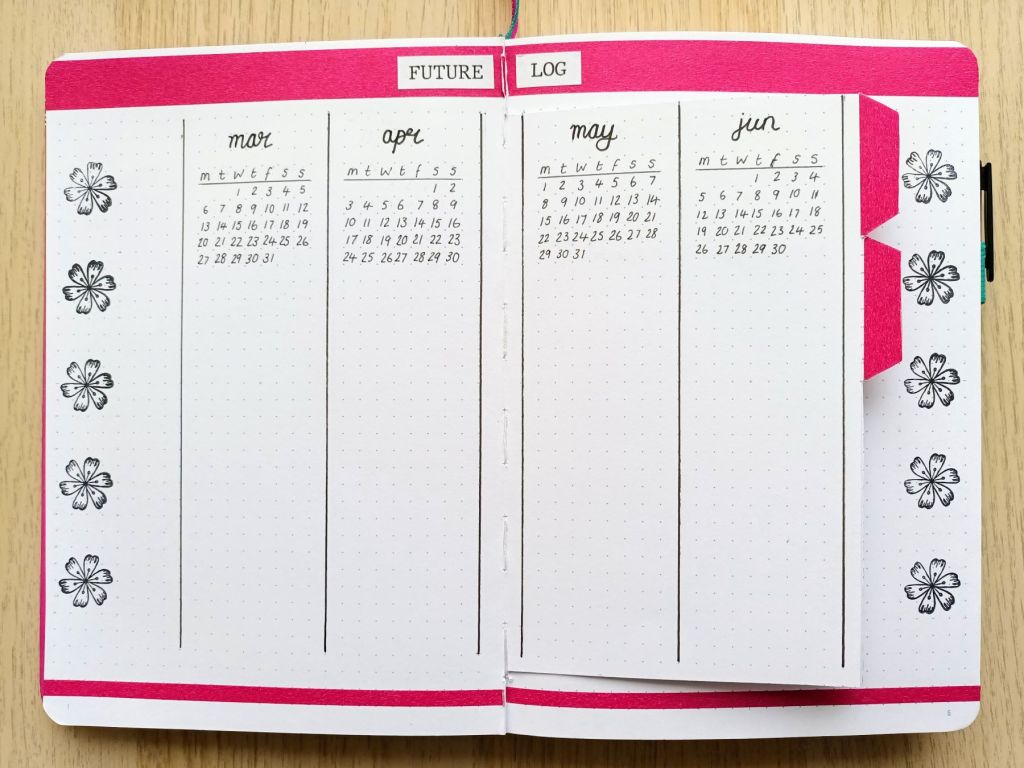
My future log for my new Bullet Journal

I created my future log for 12 months, starting in March 2023 and I’m really pleased with how simple and effective it is so I thought I would share here. It makes use of a Dutch door set up and I added little tabs for ease of use. Using a Dutch Door means that you create one title which can be seen from a number of pages.

Photo credit: Laura Jones for Keeping It Creative

Final words…

I’m really pleased with how my pages turned out and I hope you like them too. Doing some painting in your bullet journal is a super relaxing and mindful activity which I really enjoy. As long as your pages are a good weight and you don’t use too much water or add too many layers of paint there should be no bleed through or page wrinkling.

Wishing you all a wonderful February,

Posted in art, bullet journal, Bullet journaling, creativity, Mindfulness, Planning and journaling

Setting up my Bullet Journal for January 2023: Winter snowflakes theme

Happy New Year to all of my readers! Wishing you a fantastic 2023. I’m a bit late sharing my bullet journal pages this time as I only just got them finished. I’ve done a snowflakes theme before, but last time, I did a monochrome version with just my Pigma micron pens. I ordered some new brush and fine nib pens to arrive just after Christmas and there are lots of lovely blues in the set of 24, so I thought I’d try out the fine tips on my January spreads. I hope you like them and as always, if you’ve shared your pages for this month, feel free to link them in the comments.

Cover page

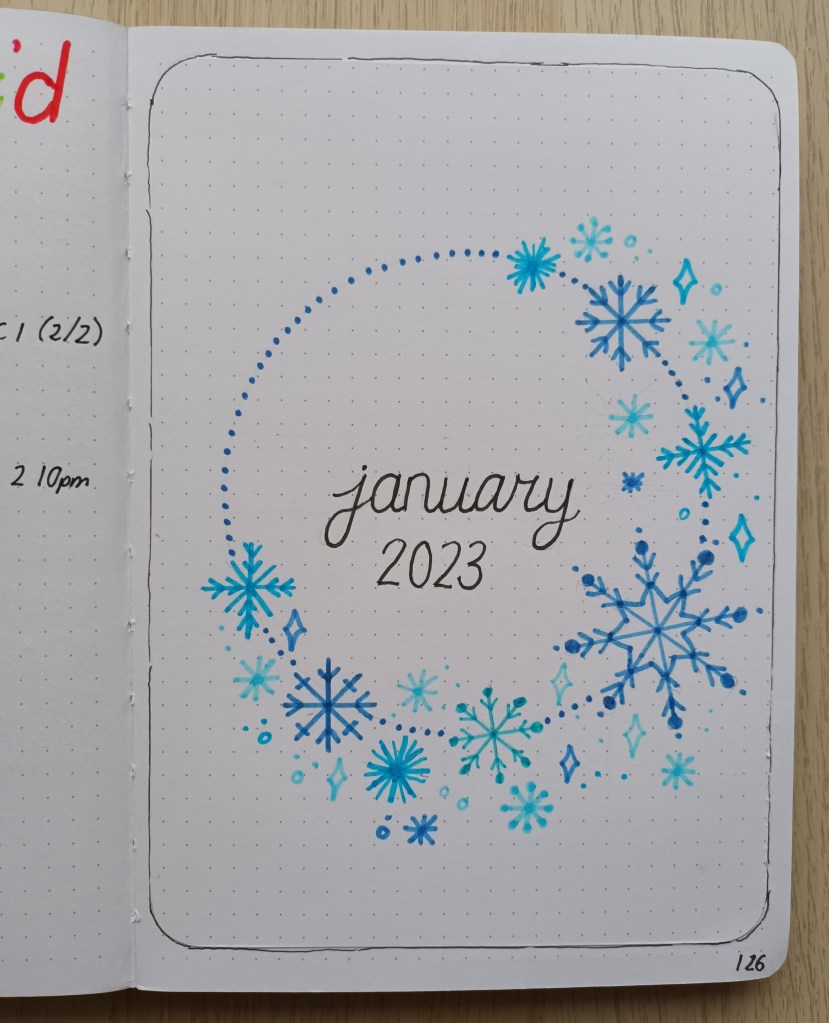
This month’s cover page is heavily influenced by a design from @createmore.se on Instagram. I’ve changed it up slightly by adding sparkles, dots and small circles but the composition is mainly the same. I used my circle drawing tool and, as I messed up the lettering in my notebook, I cut a page from the back using my X-Acto knife, trimmed it down, created the wreath and then stuck it in after I’d finished. I decided to do a rough freehand border around it to make it stand out. My new pens are from the Ohuhu brand and I ordered the mid tone range which has some lovely pastel colours.

Photo credit: Laura Jones for Keeping It Creative

Monthly Calendar

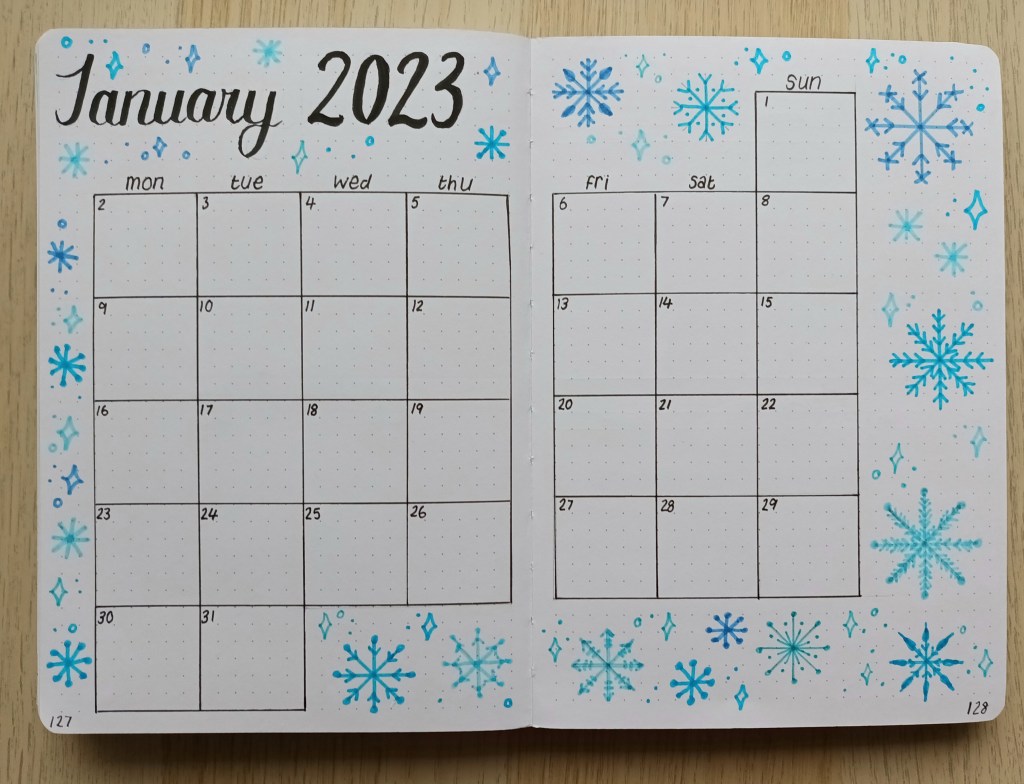
I’m really pleased with how this one turned out. It’s my usual grid layout with different snowflake designs filling the space. It took me a while but it was a nice bit of mindful drawing in the evening of the first of January,

Photo credit: Laura Jones for Keeping It Creative

Finances

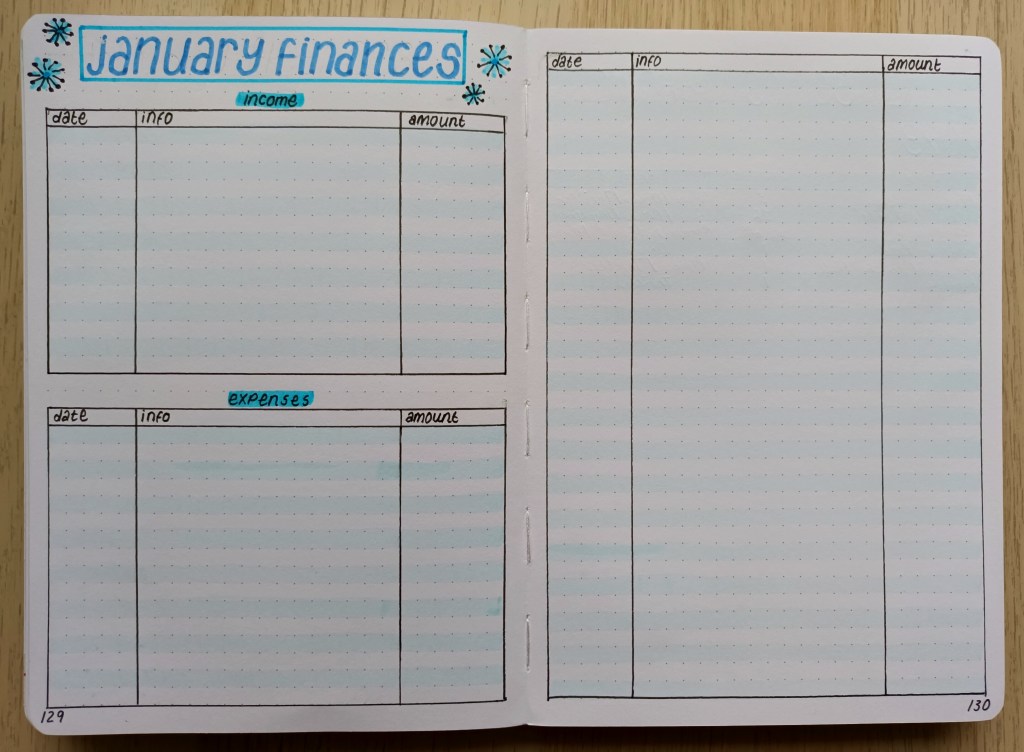
Again, this spread is self explanatory. By the end of last month, my expenses table was completely full – in fact I ran out of space! Hopefully, this month will be a lot lighter on the spending front!

Photo credit: Laura Jones for Keeping It Creative

TV series watched

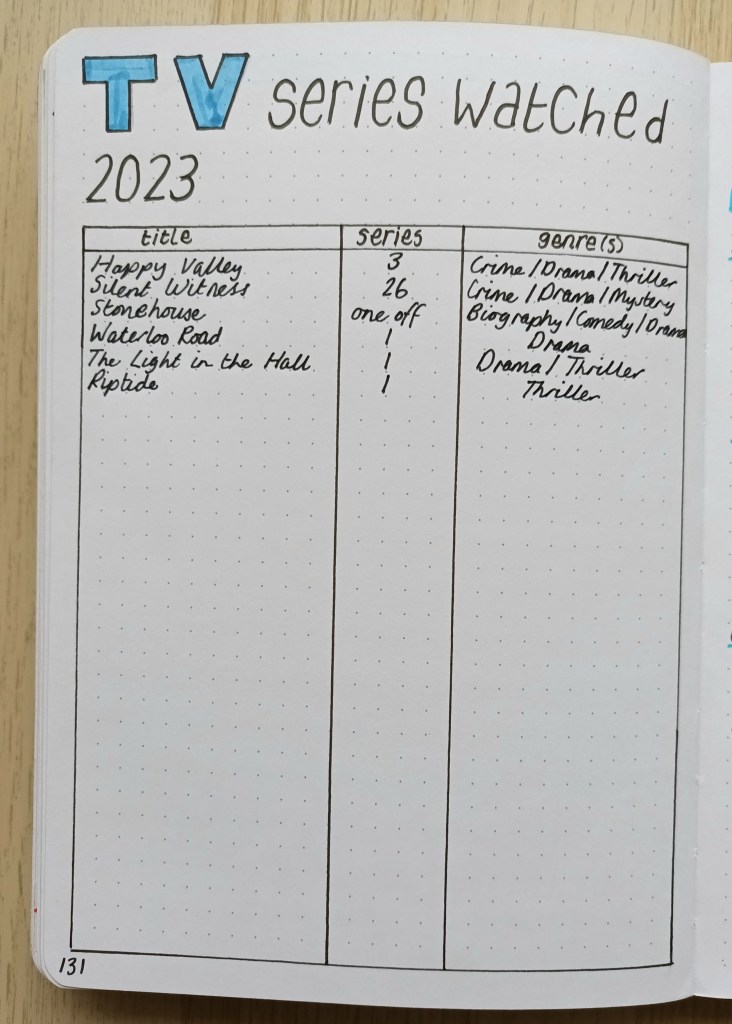
I don’t do one of these each month but my last one ran up until the end of December so I’ve just set up a new one. I like to record all of the different series we watch and the particular genres we enjoy. It’s nice to see all of the things we’ve watched and is a good reminder of what we’ve seen.

Photo credit: Laura Jones for Keeping It Creative

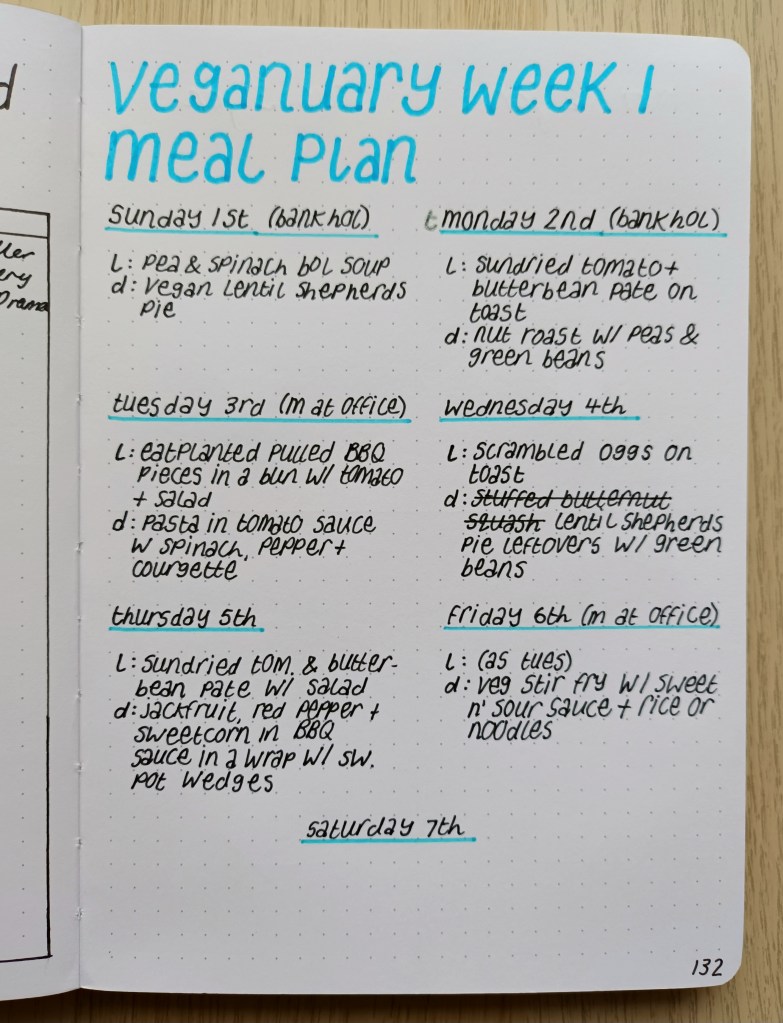
Veganuary Week 1 Meal Planning

My husband and I are doing Veganuary again this year which means we’re eating vegan for the whole of January. It gets easier every year but we still need to do a meal plan each week so that we know what we’re having for lunch and dinner each day. I also find the meal planning pages from previous years really useful. Obviously, this page could be useful whatever your diet but we don’t tend to spend long thinking of meal ideas the rest of the year.

Photo credit: Laura Jones for Keeping It Creative

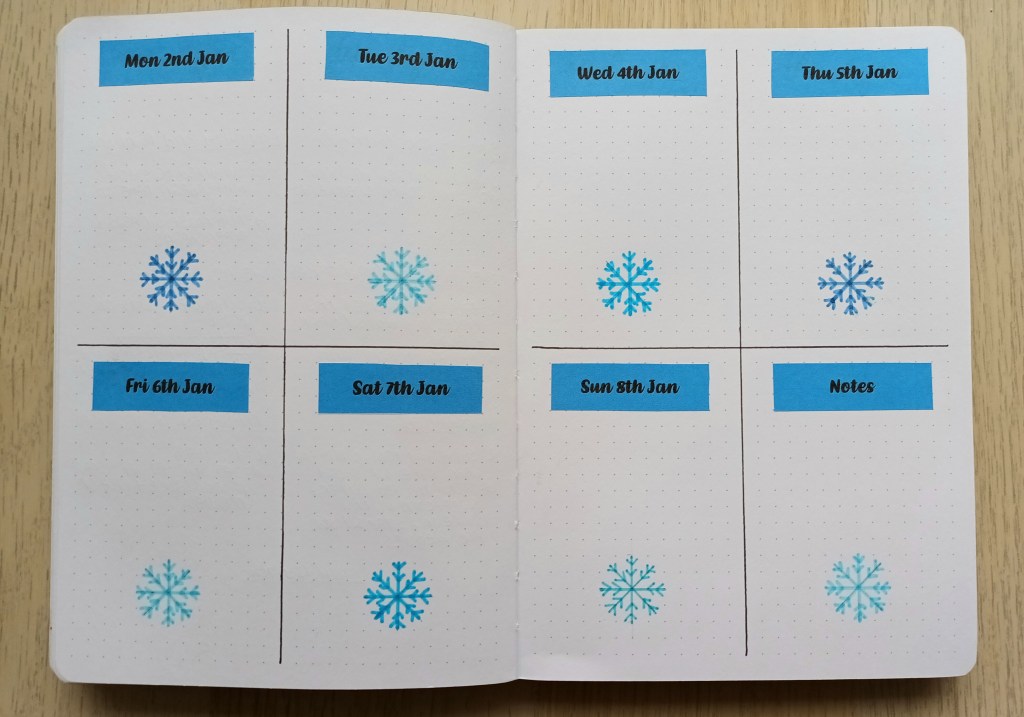
Weekly Plan

This is my first weekly of the month. I used the same snowflake design for each day because coming up with different designs is what took a lot of time for the cover and calendar. I messed up on the spacing for this spread so the bottom columns are one dot space shorter than the ones at the top but it doesn’t bother me too much as I tend to write less at the weekends anyway.

Photo credit: Laura Jones for Keeping It Creative

Final words…

That’s all of the spreads I’ve drawn up so far. I have my running task list to set up this morning which will go on the page after my weekly plan and I will of course be doing more meal planning spreads and weekly plans over the weeks. I hope you’ve enjoyed looking at my spreads for this month. We have no snow here at the moment but it is certainly cold enough to get some white stuff soon.

Posted in art, Blogging, creativity, lifestyle, memory keeping, Planning and journaling

Top Tips for a Successful December Daily in 2022

This year, as I’m in a good place with my mental health for the first Christmas in a while, I’ve decided to do another December Daily challenge. I made a TN style journal quite a few years ago and I found it really enjoyable. The finished booklet looks great, and I have loved looking through it this month as a wonderful reminder of the things we did in December 2018. I can’t wait to get started on my 2022 album but I’m trying to make sure I’m well prepared and have everything I need to meet with success. I was amazed by the array of YouTube videos which showed people still working on their 2021 album in September of this year – some of them with pages and pages still to complete! With this in mind, I decided to write today’s blog post which focuses on my top tips to make sure that the process goes smoothly and ultimately, that the challenge is completely by the end of the holiday season (or at least by the end of January 2023).

What is December Daily?

The idea for December Daily was created by Ali Edwards who is a designer, blogger, workshop instructor and author based in the USA. She has a passion for memory keeping, capturing everyday life with photographs, words and decorative elements. On her website she has this to say about the project:

December Daily® is a December mini-album project that documents the 25 days leading up to Christmas. The simple goal is to capture the spirit of December via one story per day.

Since 2007 this project has become one of the highlights of my year and a beautiful community of memory keepers has come together to share their December stories with one another. It’s an awesome way to document and celebrate the season.

Tips for a successful and fun December Daily

As part of the preparation for my 2022 December Daily, I’ve watched lots of inspirational videos, read bits and pieces about the project online in various blogs, and collected a number of tips and ideas. As I explained earlier, I’ve seen quite a number of YouTube videos of people still working on their album for 2021, despite the fact that we’re getting close to December 2022. If I was in this situation, I would be worrying that I’m never going to get there and may have already abandoned the project part way through (and likely with feelings of guilt about all the time and money I’d spent). So, below are my top tips for success, enjoyment and a timely completion.

Start by watching YouTube videos and reading blog posts for inspiration

You already know the main idea behind December Daily but there are so many different ways to approach the project. Well before the start of the month (I began in October!), it’s a good idea to watch a range of videos and read blog posts for inspiration and composition ideas. You’ll find that some creatives prepare a mini album before they begin, leaving space for photos and journalling, whilst others use a 6×8 D rings binder and make up the pages as they go. As well as seeing different layouts, you will also find many variations in shape and sizes of journal. There are pros and cons to all of the different methods, layouts and album sizes, and of course, there is the cost to consider – the more supplies you want to use and therefore need to purchase, the more expense involved.

When watching videos and reading blog posts, I like to make notes and sketch the detail of layout ideas so I can remember my favourites at a later date and seek inspiration from them if I get stuck. I’ve also collected lots of ‘story’ and photo ideas on Pinterest and then copied out my favourites in my bullet journal to refer to throughout the month. I only chosen prompts which are relevant to me and my family situation.

Consider which supplies you want

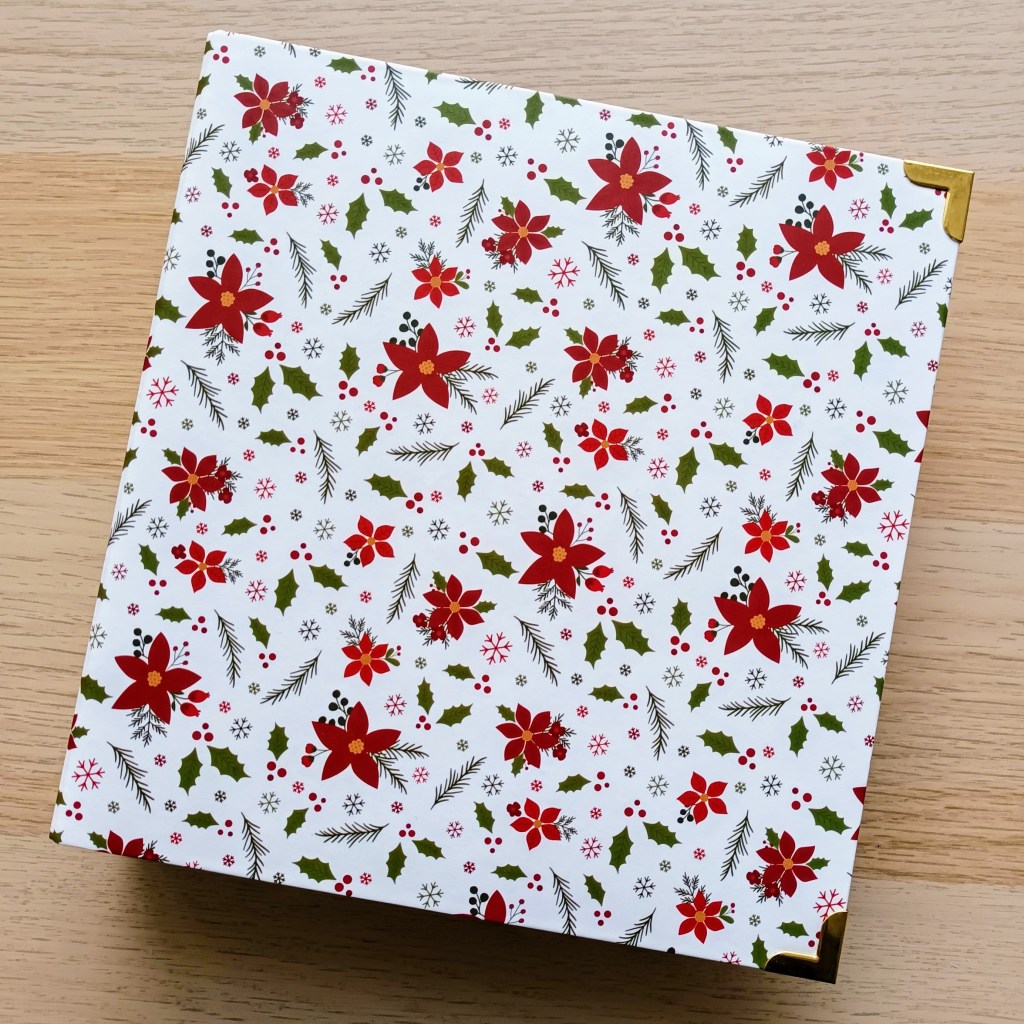
Before you embark on the project, think about what you might need to complete it. Doing the above should have helped but you might also want to sit down and create a list in preparation for purchasing items. For example, I decided I wanted to do a 6×8 album with some of the pages inside page protectors and some just reinforced with card. I also love the idea of lots of different layouts and photo sizes so I took this into consideration too, again making notes about my ideas. I ordered my album and page protectors pretty early on as when I looked at available options, I noticed some of the ones I liked were almost sold out as they had been released last year. I chose an Echo Park white album with poinsettias, holly, berries, snowflakes and spruce stems on and I still absolutely love it!

6×8 Album from a collection by Echo Park

Other items to think about could be Christmassy papers in 12×12 size or smaller, glittery number stickers for labelling each day, journalling cards, gift tags, stickers, washi tapes, ephemera, ribbons, twine for attaching tags, sequins for shaker pockets, glue sticks and tape runners, maybe even a fuse tool for sealing shaker pockets – the possibilities are endless.

I also made sure I ordered my supplies from a company based in the UK as I wanted to make sure my items were received quickly with no chance of being stung by customs fees. There are lots of resources on Ali’s own website which look amazing, but they would end up being very costly! Although I’m prepared to spend quite a bit on the project, I did create a fixed budget, so I don’t overspend.

Choose your main items from one designer collection

If you want all of your pages to go together really well, it’s best to have a specific colour palette and style throughout. An easy way to achieve this is to choose items from a particular collection or at least from a particular designer. For example, this year, all of my supplies (ordered online using the Craftie Charlie website) are from Carta Bella’s ‘Home For Christmas’ and ‘Happy Christmas’ collections. I also purchased a few bits and pieces from Hobbycraft a few months ago but if these don’t go with my new supplies, I’ll use them for decorating my bullet journal instead.

December Daily Supplies from Craftie Charlie

Think about creating some foundation pages

Before December begins, you might want to consider making some foundation pages. These are pages which are done in advance to give yourself a head start on the project. For example, you might create a cover page which includes a title and the year 2022. You might also have a go at making particularly crafty stuff pages and elements such as shakers (containing sequins or glitter), sewn materials or multi-layer bits and pieces,

You could also create a page which explains your reason why. This is short piece of journalling which says why you’re doing the project and what you hope to get out of it. Is it a way of recording your little one’s first Christmas? Is it a chance for you to have more fun this December? Is it a way of winding down each evening by doing some journalling or is it more of a photographic challenge for you? Again, this is totally personal to you. You might want to watch videos or read about what it means to others, but you may have completely different ideas and reasoning.

This year, as one of her foundation pages, Ali Edwards created a table of contents, and this idea appeals to me too so I might give it a go. You can view her first set up video here. I’ve subscribed so I can watch all of her videos as and when she shares her creative process.

Journal your experiences and how you feel in the moment

I’m going to carry around a very small notebook in my bag wherever I go during the month of December so I can make notes about my experiences and how I feel. This means that even if I don’t do the page for that day straightaway, I’ll still have a record of the key details and my emotions at the time. You could also create a page on your phone using an app such as Notion if you would rather write things down electronically. Also, make sure you take lots of photos so you have plenty to choose from – let your family and friends know about the project so they can help with image ideas.

Above all, have fun!

December Daily is potentially a wonderful and fun memory keeping challenge to do, but it won’t be if you get yourself stressed and worried about getting everything perfect! Remember, there are no right or wrong ways to go about it – it should be completely personal to you and as simple or creative as you want. You may use lots of photos and decorative elements, or you may just do a series of simple journal entries.

The holiday season can be incredibly busy and it’s important to find time each day for rest and relaxation. This may mean working on your daily entry in the evening to help you wind down, but alternatively, it could mean that you make up most or all of your album after Christmas, when you are able to devote a few hours each day to some enjoyable and mindful creating, working at your own pace. If you want to spend most of next year finishing your creative project and this is what would make you happiest, go for it! Whatever you do, keep it fun!

Final words…

I hope you’ve found today’s post useful, and the tips have helped you with preparing yourself for doing your own December Daily project. Let me know if you’re going to give it a go or if you’re taking part in another challenge for the festive season e.g. Blogmas where you try out new and fun things on your blog related to Christmas. Although I’m not doing Blogmas this year, I’ll hopefully find the time to do a few blog posts next month as well – I might even share a few of my favourite December Daily pages as I go along too.

Posted in art, bullet journal, Bullet journaling, creativity, Planning and journaling

Setting up my Bullet Journal for November: Squashes theme

For this month, I took inspiration from seasonal eating and chose something we always enjoying trying lots of varieties of at this time of year: squashes! There are butternut squashes in the UK supermarkets pretty much all year round but once late September arrives, the mixed squashes begin to appear in the veg aisle, followed by huge pumpkins for Halloween, adding lots of autumnal colour and different shapes and sizes – some smooth and others with knobbly bits. This autumn, so far, we’ve sampled acorn, carnival, red kuri and sweet dumpling and we have two small delicata squashes lined up for this week. Each has its own unique flavour, some sweeter than others, and recommended uses include for soups, mash, risottos, tray bakes and stews.

Photo credit: Laura Jones for Keeping It Creative

For this month’s spreads I used my Tombow brush pens, Pigma microns and white gel pen for the calendar, Tombow and Micron pens for the finance spread, a pencil for sketching all of the squashes and my watercolour paints to create the front cover. I used a photograph I found online to help me sketch out the cover image.

Front cover

For the front cover, I took a slightly less that A5 piece of smooth watercolour paper (hot pressed) and sketched the squashes based on the photograph. I then mixed my Winsor & Newton Cotmon watercolours to create the different shades I needed. I used the wet on dry technique and made sure that I worked in a way that meant that all adjacent squashes were left for dry before painting the next one. Rather than sticking in the watercolour paper, I scanned the image and added the November title before printing it off and gluing it onto the page. Watercolour paper is really thick and would make my notebook too bulky.

Photo credit: Laura Jones for Keeping It Creative

Calendar pages

I used the usual 6×6 dot grid for my calendar, added the title using the bullet end of a brown Tombow and then sketched out lots of squashes using images that I found online. I then coloured them in using Tombows and Crayola supertips before outlining using a 0.1 nib Unipin fineliner. I also used a Gelly roll pen in 0.5 to add a few highlights. I filled in the spaces by adding leaves using the black pen again. I’m pretty pleased with how this page turned out but I wish I hadn’t drawn lines of the butternut squash – once it done, it’s done though!

Photo credit: Laura Jones for Keeping It Creative

Finances

I’ve been tracking my finances since August and it takes just a few minutes each week to update my tracker. I might identify outgoings by category this month e.g. clothing, books, hobbies, beauty products etc, rather than recording exactly what I bought. By the end of the month, this will be absolutely full!

Photo credit: Laura Jones for Keeping It Creative

Weekly plan 1

I’ve been trying out different weekly layouts for a while now and still haven’t decided which I prefer. This time I opted for vertical boxes with a little munchkin squash at the bottom. When I’m working at the university I need much more space to record events whereas on other days, I only need space for a few lines as all of my to-dos go in my running task list. I wanted to blur out the university information for privacy reasons and I found a great explanation online which was quick and easy! I love learning how to do new things on the computer.

Photo credit: Laura Jones for Keeping It Creative

Final words…

I hope you’ve enjoyed looking at my spreads for this month. Again, I’m late getting them finished but I had lots of life admin stuff to do last week and we were out all day on Halloween as it was my husband’s birthday (no getting dressed up or entertaining trick or treaters for us!). Also, the lighting has been pretty rubbish, so I’ve struggled to get decent photos taken of the pages. I should start making plans for December’s spreads now as during the month itself I’ll be busy doing journalling and photographs in the form of a December Daily album.