Posted in art, Bullet journaling, coloured pencil, creativity, goal setting, planner lifestyle, Planning and journaling

Setting up my bullet journal for May 2025: Primrose / primula theme

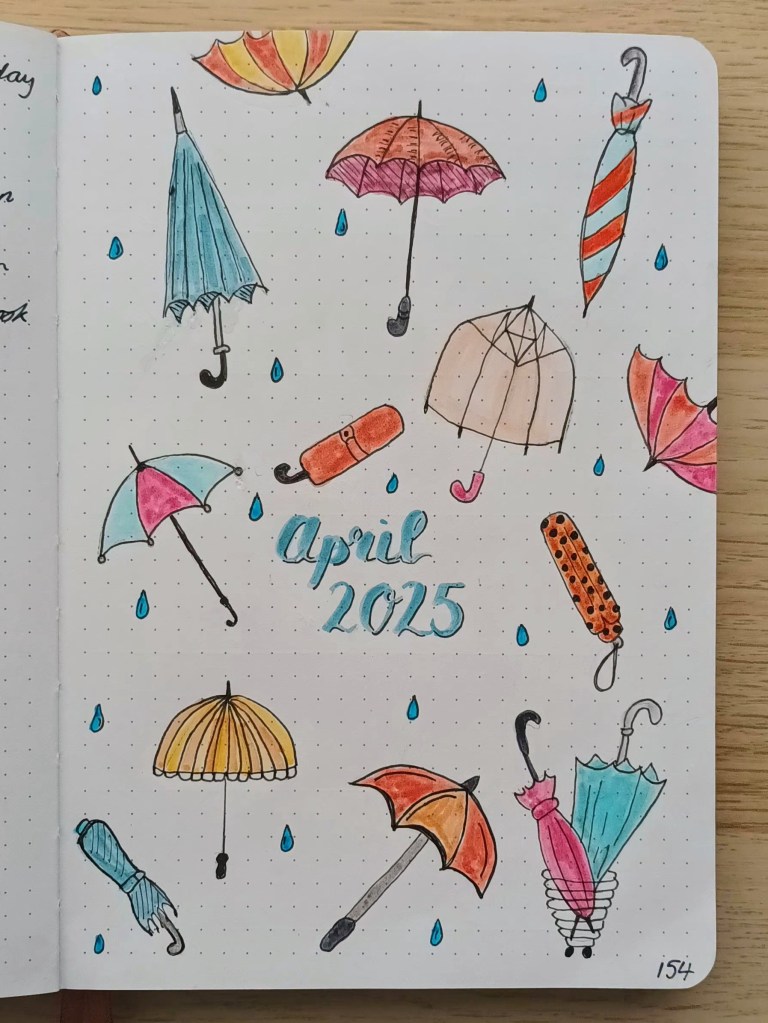
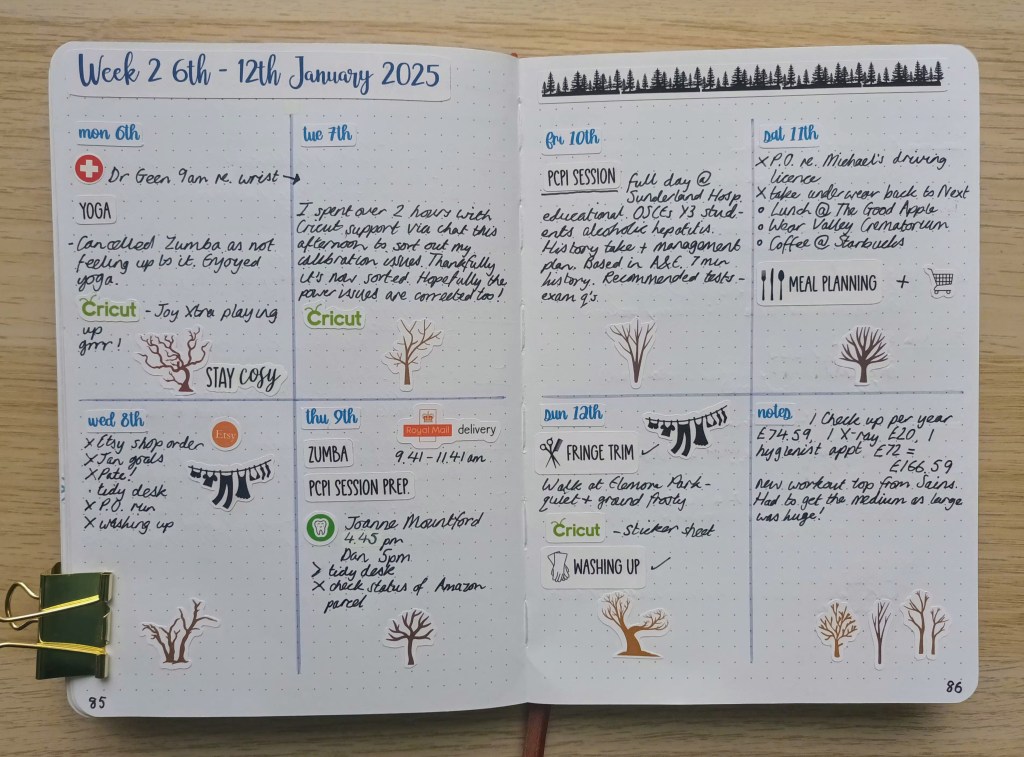
This month, I’ve again taken inspiration from our garden. A few weeks ago, I decided that I wanted to add more colour out the front of the house, so we went to the garden centre to look for a set of six bedding plants that should come back year after year. I opted for primroses (AKA primula) as there was already one out there which pops up each spring and was obviously set before we moved in over a decade ago. After the flowers had settled in – they went a bit floppy when we first installed them – I took some macro photos to use as inspiration for my spreads. It’s taken me ages to sketch out, draw and colour in all of the images but it was such a lovely, mindful activity that I found it really therapeutic. As I write this, it’s the 2nd May and I still haven’t finished all of the decor but I have drawn up my calendar, finances, goals and first weekly so I can actually fill in events and tasks. I hope you like my finished pages and they inspire you to give florals a go to practise your drawing, colouring or maybe painting skills.
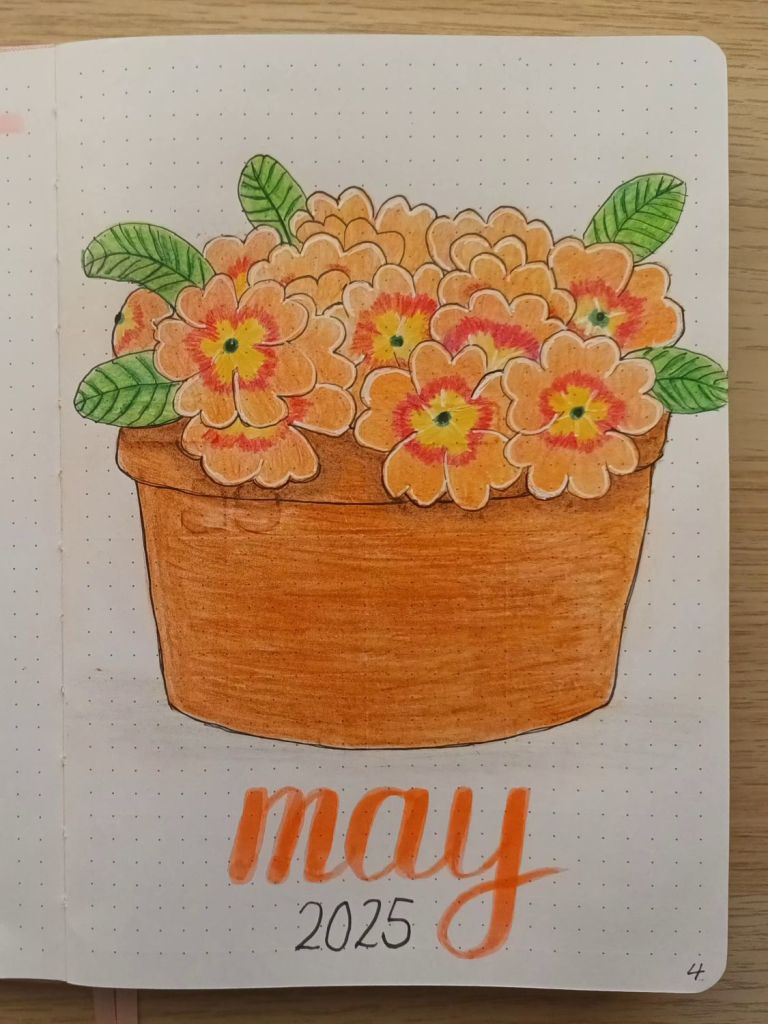
Front cover

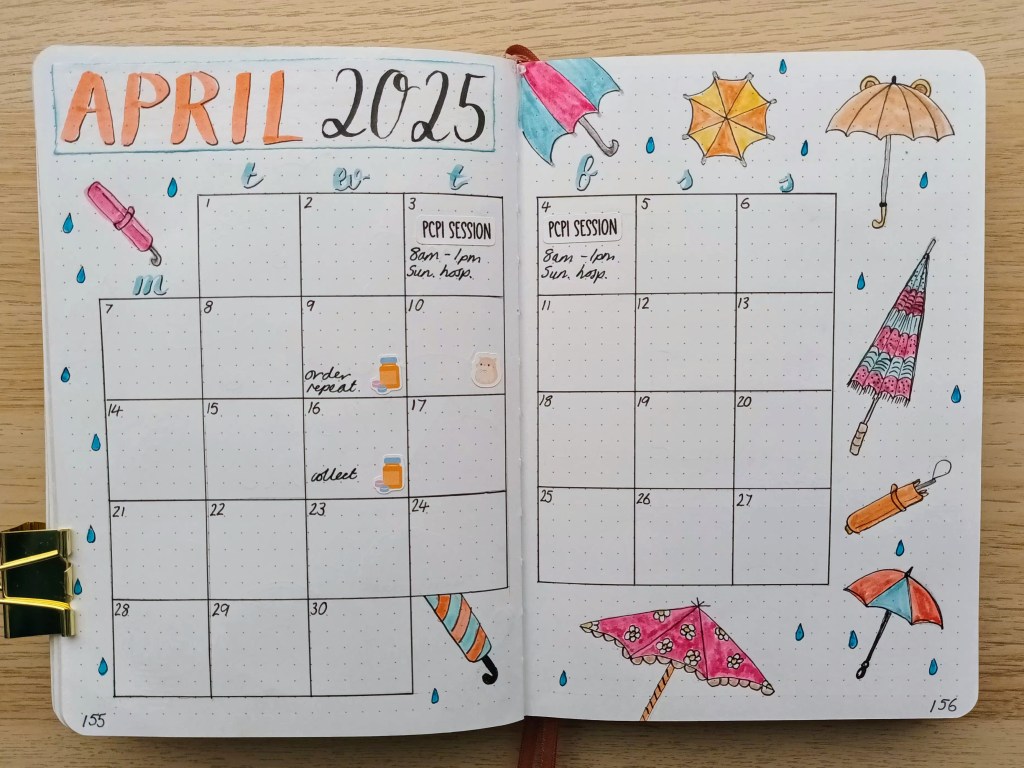
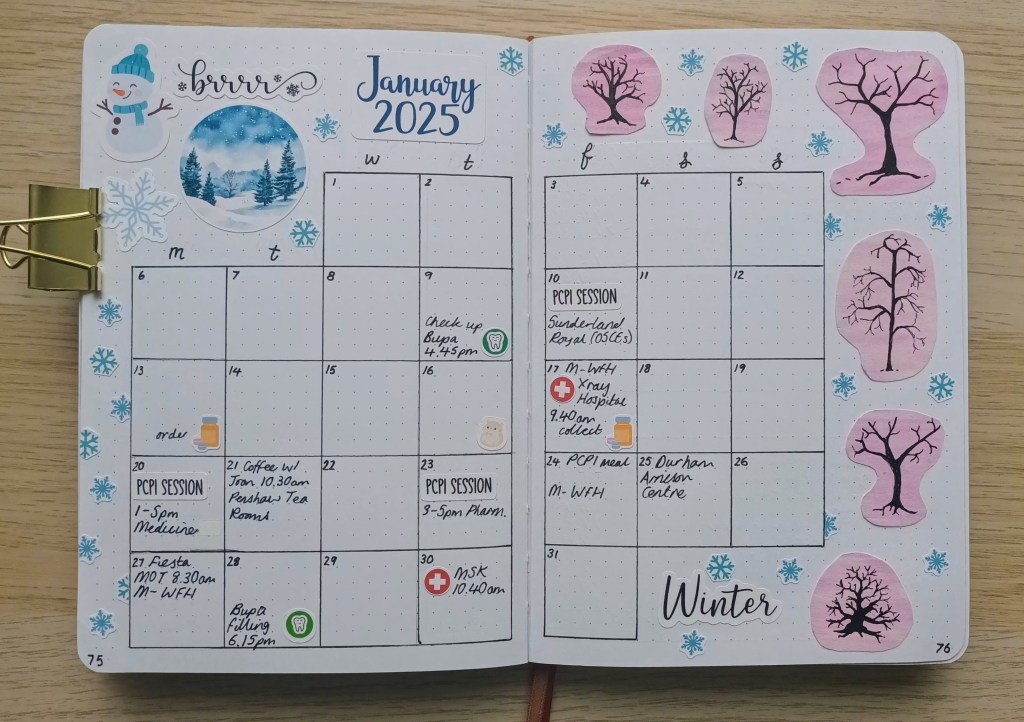
The calendar was the last page I finished and took me a long while to complete. I used a photograph of a plant pot of primroses for reference which I found on Google. I used mainly my Staedtler Ergosoft coloured pencils and blended a few shades together to get a nice peachy colour. I also used my blending pencil to mix up the colours and to create a smooth appearance. I also used my Sakura Gelly Roll pen in a size 10 to draw lines inside of the Pigma Micron as the actual primroses had a very thin white trim.
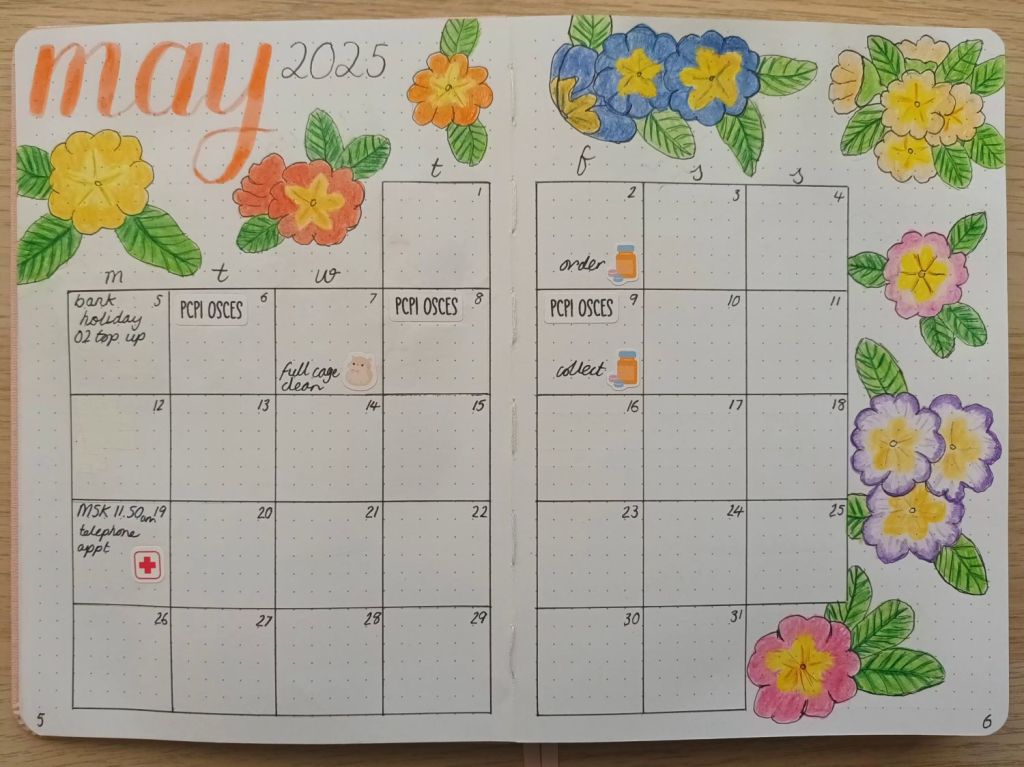
Photo credit: Laura Jones for Keeping It Creative

Monthly calendar

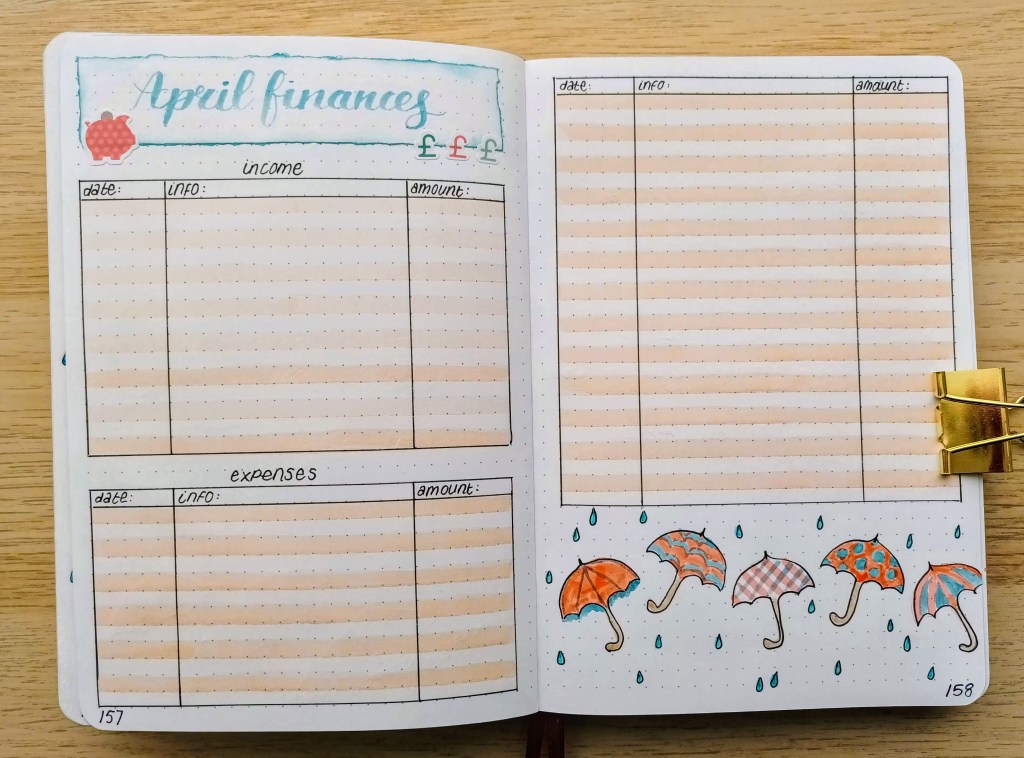
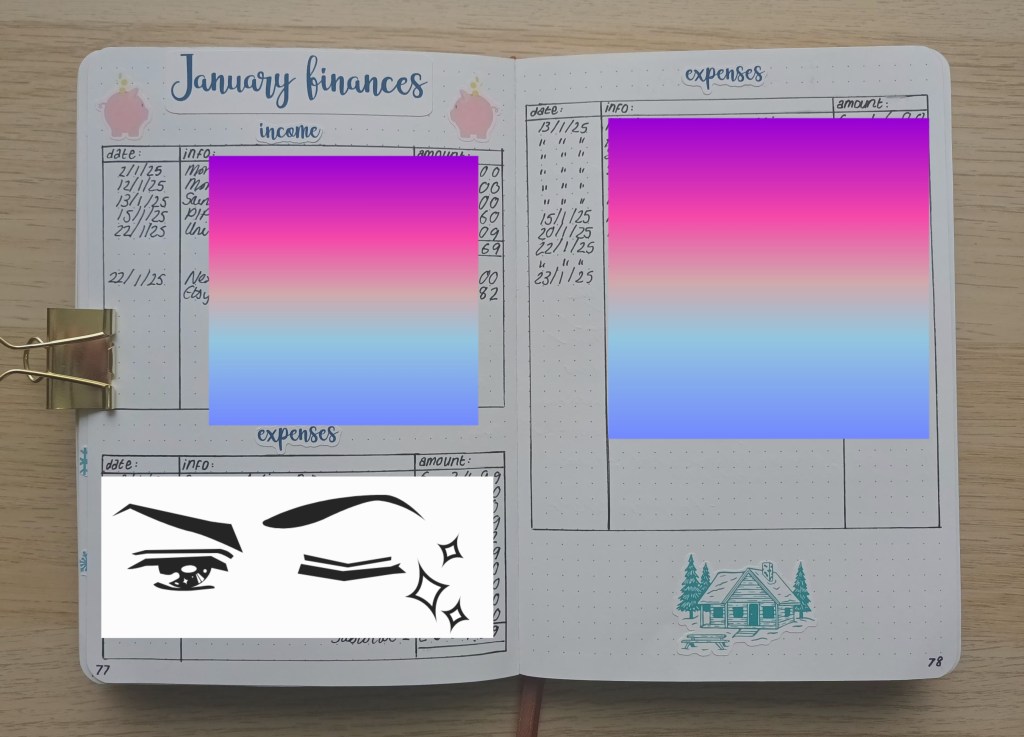
I added the decor to my calendar second, after I did the image for my finances record, and, as it had taken me such as long time to finish that one, I opted for a more sketchy appearance to the primroses you see here. I held my fineliner really lightly and tried to create a slightly wobbly appearance so the plants looked more natural. I’m really happy with how they turned out and the colours look so cheerful. I made good use of lots of my coloured pencils and also used my blending pencil to blend out any harsh lines.
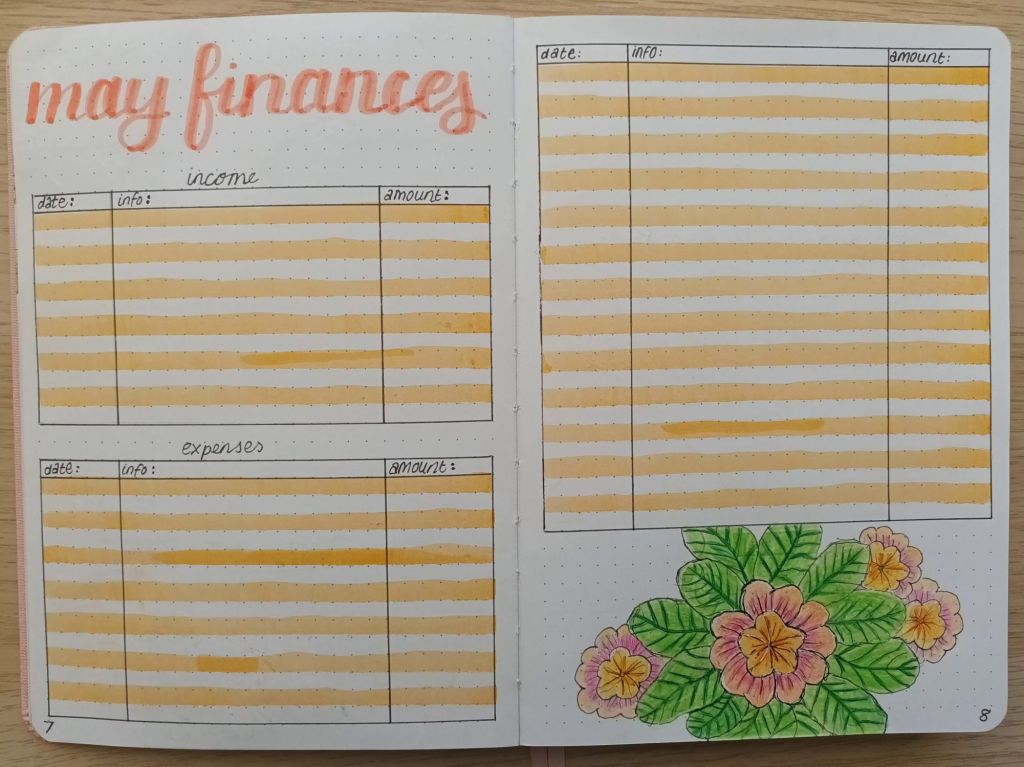
Photo credit: Laura Jones for Keeping It Creative

Finances record

As well as the pack of six small primrose plants, we also purchased a much larger one for our back garden. The flowers are a lovely, pale pink but I didn’t have a coloured pencil which matched so I’ve gone for more of a peachy colour. I initially did just the flower in the centre but decided there were too many leaves and not enough floral bits so I added the other two and made them a little more washed out so the central one stood out.
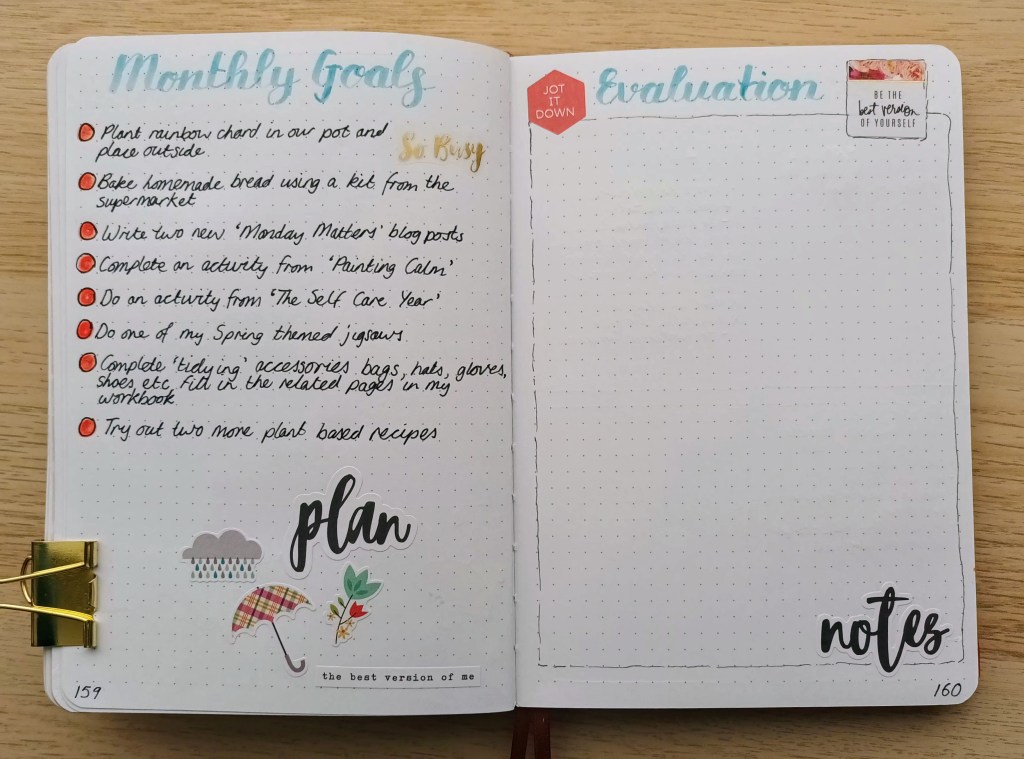
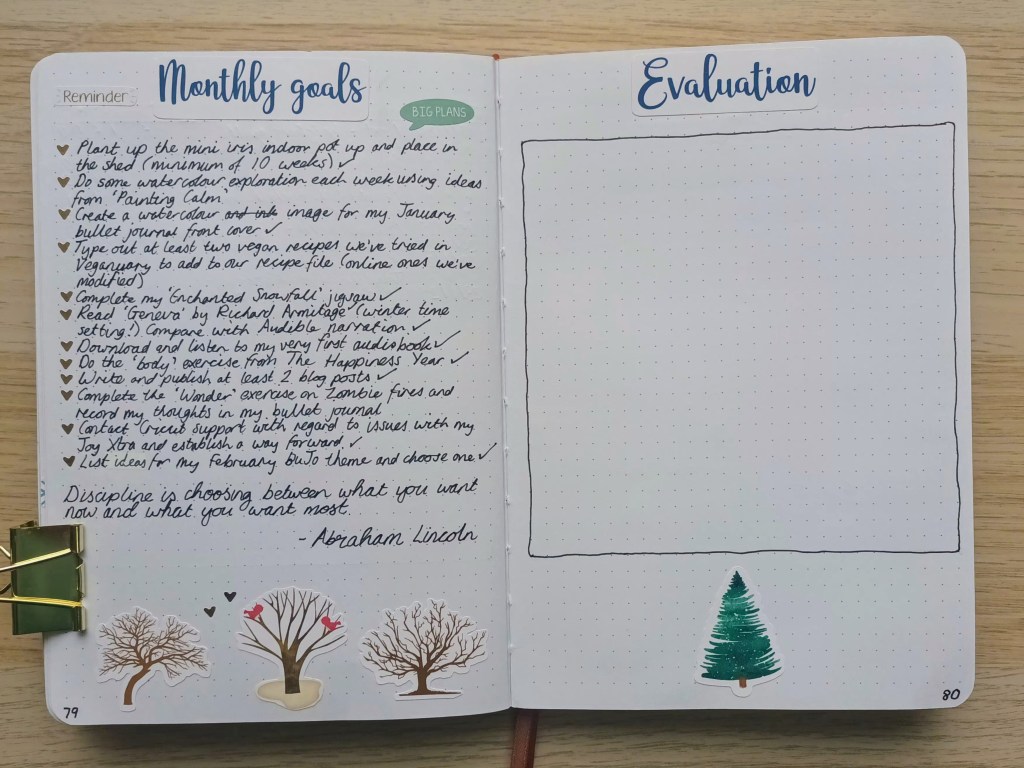
Photo credit: Laura Jones for Keeping It Creative

Monthly goals

Last month I (yet again), picked far too many goals to be in with any chance of achieving them all. So, for May, I’ve really, really restricted myself and opted for just 5 (go me!). And, I’ve already achieved one of them as I made bread for the very first time yesterday!

Rather than adding some more primrose illustrations, I opted to add some stickers to make the set up much quicker. Some, I’ve made myself and others are from my ever increasing stash (you can never have too many stickers – right?). However, I have just started a new BuJo this month and a not to do goal of mine is to add plenty of my own illustrations straight into my notebook rather than overloading with stickers and making my journal super bulky (my orange one would barely close by the time I finished it!).
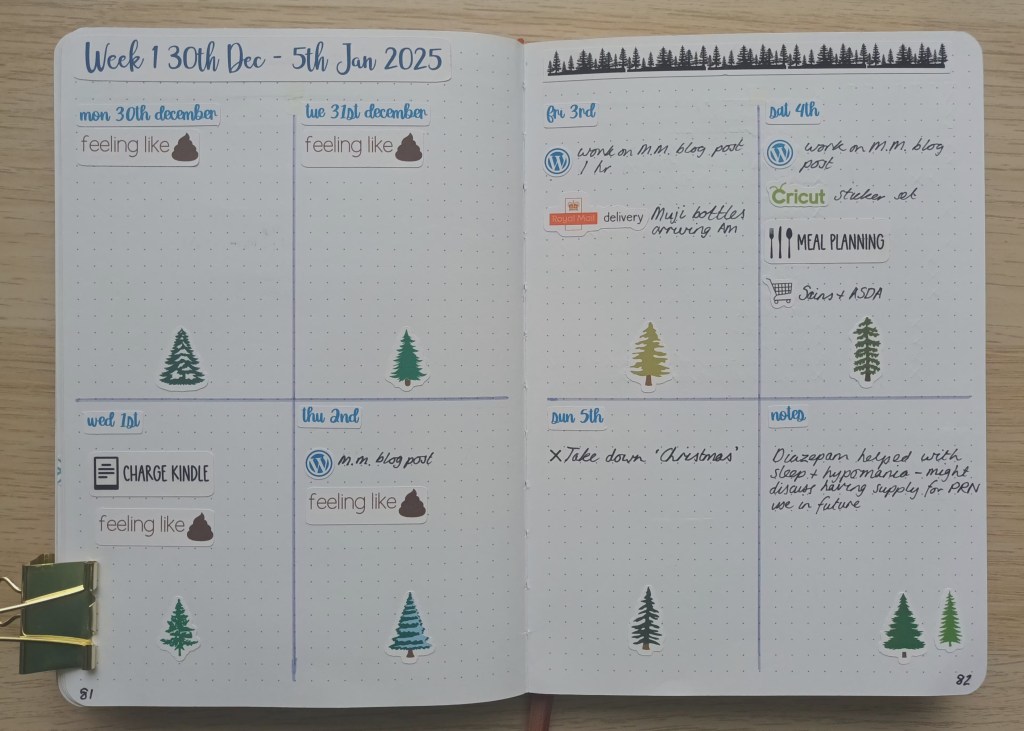
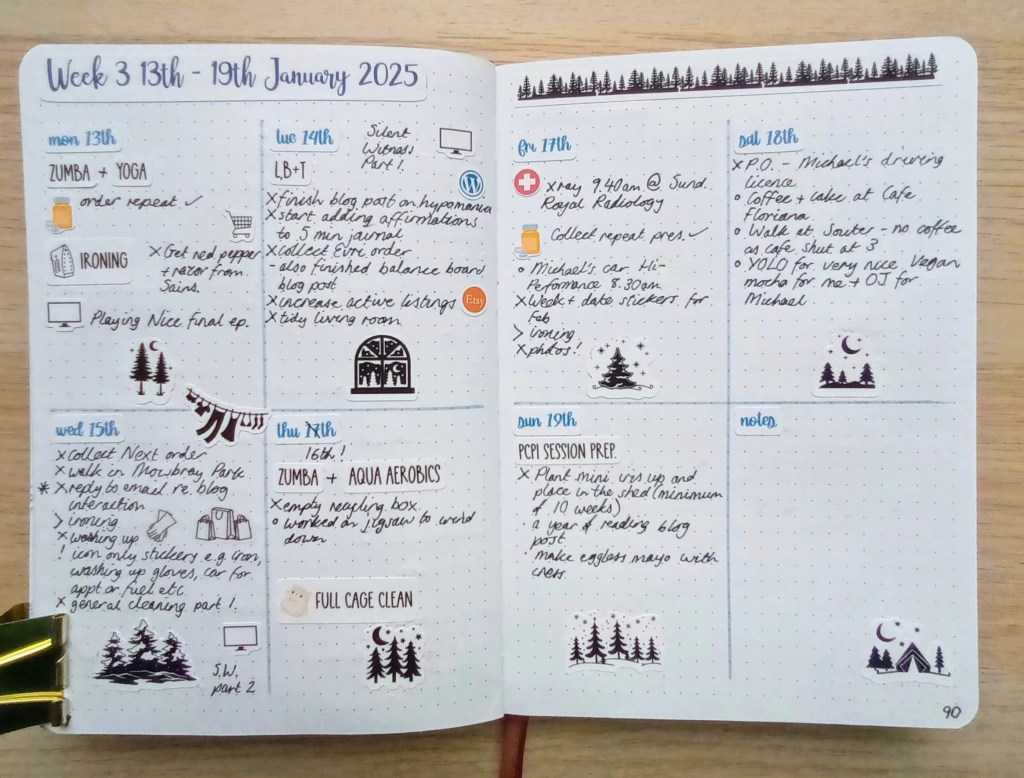
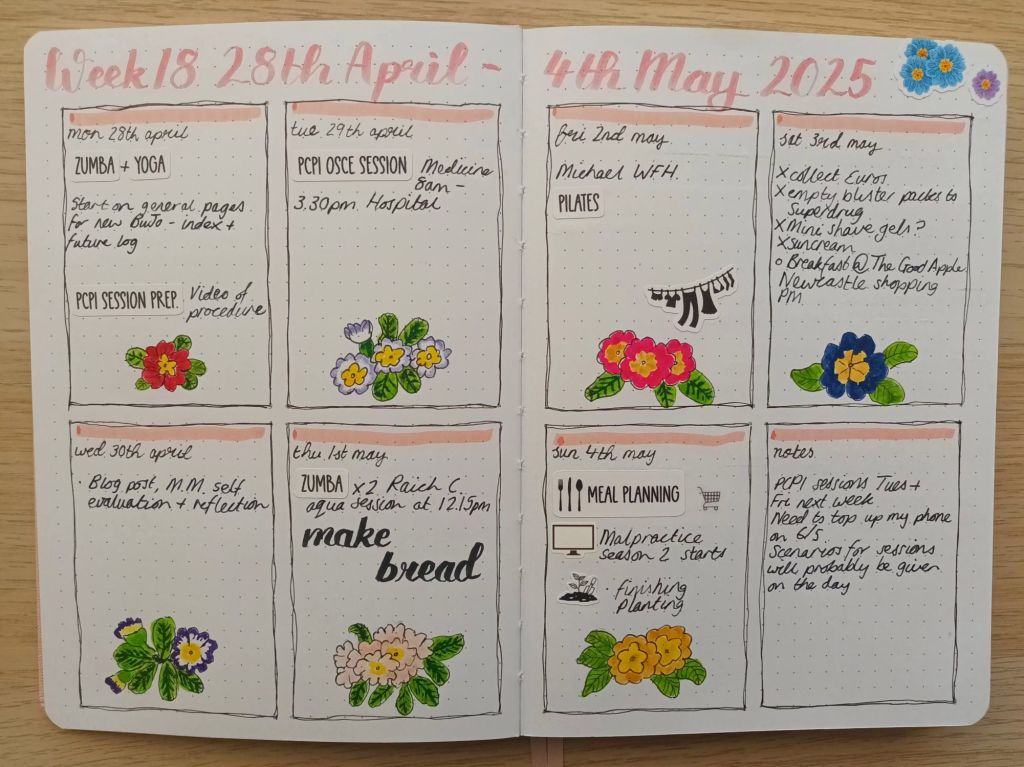
Photo credit: Laura Jones for Keeping It Creative

Weekly plan

I’ve been using this same style layout for quite a few weeks now and it really works for me. It gives me enough room to write events and add a few to dos underneath each day. I can then add a small illustration at the bottom if I want to, or use the full space for recording. This week, I’ve done some small primrose illustrations but I may not do any next week as I have lots of sessions at the university so I’ll be super busy.

Photo credit: Laura Jones for Keeping It Creative

Final words…

Thank you for taking the time to visit my blog today. I hope you like my finished spreads. I think they look really colourful and provide a great reminder of our new plants and all of the other bright colours of primrose which you can get. The flowers seem to be thriving at the moment but as we haven’t had any rain for weeks, they require daily watering as the soil is getting so dry. I’m hoping they’re going to stay looking good for a least another month and continue to make me smile each time I get in and out of my car!

Wishing you a marvellous May,

Much love,

Posted in bullet journal, Bullet journaling, creativity, goal setting, Hand lettering, planner girl, planner lifestyle, Planning and journaling, productivity, Setting goals and intentions

Setting up my Bullet Journal for April 2025: April showers, umbrella theme

I hope you’re all enjoying the sunshine if you have it and making the most of the warmer Springtime weather. This month, for my BuJo, I’ve opted for an April showers and umbrellas theme. It’s something I did before back in 2021 but my set up is quite different so I don’t mind repeating it. I’ve used coloured markers (Tombows, Crayola Supertips, Pentel sign brush pens and Pigma microns) for all of the doodles and I tried to stick to some kind of colour palette to make the pages cohesive, although I deviated at times! I hope you enjoy seeing my set up and don’t forget to let me know what theme you’ve chosen for April in the comment section.

Front cover

After writing a small title using a blue Pentel brush pen, I filled the page with different umbrella doodles using a combination of oranges, pinks and blues. I then added raindrops to finish things off.

Photo credit: Laura Jones for Keeping It Creative

Two Page Calendar

I like to draw up a nice, big calendar so I can add the main events of the month straight into it. I also like to put reminders in such as when I need to order my medication and when our hamster, Aggie will be getting her monthly full cage clean (an event that my husband and I always look forward to – not! ha ha!).

I enjoyed adding umbrella doodles in the surrounding spaces and some more raindrops.

Photo credit: Laura Jones for Keeping It Creative

Monthly finances

I always like to keep track of my finances each month so my outgoings don’t exceed my income. I fill in my spending each week so the task doesn’t become something too onerous. I remembered that I had a stencil sheet in my collection which had an umbrella outline as part of the shapes, so I used this to create uniform images across the bottom of the page. I used a Tombow and the Pentel sign pen to create a sketchy feel to the colouring as I didn’t want it to be too perfect.

Photo credit: Laura Jones for Keeping It Creative

April goals

I decided to try to limit the amount of goals I set for this month as there are a few from March that I’m still working on. I picked out eight which I still think is a few too many, but some of them are relatively quick ones such as planting our chard seeds outside and trying out a couple of new plant based recipes.

Photo credit: Laura Jones for Keeping It Creative

Final words…

I would share my first weekly, but I haven’t got around to decorating it yet and I’ve added some personal information to it which would need blocking out. I might share the weekly plans on Instagram at a later date – you can find me here if you want to see my content.

I had fun doodling lots of umbrellas this month but I really must remember to be careful not to smudge the marker colours as I had to use some whiteout pen to hide a couple of smears! This is part of the joy of being left handed – can anyone relate?

That’s all for this month. Wishing you an amazing April,

Posted in creativity, journalling, memory keeping, reflective journalling

Creating my February highlights pages in my new journal

Over the years, I’ve tried lots of different ways of creative journalling in Traveler’s Notebook inserts that I’ve purchased or made myself. I’ve loved completing different pages and layouts but I’ve often found myself trying to record too many different things in far too much depth. This has meant many collections of photos and ephemera in various bits and pieces of storage which never got journalled about (I didn’t even get started on them), half finished pages (often with photos and decor stuck in with spaces to journal about events and experiences and numerous blank pages (where I’ve penciled in what is to go on there) left to fill in later. It’s also been the case in the past that, during periods of bipolar illness, I’ve struggled to get motivated to do any journalling when depressed or taken on too much when I’m high, leading to tonnes of half finished or barely started creative projects.

Although my bipolar disorder is better managed now, and my mood is much more stable, I still wanted to find a way to record things whilst at the same time ensuring that journalling does not become too onerous a task. I think I’ve now found a method that works and I’m excited to share what this looked like for February this year.

In January, I started a new TN wide journal insert as a memory keeping project for 2025 (and if it continues to work for me, beyond this). Each month, I intend to create a double page spread with the main highlights on including events, trips out, purchases and general happenings. I set up the pages at the beginning of the month with a background paper and the title and then work on filling it in just after the particular month has ended. Today I’m sharing my pages for February which I’ve just finished this week and a little explanation of how I set about doing them.

Monthly Highlights Journalling

The idea of doing monthly journalling came from Kelseyleigh over at My Abiding Journal on YouTube. She’s been doing summary spreads of each month for quite a few years now and I’ve picked up lots of tips and ideas from watching her videos so I definitely recommend subscribing to her channel and watching some from the archives as well as tuning in to the livestream of her process which offers so many ideas and the opportunity to purchase stickers to use if you join her on Patreon.

Personally, I’ve not joined Kelseyleigh’s paid tiers as I like to make my own stickers and ephemera using my Cricut machine. However, she has some lovely ideas for each month of the year and I think her members get to suggest ‘bucket list’ items for inclusion on her sheets.

A few tips for success

As well as picking up some tips from Kelseyleigh, I’ve also developed my own systems for collecting bits and pieces, photographs and ephemera. As a Canva Pro and Cricut Design Space user, I’ve also got into the habit of designing a set of stickers each month too. Here’s what I’ve learnt so far and what is working for me:

  • If you want to have a background to your pages like I have, it helps to choose a simple patterned paper and adhere it prior to doing your journalling. I’ve also found that adding the letters of the month using small stickers that I create using Cricut Design Space helps in seeing how much space you have to work with. If you don’t have alpha stickers, you could try hand lettering a title, stamping the letters or use a letter stencil, depending on your craft supplies and how you want your pages to look.
  • As you engage in different activities during the month, think about photos you could take (or source) which would provide a good record in your journal. For example, I’ve screenshot and then cropped online images of items I’ve purchased if I want to include a very small photograph of a product that I’ve been excited to buy. I’ve also tried to consider photos that I could take which aren’t too busy so as to be able to shrink them enough to add as part of multiple photos on my dedicated two page spread.
  • Throughout the month, consider items that you could stick into your journal (tip ins) for example a business card, parts of some packaging, your menu choices when you go out for a meal, a section of a leaflet or map etc.
  • Use a small envelope to collect mini photographs, patterned paper, tip ins (e.g. maps, business cards, packaging labels as mentioned above), stickers and ephemera for the month and store it in the back pocket of your BuJo or other planner.
  • Create a notes page in your journal or on your phone to store information about events and happenings you want to record, ideas for captions, stickers you want to add to fill spaces on your pages and any other creative thoughts you have during the month.
  • Create a folder on your phone to add any photos you want to use in your journalling. This means you don’t have to spend ages searching your photos, screenshots, downloads, uploads and other resources when the time comes to work on your pages.
  • Use Canva or the PicCollage app to add small photographs that can fit together to create a single image to print. I have a 4×6 and 6×4 inch template on Canva for this purpose as that’s the size that my Canon Selphy prints at.
  • Consider purchasing an instant photo printer such as a Selphy, Instax or Sprocket so you can easily add to your photo collection and make mini versions of images you want to include. Check online reviews for the pros and cons and different price points so you can choose the right one to suit your needs and budget. I have a Canon Selphy which I’ve been using for years but you might prefer photographs that have a sticky back so you can put them straight in to your journal without needing to cut them out and add adhesive.

My February highlights pages

As I’m currently trying out the monthly recording system, I’ve picked out a notebook that I had already made and which fits in to my Carpe Diem Traveler’s Notebook that I’ve been using for journalling for a few years. So far, I’ve found that not everything I want to record will fit into the double page spread in my TN wide insert but I want to trial using this size for the full year to see if I always have too much stuff to include. It’s helping me to decide which are the main highlights and is good at making me condense things down or just let a photo do the talking (wholeheartedly embracing the saying that a picture is worth a thousand words). I may, in future use a larger blank notebook but I need to make sure that I’m still able to fit in the time at the beginning of the next month to create the pages.

Photo credit: Laura Jones for Keeping It Creative

Final thoughts…

One of the main problems I’ve found with creative journalling is wanting to document all of my life in detail using photos captions and lengthy bits of writing. Although I love working on my pages, it’s impossible to cover everything and trying to can lead to lots of overwhelm and feeling like you can’t keep on top of it. Creative journalling should be an enjoyable experience and if it starts to stress you out, I think it’s really important to do some self reflection on why. Although I’ve only done January and February so far, the pages were a pleasure to work on and only took a few hours to finish. My only issue now is you decide which highlights to include and which to miss out.

If you’re struggling to keep up with your creative journalling and feel like you’re always behind and desperately trying to get up to date, monthly highlight journalling might be a good way forward. Also, there’s nothing to stop you doing an extra couple of pages if you want to document something like a wedding, birthday, holiday or other special event in more depth before returning to a double page per month.

I hope you’ve found today’s post useful and it has helped you to see the benefits of doing a monthly summary if you have minimal time to work on your spreads. If you would like me to share future finished pages please do let me know in the comments.

Posted in bullet journal, Bullet journaling, creativity, goal setting, intentional living, lifestyle, planner girl, planner lifestyle, Planning and journaling, Setting goals and intentions

My Spring 2025 Bucket List

Late last month, I sat down at my desk to create a list of ideas for what I want to do over the course of spring with a view to writing a bucket list for the season. When I’d finalised things, I set to work on a two page spread in my bullet journal which contains all of my planned activities, a sticker image or two to represent each one and some general springtime flowers. Today, I’m sharing the pages I created in the hope of inspiring you to make your own Spring bucket list. I’ll also discuss how I went about choosing what to include.

My finished Spring bucket list BuJo spread

Photo credit: Laura Jones for Keeping It Creative

How I went about choosing my bucket list items

I started the process of choosing my items by looking at my vision board for 2025. This helped me to focus in on things I want for the year and I picked out using my Cricut Easypress to create some projects and using the principles of Kaizen to discover why I haven’t made much progress with tidying and organising my craft room. You can see above how I added these to my bucket list.

I also thought about things that I wanted to achieve last year, but, for whatever reason, didn’t get around to or didn’t have much success with. In 2024, we bought a wide shallow pot to grow rainbow chard in. We planted seeds and grew some leaves but we didn’t really maintain them and also never used them in any recipes. For this reason, I’ve added homegrown chard to the bucket list and a picture of some nice colourful leaves to remind me of my intention.

Next, I considered creative pursuits that I want to do more of and remembered that I loved exploring with my watercolour paints. I hope to do more painting so I added ‘Do another watercolour exploration or two’ to my list. I’ve tried to keep it realistic and doable by only stating one or two activities this spring as I tend to add too many items and then struggle to get them all ticked off in the given time.

There are also a few activities on my list which I like to do every year or each season such as decorating our home, doing a seasonal jigsaw and collecting photos, ephemera, caption ideas and tip ins for my creative journalling. This year, I’ve bought a gorgeous Garden Allotment jigsaw puzzle which I couldn’t wait to get started on and have already made good progress with. I’ve also started to change our home decor to add spring related accents, including a few new ornaments which I purchased over the weekend. Towards the end of the season, we will be going on holiday to Portugal and, whilst there, I will be planning which aspects of the trip I wish to document in my journal so this has become part of my bucket list too.

Finally, I turned to Google and Pinterest to provide inspiration for other items to add to my list. I searched ‘Spring bucket list ideas for adults’ and selected some activities which appealed. I included some which I think would be fun to do such as baking bread and playing an outdoor game. I’ve already seen a frisbee in a National Trust shop which reminded me of my intention to do something I enjoyed as a child but I’m keeping my options open until the sunnier and warmer weather comes.

Final words…

I hope you’ve enjoyed seeing my spring bucket list as a creative double page spread in my bullet journal. If you haven’t yet had a go at writing a seasonal list, I thoroughly recommend it as a way of making sure you get the most out of the coming months. It’s also great fun creating decorative pages and looking at a colourful layout (especially with doodles or stickers) can help keep you motivated to try new things and revisit favourite activities.

Let me know in the comments if the idea of creating a bucket list appeals and feel free to add your Instagram or other details if you share yours on social media.

Posted in bullet journal, Bullet journaling, creativity, goal setting, Home cooking, intentional living, planner girl, planner lifestyle, Planning and journaling, productivity, watercolour painting

Setting up my Bullet Journal for January 2025: Bare winter trees theme

Following on from my winter foliage theme for December, I continued taking inspiration from nature and chose winter trees as the focus for my January spreads. With being ill at the beginning of the month, I simply drew up the basics of my layouts and added the decoration later when I was feeling much better.

So, although January is nearly over, I thought I would do this post to show how my spreads turned out and some of the ways in which I use them. Obviously some of the information needs to remain private so I’ve covered a few bits up.

Front cover

As I enjoyed doing my watercolour painting so much last month, I thought I’d give it a go with my front cover for this month. Again, I used cold-pressed watercolour paper but this time, it was from a new paper pad I picked up in Hobbycraft which has quite a pronounced grain to it. As my BuJo is getting very bulky, I needed to scan and print my finished art, but, although it doesn’t look exactly the same as the painted piece, it’s quite close, with the tree looking slightly paler. I also like the fact that you can see some of the grain in the sky. My inspiration for the background was from a photograph which I took early in the month, although I wish I’d had the photo in front of me when I did the sky as mine looks a bit bland in comparison! I opted for a dark brown tree and created a muddy grass ground effect using my fan brush, rather than painting snow.

Gorgeous winter sky. Photo credit: Laura Jones
Photo credit: Laura Jones for Keeping it Creative

Monthly calendar

I wanted to create a watercolour background effect again for some mini tree images to surround my calendar, so I selected some relatively thin paper from my stash and did some trials with it. I also had a go at painting mini backgrounds in the back of my bullet journal but I didn’t like the effect with the coated paper of my Notebook Therapy journal. The paper I opted for was a cream coloured drawing paper which the paint sat nicely on and didn’t cause buckling. When my simple backgrounds were complete, I used four sizes of Pigma Microns in 0.4, 0.2, 0.1 and 0.05 to create different tree shapes. I’d watched various online tutorials on You Tube and the key teaching points were to create lots of y shapes and make the branches thinner the further you went out and up from the trunk. I’m really pleased with the different effects that I achieved. They’re not based on particular species of trees but I did spend a lot of time this month looking at bare trees on my various walks (okay, it turned into a kind of mini obsession ha ha!).

Photo credit: Laura Jones for Keeping it Creative

January finances

I kept these pages really simple because I wanted to spend time on other things. Obviously, I’m not sharing information about my income and expenses.

Photo credit: Laura Jones for Keeping it Creative

Monthly goals

I tried to create heart stickers in Cricut Design Space but the cutting was so off that I ended up having to spend hours talking to a representative from Cricut to get it sorted. I found these mini hearts in my stash and used tweezers to try to get them relatively straight!

Photo credit: Laura Jones for Keeping it Creative

If you want to see my evaluation for the month, let me know in the comments and I’ll do a quick blog post about it.

Weekly plans

The first week of my weekly plans is a bit sparse and I couldn’t resist making some feeling like poo stickers to show why the first half of the week is pretty much blank. Some of my dailies are more busy than others and sometimes I run out of room. I also usually do a rolling weekly for general, none day specific tasks.

Meal planning

My husband and I have now got into the habit of doing one of these each week. We peruse our cookbooks, recipe files and magazine cuttings as well as looking online. Then, I write up the plan whilst my husband makes a shopping list and checks ingredient availability in our cupboards. It takes quite a while, but it’s well worth it.

Photo credit: Laura Jones for Keeping it Creative

Final words…

I hope you’ve enjoyed seeing my January spreads, including how I fill them out. I’ve almost finished my pages for February now so I will no doubt be sharing them very soon, hopefully before the end of the month.

Until next time,