Posted in art, bullet journal, Bullet journaling, creativity, Planning and journaling, stamping

Setting up my bullet journal for September 2023: Arts and crafts theme. Plus tips on using stamps and ink.

This month, I debated doing an autumnal theme using my own stickers. However, I’m yet to give sticker making a go on my Cricut Joy so I’m going to save this idea until October. For September, I decided to create my pages using a range of stamps from a set I got with a craft magazine a few years ago. The images feature a range of crafting tools, many of which I use myself when I’m journalling. This is the first time I’ve used stamps in my bullet journal and I’m really pleased with how my spreads turned out. Today, as well as showing my September set up, I thought I’d also share some tips on using ink stamps effectively.

Front cover

I started my cover page by stamping September in the centre using typewriter style alphabet rubber stamps from Hobbycraft, and then adding the year underneath. I then took the larger of the stamps and added the images in pre-determined spaces. After this, I filled in with the smaller stamps. I used StazOn black ink throughout as I’ve found that this produces crisp images and doesn’t soak into the page. Following the drying time, I coloured in using the brush tip of some of my Tombow Dual Tips and also added a box around the month.
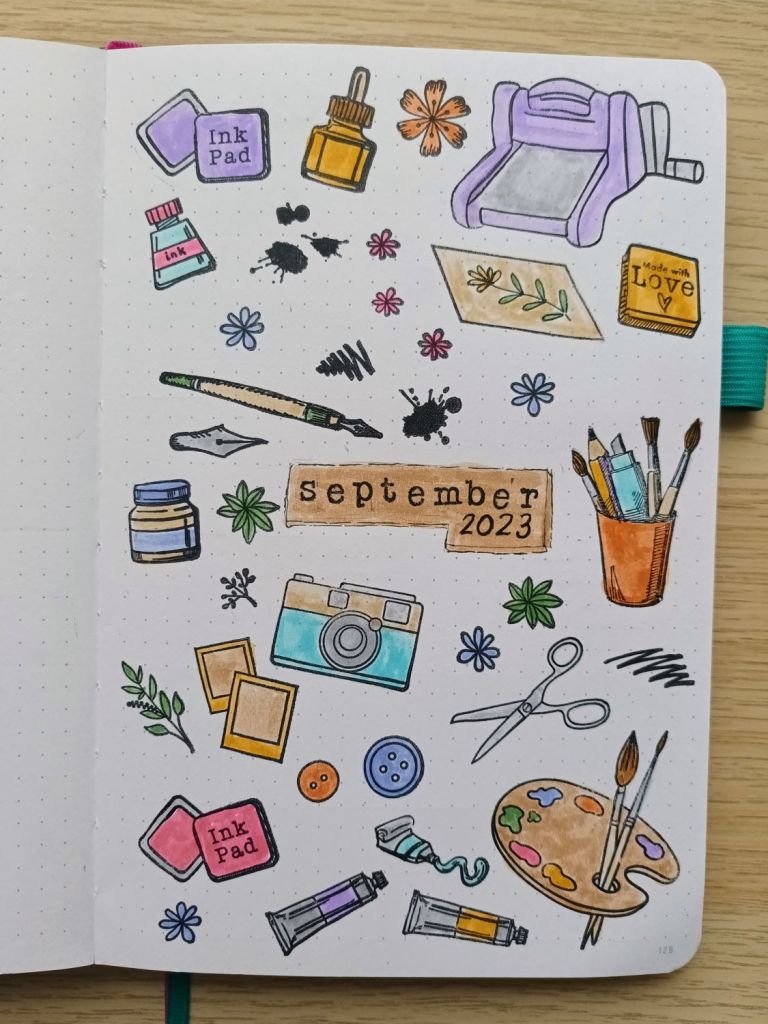
Photo credit: Laura Jones for Keeping It Creative

Calendar pages

This is my usual calendar set up for the month with the grid drawn out using a 0.3 Pigma Micron and a 0.05 for the numbers. Again, I planned where to put the larger stamps and them filled in the gaps with smaller images.
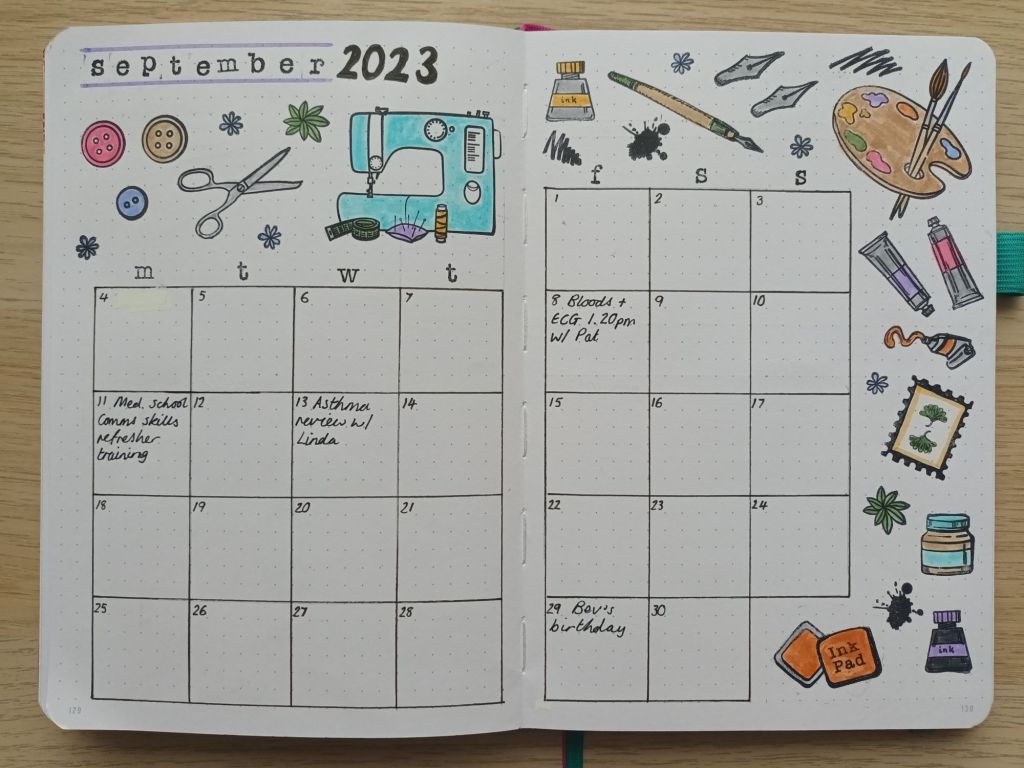
Photo credit: Laura Jones for Keeping It Creative

September finances record

Again, this is my usual finances record of my income and outgoings with some decoration using the same stamps set.
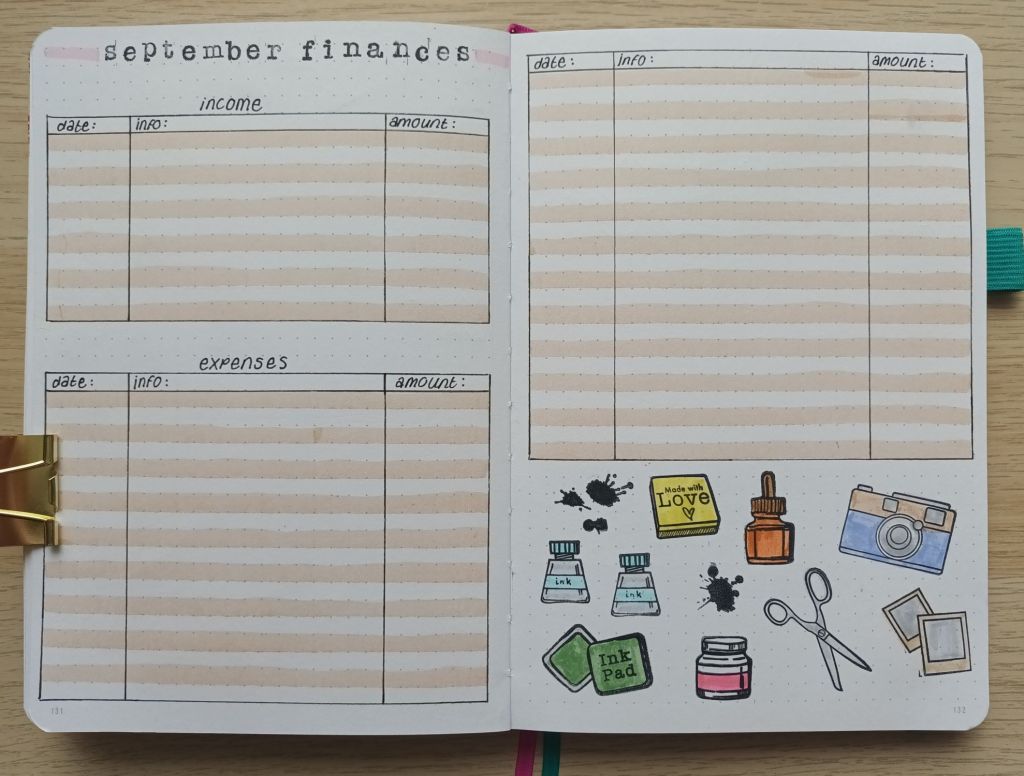
Photo credit: Laura Jones for Keeping It Creative

Weekly plan for the first week

As I have quite a few appointments, a training session and hopefully some university sessions next month, I will be creating a weekly plan as well as my usual rolling to do list. I’ve got the first one ready and will make the others as and when I need them.
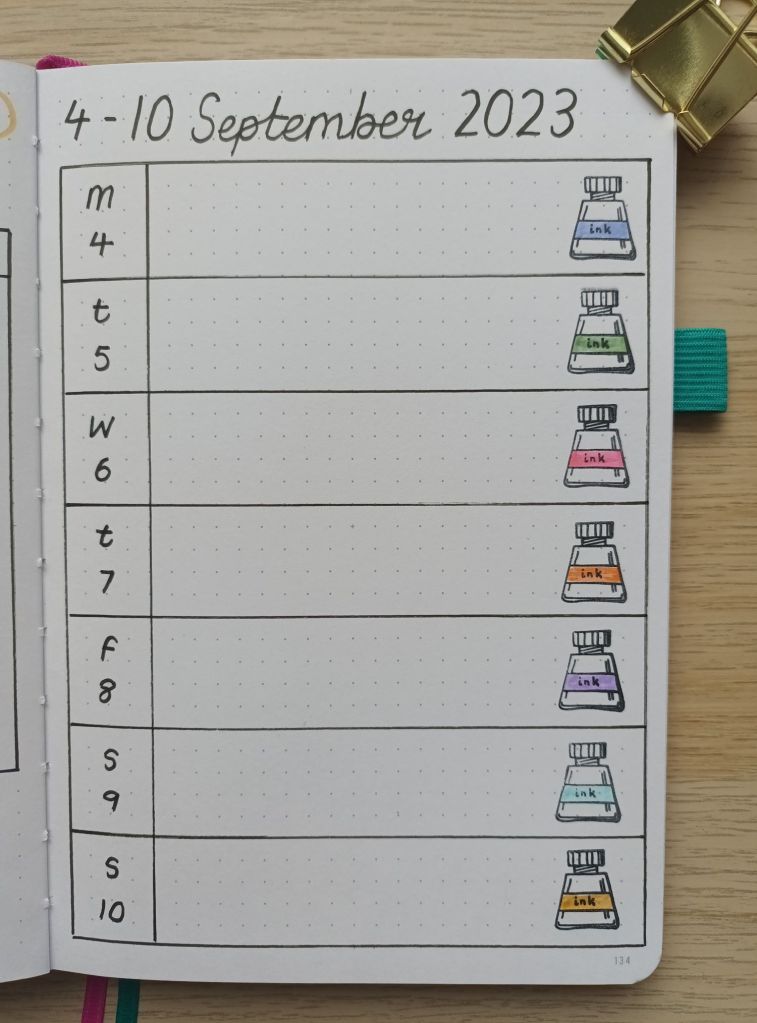
Photo credit: Laura Jones for Keeping It Creative

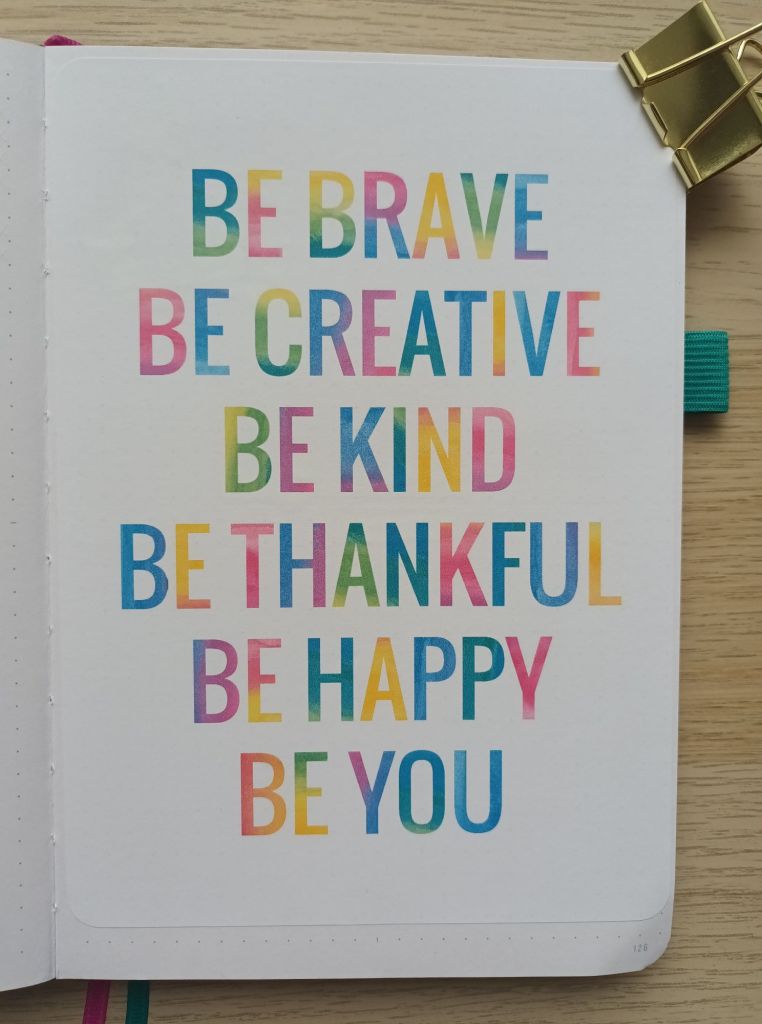
Covering up a big mistake

Sometimes, even when you’ve spent a while planning a page, an ink stamp print messes up completely and can’t really be fixed. When this happens I like to use my correction mouse to cover over the printing and then find something pretty to cover the page. I found this positive message as a free download and resized it to A5. I then printed it on sticker paper and stuck it in.
TV series watched record

I’ve just completed my first TV tracker so I made a new one for the rest of the year. Not only does this serve as a reminder of what we’ve watched, it’s also good for TV series recommendations to give to others. As this is not part of my September pages, I chose a pretty floral stamp to finish things off and then coloured the images using a dusky rose colour Tombow.
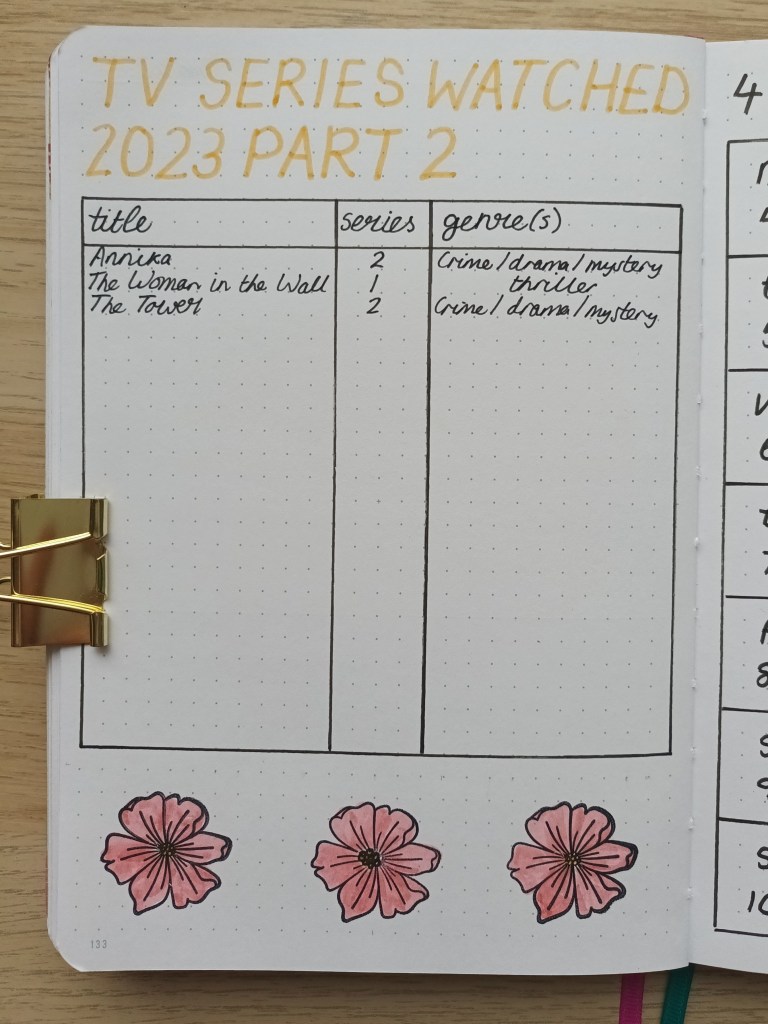
Photo credit: Laura Jones for Keeping It Creative

Tips for using ink stamps in your Bullet Journal

Stamps are a great way to quickly decorate your bullet journal pages but they take a little getting used to. Here’s some beginner friendly tips to help you get the most out of your stamping experience:

  • choose good quality ink I love the StazOn ink, and although it’s more expensive, you get what you pay for and this one prints beautifully creating a thin and crisp image.
  • dress appropriately Stamps can be quite messy and it’s easy to get ink everywhere. I recommend putting on an old top before you start. I have several tops and pairs of leggings which I wear whilst doing any form of crafting and there are various marks and cuts on them
  • allow drying time When you print, the ink sits on the page and so takes a while to dry. This means you need to allow time for it to dry. If you don’t, you may smudge your images and make a mess of your page.
  • make sure your BuJo has thick paper If you don’t want bleed through or ghosting, I recommend only using stamps in BuJos with thicker GSM paper. My current notebook is 160 GSM and is the perfect thickness
  • test and practise Before I use the stamps, I always test them out on scrap paper. This gives you the chance to see if there are any areas of the image which tend to not print properly and need a little more pressure. Testing them is also a good opportunity to practise and refine your stamping skills
  • plan your page and stamp placement Spend some time planning out your page and where you want to put your stamps before you ink them up. Visualising your finished page before you start is the best way to create a spread you love.
  • ensure the whole of your stamp is covered in ink Getting your stamp fully inked but not too covered takes some practise, but after a while, you will become more confident in doing this. This is another reason why I love the black StazOn ink because the pad is firm which means you don’t end up over-coating your stamp.
  • place and lift your stamp carefully Again, this takes practise but you want to ensure the stamping block presses on evenly and that you remove the block slowly and precisely.
  • fill in any unstamped bits If there are small areas which didn’t quite print properly, use a thin fineliner to draw them in (make sure you wait for the ink to dry first!). Always make sure your pen is waterproof if you plan on colouring in the images. I use a Pigma Micron in a 0.1.
  • use water based pens to colour in I use Tombows to colour in my images. Again, it’s best to practise as you may find that some smudge the ink. For example, despite being water-based Zebra Mildliners are notorious for smearing.
  • clean your stamps Always take the time to clean your stamps and place them back on the storage sheet. This means that they won’t get lost and you have an image guide for each stamp
  • cover up Don’t forget to place the lid firmly on your ink to prevent it drying out.

Final words…

Thank you for taking the time to look at and read about my pages for September – I would love to know what you think of them. If you’re keen to try out ink stamping, I hope my beginner tips prove to be useful. If you have any more questions about stamping, drop them in the comments and I will try to answer them as best I can.

Wishing you all a lovely September,

Posted in bullet journal, Bullet journaling, creativity, lifestyle, Planning and journaling

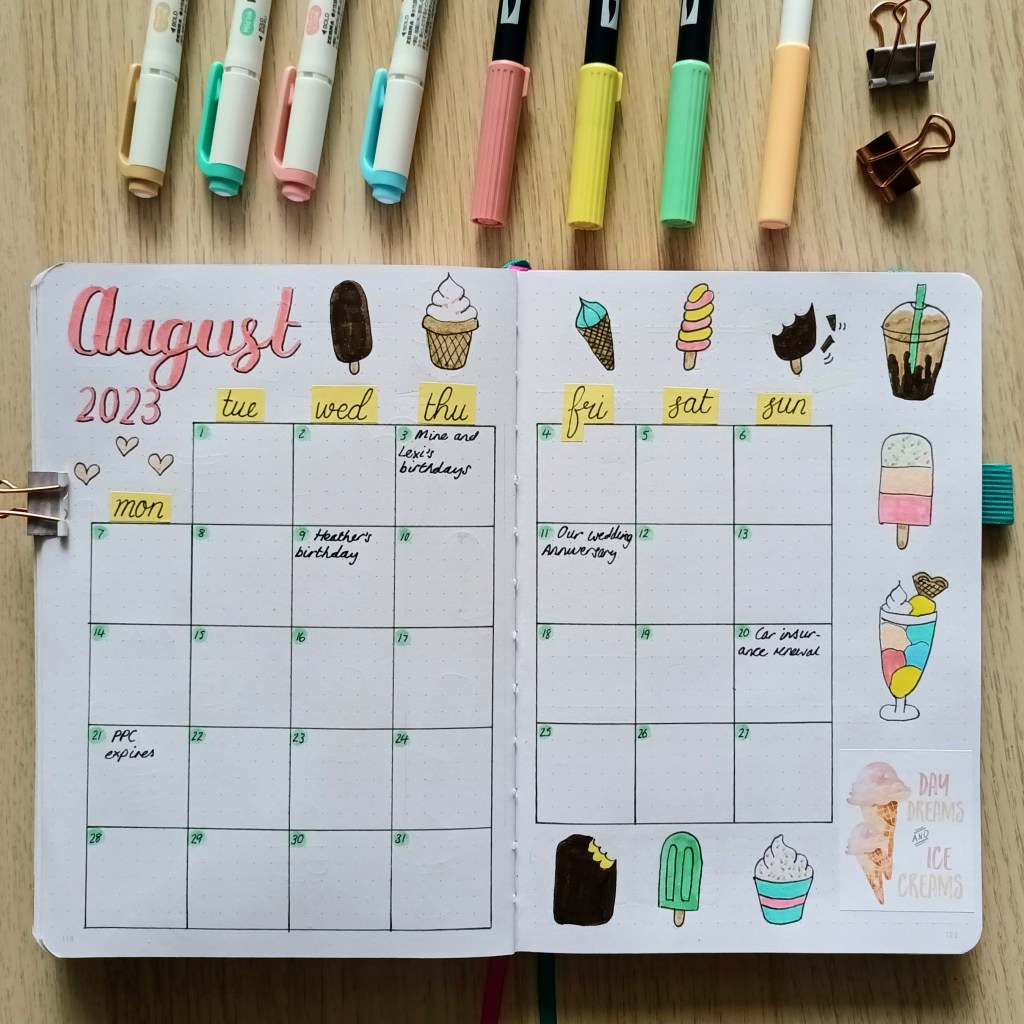
Setting up my Bullet Journal for August 2023: ice cream and ice lollies theme

Today, as I write this blog post, I have the window in my craft room wide open and a large bottled of iced water on my desk to sip from. The weather has finally improved after days of rain, and the sun is peeping out from behind the clouds. I was beginning to think the summer was over but it appears to be back, for a brief time at least judging by the forecast! August is almost here and it is one of my favourite months as my niece and I share our birthdays on the 3rd (which coincides with factory shut down week so my husband can take some well earned time off from his office job), plus we celebrate our wedding anniversary (17 years on the 11th!). As we will be busy making the most of holiday time next week, I started working on my spreads super early, this time, choosing a seasonal theme of ice cream and ice lollies.

Cover page

Once I had decided on the theme, I spent some time searching Google for pictures of bullet journal spreads that others had shared, doodles of ice creams and lollies, plus photos of some of my childhood favourites and different types of cones. I then printed off lots of examples for inspiration for my spreads.

For the cover, I opted for some brush lettering in the centre of the page with just a simple hello August. I wasn’t happy with my first attempt, so I practised on my pad of dot grid paper then cut out the title when I was happy with it. The slim border around the cut out is created using mint green ink on a finger sponge dauber which I lightly pressed all around the edge. One the lettering was sorted, I then penciled in a range of ice creams and ice lollies before using a 0.2 Pigma Micron to outline and a 0.05 to create the cross hatching for the cones. Finally, I used Tombows and Mildliners in pastel colours to complete the doodles.

Photo credit: Laura Jones for Keeping It Creative

Calendar page

The calendar pages features my usual 6×6 grid spaces boxes with a pop of colour for the dates. I enjoyed creating the doodles for these pages and I’m pleased with how they turned out. I messed up once so I covered the mistake with a sticker I created using a Google image.

Photo credit: Laura Jones for Keeping It Creative

Finances and habits pages

Although the beginning of August is likely to be expensive for our joint finances, I’m hoping to keep my personal spending relatively low so I’ve made my outgoings table even shorter than last month. This left a big space at the bottom of the page, so I filled it with some habit trackers. Recently, I’ve started going to bed really late and by the time I’ve read my Kindle for a bit, it’s gone midnight. Because of this, I’ve been sleeping in and not getting as much done with my day. So as not to put too much pressure on myself, I’ve set myself the target of being up by 8.30am for August which will still be a bit of a challenge but hopefully doable. The rest of the habits I want to instill are related to my goals for 2023.

Photo credit: Laura Jones for Keeping It Creative

Final words…

That’s all of the pages I’ve created for August so far and when I draw up my weekly plans, I will probably keep them fairly minimal. I hope you’ve enjoyed seeing my designs and I look forward to seeing other creations and theme ideas as they are shared.

Wishing you all a fun-filled August with lots of opportunities to create happy memories,

Posted in Bullet journaling, journalling, lifestyle, memory keeping, Planning and journaling, reflective journalling, TN journaling

Monday Matters: 10 types of journalling practices to try today

Journalling is the act of writing down your thoughts, feelings, actions and experiences on paper or in digital form. There are many different types of journalling practices and for today’s Monday Matters post, I’m going to share ten popular ones, most of which I’ve tried and benefitted from myself.

What are the benefits of keeping a journal?

The particular benefits of keeping a journal depend on the style you choose but can include:

  • a reduction in stress or anxiety
  • increased productivity
  • better time management
  • a place to record daily life
  • a tool for organising your priorities, your routines or your to-do list
  • clarification of your thoughts and feelings
  • a place to think about and solve problems
  • a way to get to know yourself better (becoming more self aware)
  • a chance to see negative thought patterns and behaviours
  • a safe space to explore your emotions
  • a place to express yourself in writing and improve your writing composition
  • an opportunity to get creative
  • somewhere to track your progress or achievements over time
  • improved sleep by getting your worries down on paper and out of your head
  • a place to note down important ideas or things you want to remember

Diary / personal journal

A personal journal or diary provides a space to write each day and is usually kept private due to the nature of the content. You can include whatever you like inside such as summaries of events or places visited, how you have felt today and why, lessons learnt, relationships, thoughts or worries. Depending on how much flexibility you want in terms of how much you write, you could choose a between a range of sizes (from pocket to A4 size) with printed diary pages pages, a long term ‘line a day’ style or a completely blank lined or unlined notebook which you can add the date to and fill in with as much or as little detail as you like.

Gratitude journalling

Gratitude journalling is the practice of writing down what you’re thankful for each day and can take just five minutes first thing in the morning or last thing in the evening before bed. I used to create a double page, two lines a day spread in my bullet journal which I filled in at the end of each day, but now, I use the gratitude space in The Five Minute Journal morning section. A lined notebook would work just as well and if you choose one which is really pretty and has nice, smooth paper you’re much more likely to reach for it. It’s up to you what you write but here’s a few ideas:

  • something good that happened today / yesterday
  • a person in your life which you’re particularly grateful for
  • a challenge you’re facing which is helping you learn
  • a helpful resource – a magazine article, a podcast, a non-fiction book, a YouTube video etc
  • a positive change in your life
  • something that brightened your day
  • hobbies and interests which you’re glad to have
  • personal strengths, abilities and skills you’re grateful for
  • something in your life that you tend to take for granted
  • something new that you’ve treated yourself to

Bullet journalling

The bullet journal system (or BuJo for short) was created by Ryder Carroll and is a way of organising your life in a single notebook (either an analogue or digital version). There are so many benefits to using a bullet journal including increased productivity, better time management, tracking personal progress and growth, helping you work towards your goals, stress reduction, keeping lists which you can refer back to and use again, better self awareness, a place to get creative if you so wish, great for instilling and monitoring habits, a space to record your ideas, helps you see exactly how much you’ve achieved each day / week / month and so on. A comprehensive guide to The Bullet Journal Method is available on Amazon in paperback or Kindle and is well worth a read if the idea of becoming more organised appeals.

Morning pages

Writing morning pages is a journalling exercise which involves putting pen to paper first thing every morning and writing whatever pops into your head without editing or censoring. The idea is that, each day, as soon as you wake up, you sit down and fill exactly three A4 sheets with whatever comes into your mind. The writing doesn’t have to make sense, be correctly spelt or punctuated. It isn’t read afterwards either. and is for your eyes only. Done regularly, this type of journalling promises a cathartic and ritualistic practice which is designed to increase confidence, clear the mind and pave the way for greater creativity.

Prompted journals

If you need help with what to write in your journal, prompted journals are a great place to start. There are lots of different versions available at a range of price points. Some offer daily practices and include sections such as gratitude, self care, top priorities for your day, feelings check ins, nightly reflections and so on. Others, such as the Five Minute Self Care series, can be dipped into as and when and you can flick through and choose a prompt for your writing.

Memory keeping journal

This is one of my favourite types of journalling as you can create pages about literally anything that’s happened in your life. Looking back through one of my traveller’s notebook inserts from last year, I have journalling and photos from when we went away for my dad’s 80th and my mum’s 70th, a few pages about a National Trust property we visited, some journalling about our fancy new microwave and how smart it looked in our kitchen, an introduction to Millie the hamster and photos from when she was a little baby, photographs of my new haircut and the curls my hairdresser created, a day trip to York where we walked along the wall and had some tasty vegan and veggie foods (complete with our menu choices), and finally a trip to Brimham Rocks. I’ve been keeping this type of journal for about 6 years now and they’re so lovely to look back on and re-read. I even hand make the notebooks using my own choice of pretty paper for the covers.

Travel journal

This is another type of memory keeping journal which is used to document holidays and trips. I’ve been keeping these for a few years now and even create my own handstitched notebooks for the purpose. Whilst I’m away, I collect bits and pieces to stick in such as maps showing walks we’ve taken, business cards from restaurants, tickets from places we’ve visited, postcards to remind me of scenery, art exhibitions we’ve been to or particular historic buildings, packaging and brochures. I also spend a few minutes each evening briefly recording what we did that day, how I felt and anything amusing that happened.

What you record in your travel journal is entirely up to you but I like to start with our travel information such as dates of the holiday, modes of transport, flight numbers, journey times, hotel bookings etc. I then include photographs, memorabilia and bits of journalling for each day of the trip and then finish with a summary of the holiday on the final pages of the notebook.

Art journal

If you’re not too keen on expressing yourself in written form, another great way of articulating your thoughts and feelings or getting creative is to keep an art journal. Any size and type of notebook will work but thicker paper is best to avoid bleed through (where your work seeps through to the other side) or ghosting (where you can see your work through to the next), You can also choose any type of material to practise with such as pencil, crayon, markers, ink, paint or paper for collage style layering, or you can combine a few of the above to create a mixed media piece. There’s no right or wrong way to do it – the key is to experiment and enjoy the process.

Reading journal

If you’re a bookworm, keeping a reading journal is the perfect way to record what you read and when, your thoughts and feelings about the book as you read, chapter summaries (particularly with non-fiction), any quotes you’d like to remember, an overall evaluation when you finish and a star rating to show how much you enjoyed the book. If you use an app such as Storygraph, you can even include reading focused graphs and charts too.

Garden journal

As some of my readers will know, I started a gardening journal in the spring of this year. One of my goals for this year, with my husband’s help, is to keep on top of our back garden (weeding, deadheading, pruning, tending, planting etc) and create a bright and colourful space which is a haven for wildlife. Obviously, it’s a work in progress, but my journal has helped me with recording to do lists, planting schedules, week-by-week planning, pest control, seed setting and seedling transplanting and so on. It’s also been a place to keep printed versions of articles I’ve read and tips from the various websites I’ve visited. If you’re a keen gardener or want to become more green-fingered, a garden journal is a great support and place for recording information which reflects all of your hard work. You can find out more about the benefits here.

Final words…

I hope that today’s post has inspired you to give journalling a go and reap some of the associated benefits. I would love to know which type of journal appeals the most and why. I’m also keen to know if anyone has tried Morning Pages and found them beneficial. I like the idea but, as an experienced teacher, I’m not sure I could write something without a care for spelling, grammar and punctuation, let alone three whole pages of A4!

Posted in art, bullet journal, Bullet journaling, creativity, Planning and journaling

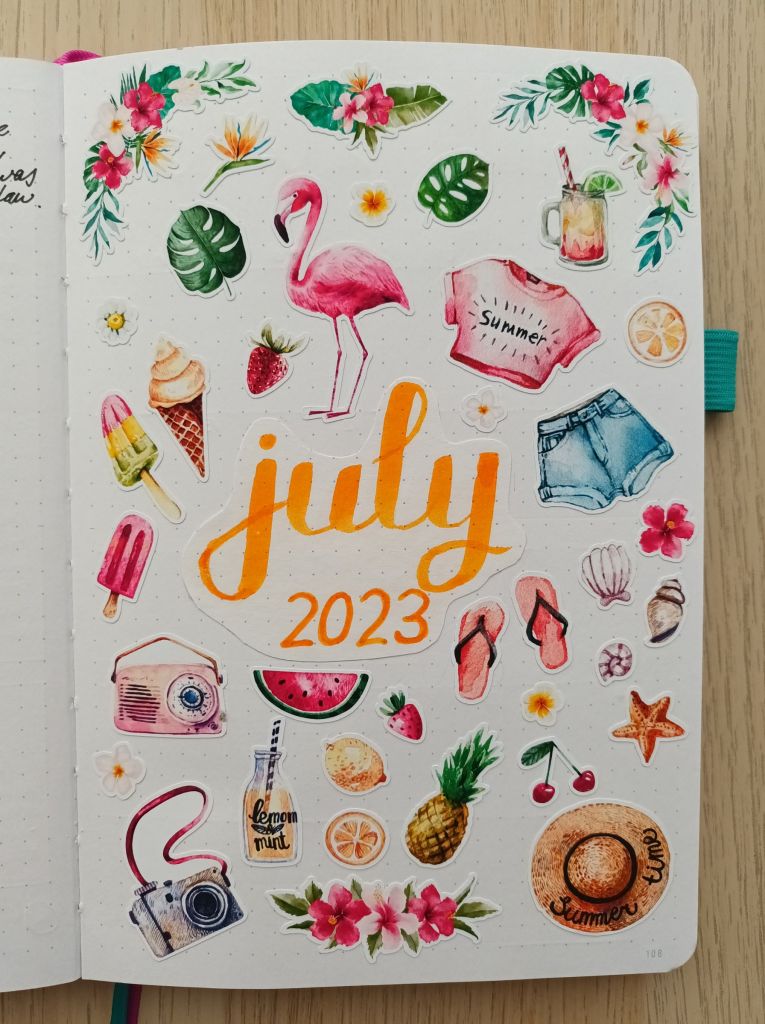
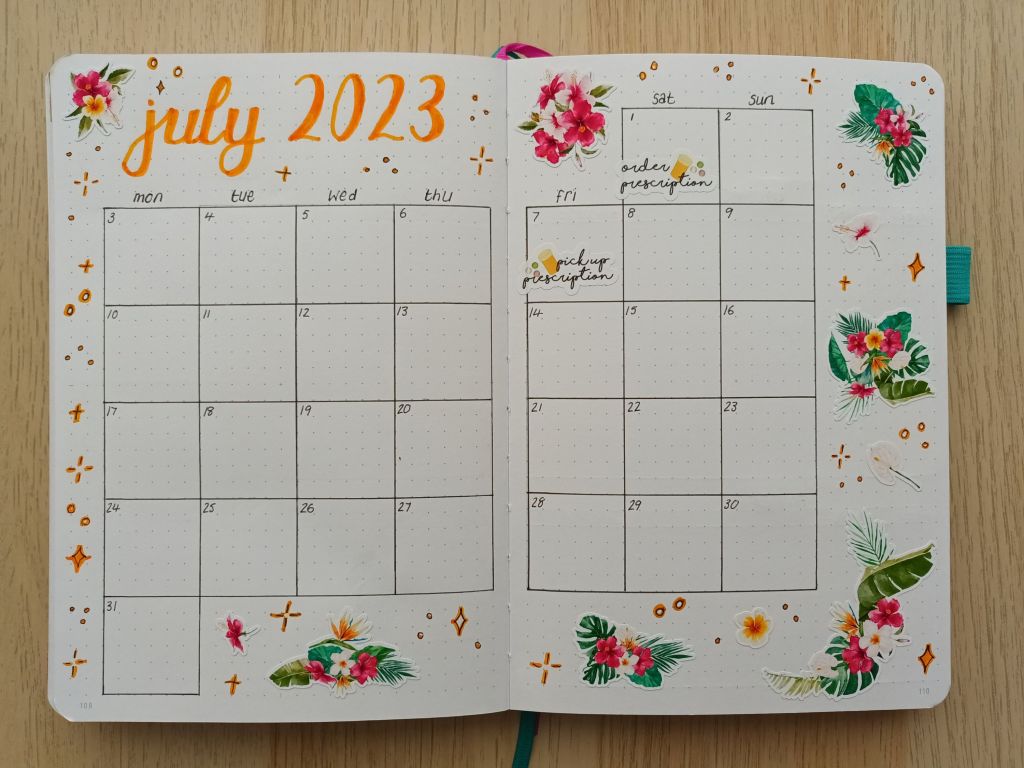
Setting up my BuJo for July 2023: Summer holidays theme

This month in my bullet journal, I’ve cheated with the décor again and bought a couple of sets of stickers to make things quick, easy and colourful. I was so impressed with the quality of the gardening themed set, that I chose to purchase from the same shop LunarLucie on Etsy. I ordered in plenty of time so that they arrived before we headed off to Norfolk on holiday. I managed to create the cover spread which I shared on Instagram but the calendar and financial pages had to wait until we returned which is why I’m only getting around to sharing them today.

Front cover page

The style of this month’s cover is very similar to the one from June but I used all of the stickers from the tropical summer holiday sheet and a few from a tropical flowers set which complemented the others beautifully. The designs are so lovely and I’m really pleased with how the page turned out. I wasn’t happy with my lettering so I used some dotted grid paper to practise, then cut it out to stick in the centre.

Photo credit: Laura Jones for Keeping It Creative

Calendar page

I had plenty of tropical flower stickers left so use these to decorate and then filled in the spaces with sparkles.

Photo credit: Laura Jones for Keeping It Creative

Finances

I want this month to be a low spend one so I made my expenses section shorter. This left me with room to add a few financial affirmations in the space at the bottom.

Photo credit: Laura Jones for Keeping It Creative

Final words…

I hope you’ve enjoyed looking at my spreads for this month. I haven’t drawn up any weekly spreads yet but they’ll be pretty minimal in terms of decoration. I might just create a running task list as the only events on my calendar for this week are my usual exercise classes.

Wishing you all a lovely and fun-filled July,

Posted in bullet journal, Bullet journaling, creativity, gardening, Planning and journaling

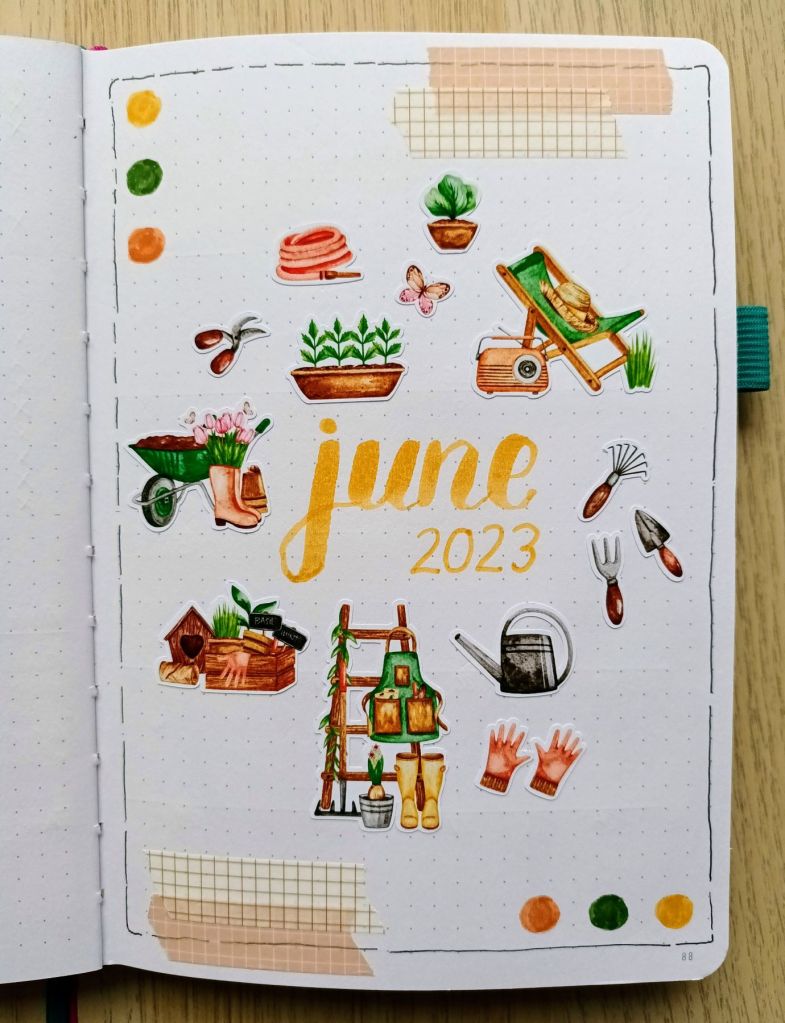
Setting up my Bullet Journal for June 2023: Gardening theme

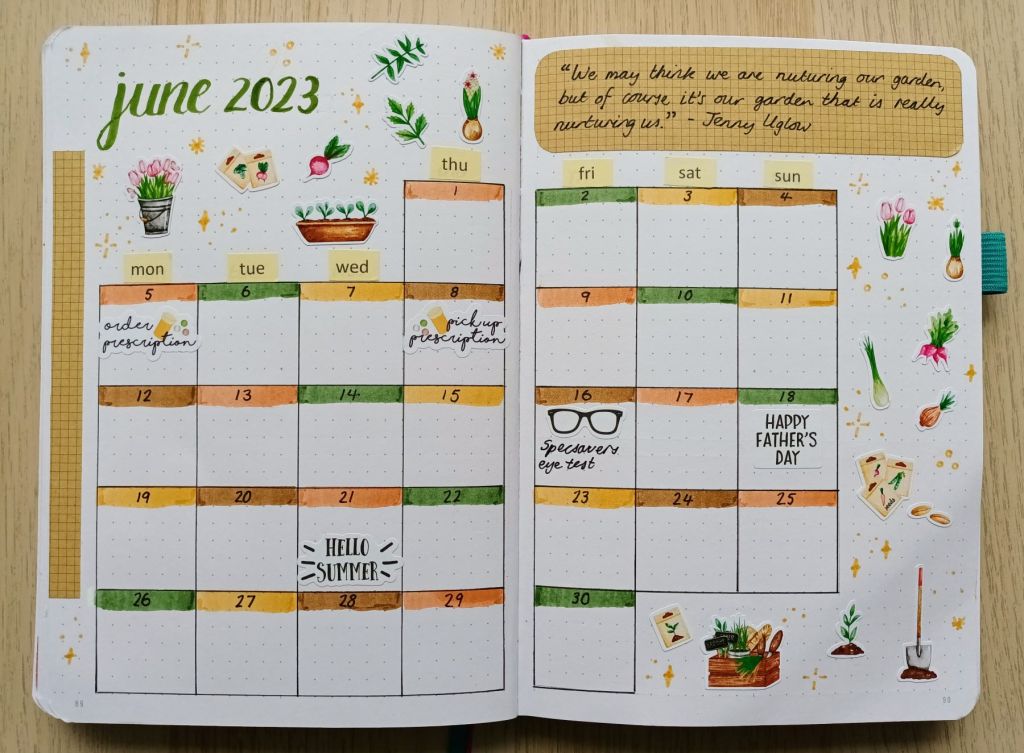
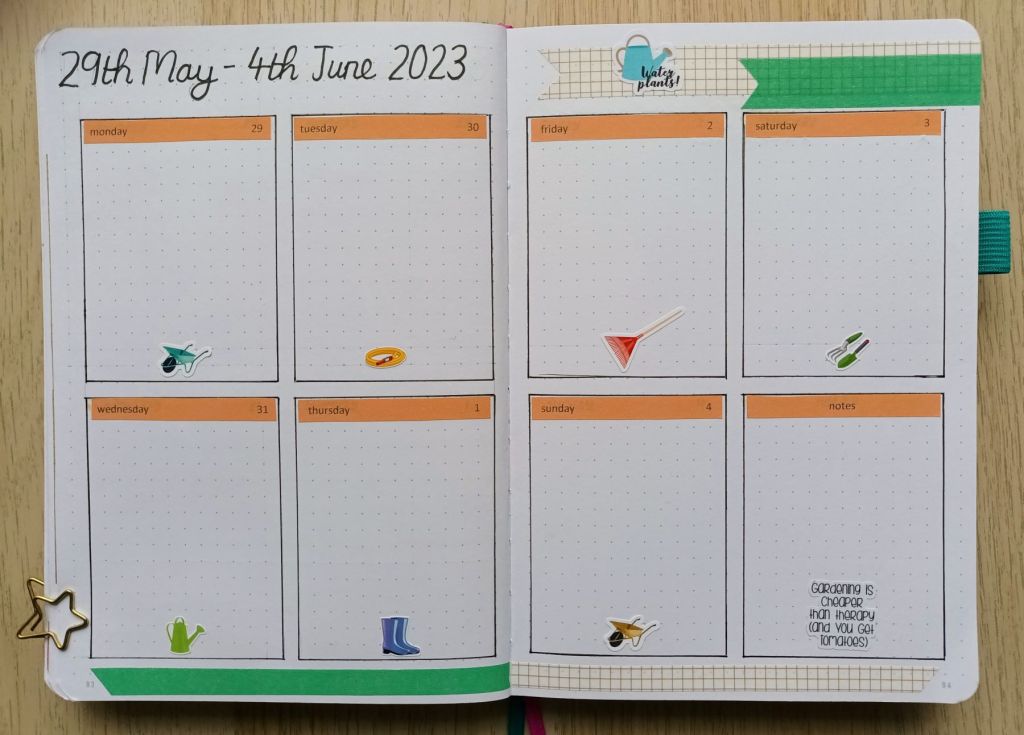
At the moment, my husband and I are busy working on our garden to get it looking neat, tidy and full of colour for the summer. I’ve recently started keeping a gardening journal which includes before photos of the front and back gardens, lists of jobs for the weekend, planting plans and records of seeds set and plants added to the borders. I wanted my theme for June to be bright and cheerful, with easy to set up pages so I decided to order some deco stickers from Etsy for the month. So far, I’ve picked out one sheet of watercolour garden related images and have used them to decorate the cover page and my calendar. I also used some icon stickers for my first weekly spread and will decide if I want to order further stickers to decorate or if I want to do some basic sketches for the rest of the weeks.

If you’re looking to create decorative but quick pages for your bullet journal, stickers and washi can be great options but obviously do incur an extra cost. They’re also great choices if you’re not keen on drawing or need to save time. You can literally type your chosen theme into Etsy, filter to UK sellers only if you need the sticker sheets quickly, select a design sheet which suits your personal style, and then, as soon as they arrive you can get to work planning out where to put them in your spreads. I found that the most frustrating part was creating my grids and lettering and then having to wait for what felt like ages for delivery but the sheet was made to order so had a lead time of two weeks.

My front cover

I used one of my new Tombows in 991 to add the title to the centre of the page and then created a loose border using a 0.4 pigma micron pen. I then added stickers around the title and placed washi plus some circles to fill in the spaces at the top and bottom.

Photo credit: Laura Jones for Keeping It Creative

Calendar pages

This is my usual 6×6 grid space calendar layout and I chose four Tombow Dual Tip pens which I tried to match to the stickers. I knew that the colours might not be exact as they can differ on your screen to IRL but I didn’t mind as long as they were close. As I was running short on stickers by the time I’d finished the cover page I added a quote on some kraft grid sticker paper and matched it with a strip on the edge and then used various sparkles to fill in the gaps.

Photo credit: Laura Jones for Keeping It Creative

Finances

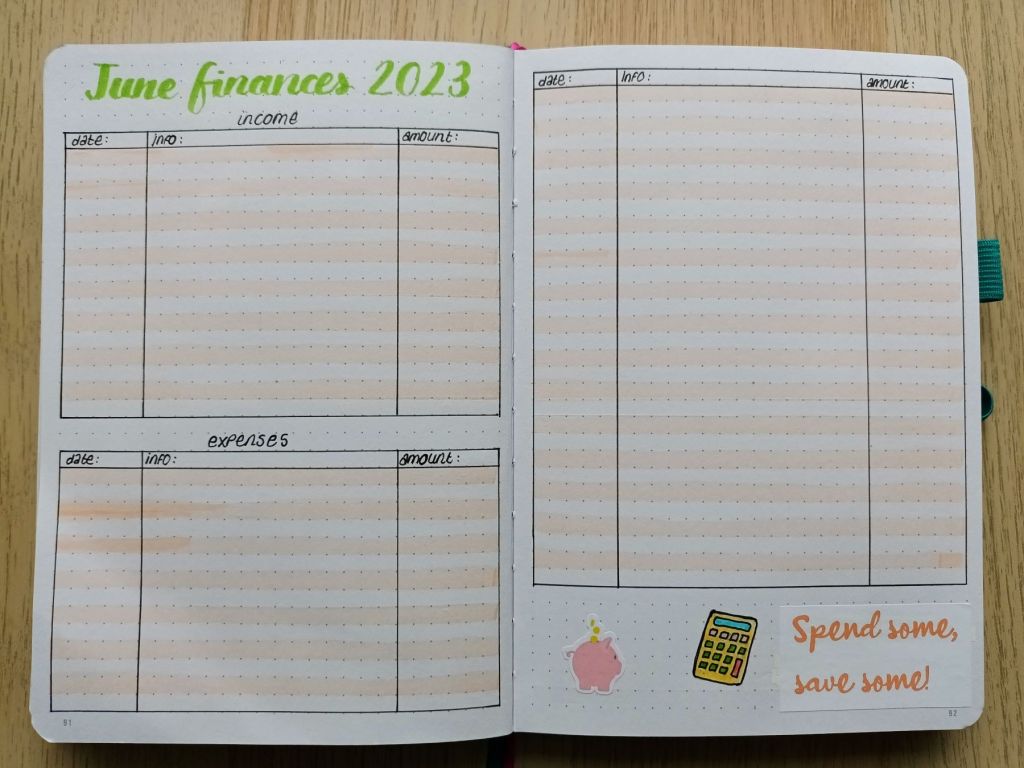
The layout of my finances spread works really well for me so I use the same design each month. There was a little space at the bottom to add a small amount of decoration using a piggy bank sticker from EllenBeeMakes on Etsy, a hand drawn little calculator and some words which I printed on sticker paper.

Photo credit: Laura Jones for Keeping It Creative

Weekly calendar and rolling weekly to do list

I decided to do a double page weekly for the first calendar page as I have quite a lot planned and needed more room to write. This means that my rolling weekly task list is over the page but I don’t mind flipping back and forth.

Photo credit: Laura Jones for Keeping It Creative

Final words…

I hope you’ve enjoyed looking at my spreads for the month of June. I don’t regularly use stickers to decorate my pages as it would be fairly costly but it is an effective way of setting up quickly and painlessly. I still managed to mess up a few times – once by smudging pen (the joys of being a leftie) and again by dripping cherries and berries squash on one of the pages (planning is thirsty work!) but my white Posca paint pen and some washi fixed those pretty well. Overall, I’m pleased with how everything turned out and I’m looking forward to using my pages.

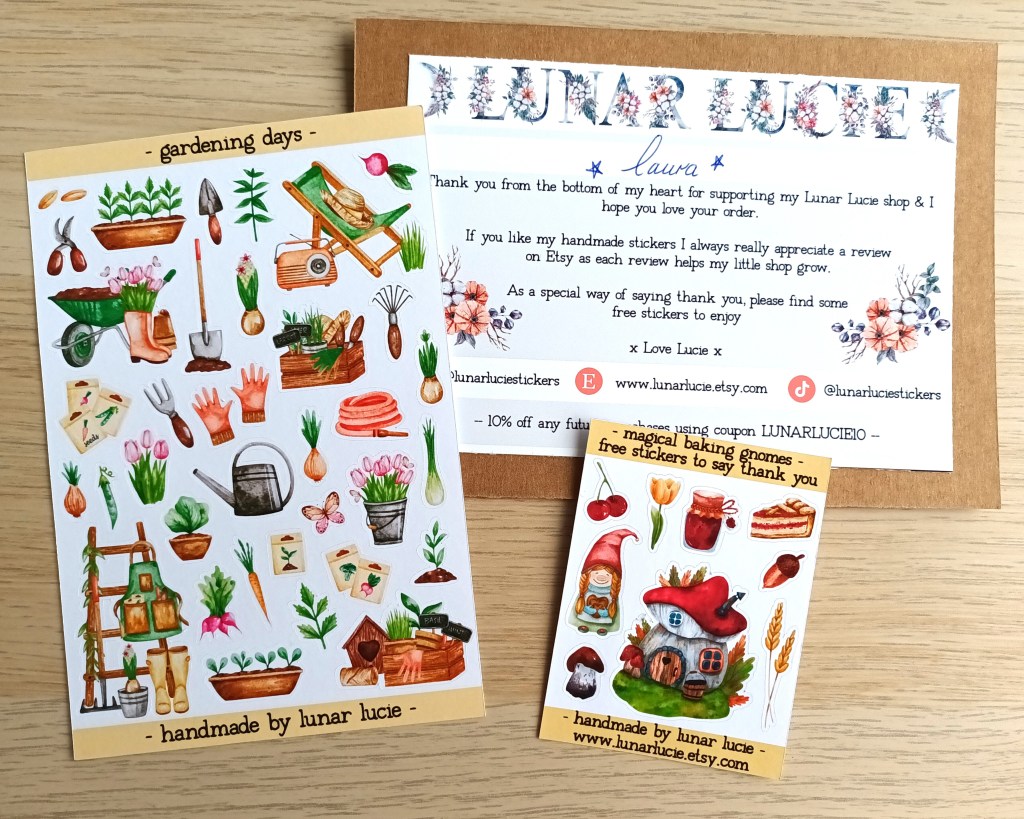
My lovely stickers which are now all used!

Wishing you a lovely June,