Blog

Posted in fitness, lifestyle, mental health, wellbeing, wellness

Monday Matters: 8 Mental Health Benefits of Exercise

Photo credit: Bruce Mars, Unsplash

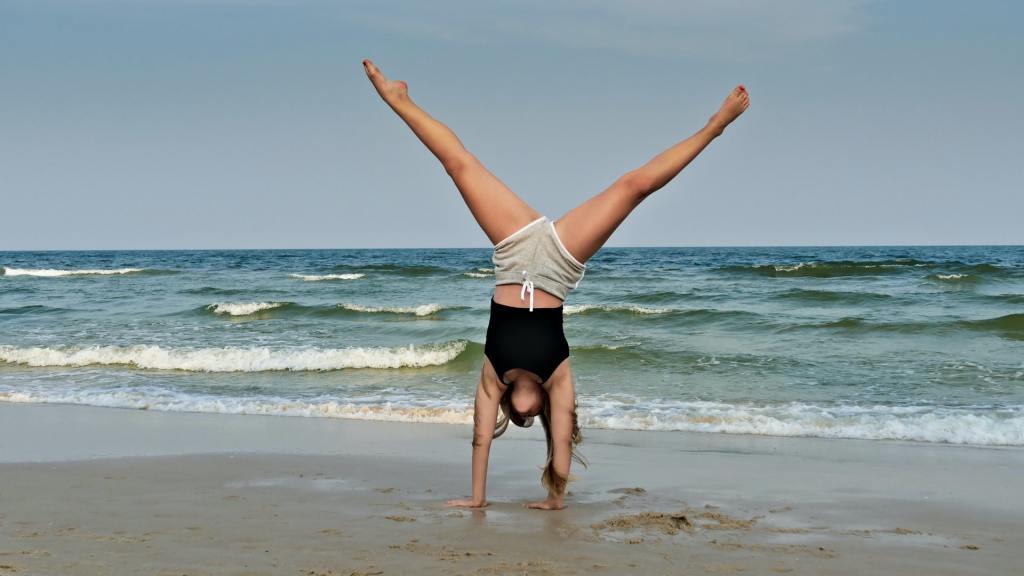
I’m sure we’re all well aware of the physical benefits of exercise such as strengthening our bodies, reducing fat, generally making ourselves more muscular and toned, plus reducing our chances of major illnesses such as heart disease, type 2 diabetes and some cancers. But, there are also lots of ways that exercise can boost your mental health too that you might not have even considered. As many of my followers will know, I recently upped my activity levels in a bid to get fit. You can see my workout record that I set up for May in my Bullet Journal here and ideas for creating a routine here. But it’s not just physical changes that I’m starting to notice, I’m also feeling so much better in terms of my general wellbeing, including my confidence levels. So, for today’s Monday Matters, I thought I’d do a little research into what I’m getting out of exercising in terms of my mental health and why it’s vital to keep going with my plan if I’m to reap all of the many rewards. Hopefully, this post will help to motivate you to fit in a little more exercise into your daily routine.

8 ways that exercise helps improve your mental wellbeing

1. increased energy levels

Finding time to get moving each day works wonders for your energy levels. This in turn, helps you to deal with all of the physical and mental aspects of your day and basically anything else that life throws at you. By getting some exercise in each day such as a gentle stroll around your local park (maintaining the recommended 2 metre social distance at all times) you’ll feel more alert and will get more done. This will increase feelings of achievement which is guaranteed to boost your mood.

2. better quality sleep

Recently, I’ve found that by the end of the day, I feel physically worn out and completely ready for bed (by 8pm actually, but I always manage to keep my eyes open until at least 9pm ha ha!). This is because research shows that although physical exercise boosts your energy levels for several hours after you have worked out, it also promotes good sleep. If you fall asleep quickly, you are less likely to start thinking things over in bed (ruminating) as you lie there and a decent night’s sleep will leave you feeling more refreshed and ready for action the next day.

3. reduced depression

Exercise is well known for releasing endorphins which are a group of hormones that are secreted into the brain and nervous system. These have been scientifically proven to enhance pleasure and reduce pain which of course helps combat depression. In fact, when I went to my doctor when I was struggling with depression, she asked if I was getting plenty of exercise and I was able to tell her that I was having a brisk walk each and every day. Also, if you do your workout outside, as long as you take appropriate measures to protect yourself from The Sun, you will also be boosting your Vitamin D levels which has also been shown to reduce depression.

4. reduced anxiety

As well as being shown to combat low mood, exercise has also been found to be great at alleviating anxiety. It is thought that one of the reasons for this is that moderately intense activity uses up excess adrenaline and helps to reduce anxious thoughts. Also, if you exercise mindfully, paying full attention to how your body feels, it allows you to switch off from stresses and worries.

5. emotional comfort and support

With the current lockdown, you are only allowed to exercise with family members that you live with, but getting a workout in can ordinarily be quite a social experience too. When I was attending my yoga class, I would chat to the instructor and the ladies before and after the class and we would even talk about the difficulties we were having with some of the poses and which were working our muscles really intensely. I also received lots of praise from my teacher, saying that she was impressed with my ability and that I didn’t seem like a beginner. This was a real boost to my self esteem and made me trying even harder. Support and encouragement when you are exercising is really good at keeping you motivated.

For now, smiling, saying good morning or hello to people you see when you’re out and about for your daily exercise can help you feel a connection to others and give you a little boost. You can even strike up a brief conversation about the weather as The British are fond of doing!

6. increased self esteem

Sticking to your exercise plan is great for your self esteem in a number of ways. I’ve found that as I’ve start to see improvements to my body, I’ve begun to develop a much better self image and this has been a huge boost to my confidence levels. I’m also really proud of myself for keeping up with my new routines and the support and encouragement from my husband has increased the feeling of positivity too.

7. a boost to your brain power

Aerobic or cardio exercise has been shown to keep your brain cells healthy and improve their connections. This has a positive impact on your cognitive functioning, giving you a better memory, greater ability to make decisions and an increased capacity for learning. This enables you to learn faster and more effectively and also has a positive impact on your concentration and general productivity levels.

8. increased confidence

Depression and anxiety have a tendency to completely wipe out our confidence levels and self belief. By setting small exercise goals and meeting them you can feel a sense of accomplishment and this will give you the confidence to set your sights even further and aim higher. This can have a knock on effect on other areas of your life too.

Photo credit: Dee @ Copper and Wild

As you can see, there are so many amazing mental health benefits to exercise which can increase your wellbeing just as much as your muscle tone and fitness levels. And research shows that you don’t have to be a complete workout fanatic to reap the benefits. Moderate exercise on a regular basis such as walking, cycling or even housework such as vacuuming, mopping and sweeping can work wonders too. I’m certainly going to keep up with my routines as I’m starting to look better on the outside and feel much better on the inside and my husband has noticed so many changes already.

Last night, Boris Johnson gave us updated recommendations about daily exercise in the UK. He has said that, from this coming Wednesday, we can, with caution and a continued focus on social distancing, spend as much time as we like outdoors in communal parks and gardens. We will also be able to drive to different destinations so that we can go to other beauty spots. This is good news in some ways but there are quite a few unanswered questions for me, such as whether car parks for forests and woods and gardens will be re-opening and even more importantly, if you are travelling a long way and maybe enjoying a picnic with your family, whether public conveniences will be available for use!

We will have to wait and see what happens I guess!

Posted in art, watercolour painting

Getting to grips with wet on wet: Watercolour basics

Last week, I wrote a blog post all about wet on dry watercolour including basic washes and fun techniques you can try to get interesting effects. This week, I’m exploring wet on wet washes and cool effects. Again, I’m sharing what I have learnt and some photographs of my actual work which I hope you will agree, isn’t too bad for a beginner!

What is ‘wet on wet’ (or wet into wet)?

As the name suggests, wet on wet refers to using wet paint and applying it to wet paper. It is also used to describe the addition of another wet colour to wet paint which is already on the page (commonly known as charging).

The wet on wet method is great for creating smooth transitions between colours, gradient effects and soft lines and edges. Artists typically use it for painting landscapes, simple skies and soft, flowing washes. Wet on wet can be a little unpredictable but that is what makes it so exciting as you are never absolutely sure of what you are going to get.

What are the issues with using the wet on wet method?

There are a few things that can go wrong when using wet on wet so it’s a good idea to explore the technique using small pieces of cheaper watercolour paper like I did before embarking on a larger piece. You will definitely find that you run into a range of issues along the way when you are experimenting but that’s part of the learning process and the fun of working with watercolour paints.

As you are working with very wet paper, one of the issues that can arise is paper buckling or cockling. This is more common (or pronounced) with thinner paper but can happen regardless of how thick your paper is. So why does it happen and what are the problems with it?

When the paper fibers absorb water they expand lengthwise, and they take on a more random alignment. When the paper dries, the fibers contract again. But to some extent the fibers retain their irregular alignment. This change in the structure of the fibers is what causes raised ridges and low valleys to form on the surface of the paper which we see as buckling… ridges and depressions… make paint flow difficult to control. It’s a nuisance which all watercolor artists have to deal with. This is pretty annoying because as you continue to paint, pigment tends to run into the low valleys and settle in pools. Stretching your paper is the common solution.’

Anthony @ Watercoloraffair.com

The method I used for stretching my paper was to soak it by immersing it in a tub of water for 5 minutes until it turns limp. As my cheaper watercolour paper is only 200 gsm this is all of the time that was needed because the thicker the paper, the longer it needs. I then fastened the wet paper to a plywood board and taped the edges with masking tape before leaving it to dry overnight. Unfortunately, the masking tape I have is pretty cheap stuff and so it doesn’t particularly stick very well.  

Another issue can occur if you use too much water. If you soak your paper and use heavily watered down paint, you can end up with ugly marks on your paper. I’ve seen a range of names for these including ‘blooms’, ‘blossoms’, ‘backruns’, ‘cabbages’ and ‘cauliflowers’ but they’re caused when the paint runs to the edges of a pool of liquid. You can avoid these by controlling the amount of water you have on your page by wetting your paper evenly all over until it has a nice sheen to it and then only slightly dampening your paint with a small amount of clean water. If you do find that water collects on your paper, you can use a dry brush to soak it up or a small amount of kitchen towel to absorb the excess. You especially need to check the edges of your work where you have affixed the tape as liquid has a habit of collecting there! I found the best way to learn is by experimenting to see what works best. I bought a few blocks of 10 A4 sheets of cold press paper, then cut each sheet into smaller pieces.

The final issue I want to mention today is the opposite to the previous problem – not using enough water. With the wet on wet technique, it’s very important to ensure that your paper is nice and damp. To ensure your work surface doesn’t dry out you should mix all of your colours first before wetting your paper. You also need to make sure you work quickly which can be hard when you first start out as you are concentrating on ‘getting it right’. This is why it helps to do some exploratory pieces with cheaper watercolour paper so you can get used to how the paint behaves.

Wet on wet washes

Using the wet on wet method has the advantage over wet on dry because it prevents lines of paint being seen. This ensures your wash is smooth and even whether you are creating a flat wash, graduated wash or variegated wash.

For the flat wash, first prepare your puddle of paint by adding a small amount of water to your pigment (you don’t need a lot as the water on the paper will dilute it further). Next, wet your paper all over with clean water. I used a large flat wash brush for this as it enabled me to work quickly. When you are applying the paint, you don’t need to be as careful as with the wet on dry method because the mixture will spread easily. You do, however, need to ensure that you are not left with any excess watery paint so remember to use a dry brush or small amount of paper towel to mop up any excess moisture so you don’t get those backruns I mentioned earlier.

For the graduated wash (also know as gradient wash), you should make a puddle of barely diluted paint then wet your paper evenly as with the flat wash. Then take some paint and sweep from one side of the paper to the other (if you read last week’s post, you’ll know that I suggested working from right to left if you are left handed like me). Then for each new sweep, you’ll need to add a little more water to the mix or to the brush each time. When you reach the bottom of your paper, the wash should be almost completely transparent. It helps to have your board on a slight incline for this to encourage the paint to seep down the wet paper.

Finally, for the variegated wash, create two fairly concentrated puddles of paint in your palette. Then, wet your paper as before. If you want a smooth transition between colours, you may want to tilt your board again. For this, sweep your first colour on in horizontal strokes either to the end of the paper or to somewhere near the centre. Then, rinse and dry off your brush a little on paper towel before adding the second colour to the still wet paint. Because the paper is wet, the two colours will blend together to create a variegated effect (Image 1). If you want a more random mixing of colours, you can simple tap colour onto wet paper in whatever pattern you like so it blooms and spreads (Image 2). Then do the same with your second colour. You can use as many different paint colours as you like but I recommend sticking to about 3 so that you don’t end up getting muddy brown colours when they bleed into each other. Like with the other washes, look out for pools of paint that you need to soak up with a dry brush or paper towel to avoid backruns.

That’s all of the wet on wet techniques I’m going to share today because I’ve run out of watercolour paper and have decided to order some more online to enable social distancing! I’ll post the results of my experimentation either next week or the week after depending how long it takes for my order to arrive. Hopefully, I won’t get as much cockling with my new paper as it is quite a bit thicker than what I have now.

Until next time, keep finding space in your life to be creative during this lockdown period and if you have any finished projects to share on your own blog, let me know in the comments and I’ll be sure to check out your work.

Posted in compassion, mental health, Planning and journaling, wellbeing, wellness

Monday Matters: Creating a WRAP Part 5 (final in the series)

Over the course of April, I’ve produced a series of posts about the process involved in creating a Wellness Recovery Action Plan. Today is the final installment in which I look at Crisis Planning. As I stated in my last Monday Matters post, I did not complete this section of the booklet myself as my illness has never reached crisis point but I intend to go over what this part of the plan would look like and suggest some ideas of what you might include.

What constitutes crisis?

Although there is no set definition for a crisis, it can be described loosely as being a state of emergency that poses an immediate threat to your physical or emotional wellbeing. Therefore, in spite of your best planning and actions to keep yourself well, you find yourself in a situation where others need to take over your care.

Crisis planning

This part of the W.R.A.P. has 9 sections and I will go over in in turn. Although the whole plan is very personal to the individual, I can offer suggestions on the kind of information you might record in each list.

Part 1: What I am like when I’m well

This can literally be copied from the second page of your plan and is simply placed in this part of the document for ease of access.

Part 2: Symptoms

This is a list of signs that tell others that they need to take over your care. Some examples include violent out of control behaviour, psychosis (loss of touch with reality), paranoia, abusive behaviour towards self or others, inability to perform basic tasks such as bathing, brushing teeth etc, showing signs of planning own suicide (Mind website information on this can be found here).

Part 3: Supporters

This is a list of people you want to care for you if the symptoms you listed in Part 2 occur. Include family members and health care professionals but make sure you seek their permission to me added to your list so that have advance warning in case something happens in the future. You can also include a list of people you do not want included in your supporters list too.

Part 4: Medication

In this section, you can write which medications are okay to be given and which are not. So, for example, you might have reacted in a bad way to a particular antipsychotic in the past and be worried that it might make you worse if administered again.

Part 5: Community Plan

In this section, you can list your preferences for your care so you can feel you have some say in what happens when you are unwell. So, for example, you might prefer to have the Crisis team visit you at home and come up with a plan for you in consultation with your partner or you might feel that you are best off being hospitalised.

Part 6: Treatment Facilities

Here, you would list where you would prefer to be treated or hospitalised if that becomes necessary. You can also add facilities that you would rather avoid if possible and why.

Part 7: Treatments

In this part, you can include treatments and therapies which you feel would be most beneficial and those which you wish to avoid and why. You may have tried alternative therapies that have worked in the past and wish them to be administered again.

Part 8: Help from others

Here, you can write down what you want from your supporters which will help make you feel most comfortable. Obviously, this list is very personal but might include the kind of things you would like people to say to you for encouragement or avoid saying as you know they will not help.

Part 9: When my supporters no longer need to use this plan

In this section, write a list of indicators that your supporters no longer need to take over your care. What are the signs that show you are once again in control of your life? This might include features of wellness that you display which show you are well on the path to recovery.

Looking forward

Remember that if you do reach crisis point, despite putting all of the elements of a W.R.A.P. in place, this is not the end of the world and it certainly does not mean that you won’t recover. After you have taken the time to get yourself feeling better and stronger, you might like to revisit your plan with one of your supporters and discuss any improvements you might be able to make to your plan and the action which goes with it. Maybe, on reflection, you didn’t do enough to keep yourself calm and relaxed in daily life and could benefit from putting more self soothing activities into place. Or perhaps a loved one recognised signs of deterioration but you chose to ignore it or go into a state of denial. Whatever happens, you can learn from the experience and try to make plans for the future.

And that, as they say in the filming industry, is a WRAP. I hope you have found my series helpful and can see the benefits of producing this kind of document to help with issues relating to mental health. If you would like support to write your WRAP, I suggest looking into if there is a Recovery College in your local area or if you are able to work with a mental health professional as part of therapy sessions to make one.

Wishing you a wonderful week,

Posted in lifestyle, Planning and journaling, Setting goals and intentions, wellbeing, wellness

How to create a beginner’s workout routine and why rest days are an important part of your fitness practice

Photo credit: Zibik on Unsplash

If you read my post on my bullet journal set up for next month, you will have seen that I intend to start track my steps and workouts in a handy spread I created for the purpose. As this will start from tomorrow (can you believe it’s almost May already!), I thought I would do some research into creating a good workout routine that targets all of the body and includes all of the necessary elements to increase strength and fitness. And if I’m going to do all of this hard work reading up on creating a rounded routine I figured I should share it with you all in case you are wanting to improve your fitness levels too. Bear in mind this will be very much beginner level and also that I’m over 40 and therefore I have to take into account a little bit of bodily wear and tear! So, without further ado, I’ll jump right into it.

My first port of call was the NHS website as I figured that this was the most reliable source of information I could find. They present guidelines for all adults aged 19 to 64 and state the following

Adults should do some type of physical activity every day. Any type of activity is good for you. The more you do the better.

NHS Guidelines for 19 – 64 year olds

The NHS then goes on to state that the exercise should consist of strengthening exercises which work all of the major muscles (legs, hips, back, abdomen, chest shoulders and arms) at least twice a week plus at least 150 minutes of moderate intense activity or vigorous intensity activity for 75 minutes. Some examples of each intensity can be found below:

Moderate activity

a brisk walk

heavy cleaning (vacuuming, mopping etc)

mowing the lawn

cycling (light effort)

doubles tennis

water aerobics

dancing

swimming

gentle aerobics

Vigorous activity

hiking

jogging

tennis singles

fast bike riding

football game

basketball

running

energetic dancing e.g. Zumba, Clubbercise

This means that, for example, you could aim for 30 minutes of moderate activity 5 days a week or an intense exercise at least once a week plus shorter moderate activities. For my moderate intensity activity, I try to do a brisk(ish) walk almost every day and a beginners aerobics class for 30 minutes at least 3 times a week which starts of gentle and then gets a little more vigorous further in.

The website also says that we should reduce the amount of time spent sitting or lying down and break up long periods of not moving with some activity. This is where a Fitbit fitness tracker is useful because you can set it up to vibrate if you haven’t done 250 steps in the hour to remind you to move (it even tells you how many more steps you need sometimes!). In fact, at 10.50am as I sit here typing, my Alta HR has just vibrated so I paused and went for a short walk around the garden and popped up the stairs to deliver this morning’s post to my husband in my craft room. I also use the opportunity to do a few basic stretches, particularly of my neck.

If, like me, you are a beginner or are just getting back into a fitness routine, you should remember to take it gently at first, so no doing long, vigorous workouts and collapsing in a heap at the end! I found that when I started doing the aerobics sessions it was tempting to push myself too far in a bid to see faster results but this is certainly not to be recommended. Far better to push yourself a tiny bit harder each day and build up to more intense routines.

You can also find a list of very intense activities which are known as High Intensity Interval Training (HIIT). These are done in short bursts where you put in maximum effort followed by periods of rest. Just thinking about that has made me feel exhausted (ha ha!) and reminds me of when I once went to a spinning class and could barely drag my jelly legs off the stationary bike by the end!

For muscle strengthening, exercises such as yoga, pilates or Tai Chi are recommended but you could also try some heavy gardening such as digging when the weather allows. Lifting weights or using resistance bands are also good for developing muscle. Personally, as you will know if you follow my blog, I’m really getting into yoga and try to do at least 20 minutes per day. It may look easy with it being so slow but some of the poses can be really intense. There are so many benefits for body and mind with yoga and if you want to learn more, check out this post. I’ve even found some yoga routines online which target specific parts of the body so you can work on strengthening your back, upper body and even your core. This is one of my favourite YouTube channels right now.

Muscle strengthening

You can combine your moderate aerobic activity with your muscle strengthening routines or do them at different times or on different days depending on what suits you. I do my yoga and a walk in the morning and then do my aerobics in the afternoon but I’m finding that the bright afternoon sun is making my living room really hot so I may change this as the weather improves. After lockdown is over, I’m also hoping to do my hour long yoga session on a Friday at the wellbeing centre and also go to the gym for resistance work and some time on the treadmill, the bikes or stepper.

Remember to exercise safely

When you first start, it’s really important to ensure you are performing exercises correctly. That’s why I would recommend that you go to a class or seek the help and support of a fitness professional. I know, at the moment, due to lockdown and social distancing, doing this in person is not currently possible but there is advice to be found online on various websites and a whole array of YouTube videos from instructors. If your technique is poor, you won’t get the expected benefits of an exercise and it may even lead to pain or injury so please do make sure you workout safely.

Schedule in rest days

When you begin a new exercise regime and develop the motivation to stick to it, you can quickly become addicted to the rush of feel good endorphins that are released during moderate activity workouts. Also, when you start to see results in terms of better muscle tone and strength or weight loss, you may think that working out intensely every day is going to help speed up your progress. However, the opposite is in fact true. Taking regular breaks in the form of rest days is just as important as exercise as it allows your body to recover and repair. In fact, skipping rest days often leads to burnout or injury.

A rest day doesn’t mean you can’t do any exercise at all. It just means that you take it easy and avoid doing anything intense. A little light stretching or a gentle walk are absolutely fine. So, for example, I shall still be doing my yoga and getting outside for a nature walk each day but I won’t be doing my aerobics on at least two of the seven days. By building in rest time I’ll be feeling refreshed and ready to continue with the rest of my routine.

I hope you have found today’s post helpful. I’ve tried to put the key ideas in bold so that you could skim read if necessary. Let me know if this lockdown period has provided the encouragement for you to get fit or if you really need to up your activity levels but haven’t found the motivation to get started yet! (I know some people are struggling with fatigue right now due to the fact the situation is quite overwhelming and stressful). If you have any further ideas or advice for me in my journey to fitness, please feel free to share your suggestions.

Posted in art, creativity, watercolour painting

Wet on Dry washes and 5 Super Fun Wet on Dry Techniques to get you started with the Basics of Watercolour Painting

A few weeks ago, I shared my vision board for the lockdown period in which I set some things to work on whilst we are social distancing and spending more time at home. One of these was to do more watercolour painting. A while back I started an online 7 day challenge but unfortunately, circumstances dictated that I didn’t get it finished. I got myself all stressed out about doing it and it basically became a chore when it was meant to be enjoyable (sometimes I get too serious!). This time around, I’ve done a lot more research (to develop my confidence), binge watched lots of YouTube videos and read lots of information on various websites (some were much better at explaining than others. I’ve also made notes on what I have learned. In this post, I want to share with you some wet on dry techniques that I tried out and really enjoyed. Hopefully it will encourage you to have a go yourself. I’ll be doing wet on wet techniques soon so look out for that popping up on my blog.

So what is Wet on Dry?

Also known as wet into dry, this technique involves using dry paper and applying wet paint to your page (which is demonstrated here). It also refers to adding wet paint to a dried area of paint already on the paper using layering (something I will explore at a later time). Wet on dry is regularly used by artists as it allows plenty of control over the paint. There are lots of wet on dry techniques and I loved experimenting on small pieces of watercolour paper. I actually split up a few large sheets into sections using masking tape and then left them to dry and used my paper trimmer to make little labelled cards showing the different examples.

Washes

The first technique I tried was washes. These basically involve adding paint to your paper in a smooth uniform way. There are three main types of wash – flat, graded and variegated. With a flat wash you apply the same colour and tone across the whole of the area you are working on. With a graded wash you graduate the colour from a light to dark tone or from dark to light. And in a variegated wash the colour and tone changes in various places of the work area.

With the flat wash, I wet my brush in clean water and then half loaded it with paint. Starting in the top left hand corner, I swept horizontally to the top right hand corner. I then repeated that action adding more paint for each stroke all of the way down the marked out piece of paper (I used masking tape to get neat edges). As you are working wet on dry, you need to work quickly to ensure that the paint in the wash area you are working on stays wet. You also need to slightly overlap your brush strokes so you are working into the bead of paint that forms at the base of each line. If you find when you get to the bottom that too much paint solution has formed at the end, you can mop it up with a paper towel dried clean brush to avoid streaking or a back wash being created which is where the solution bleeds back up the paper and creates an unwanted blooming effect.

For the graduated wash (also known as a graded wash), I started with a little water and lots of pigment. I then did one sweep horizontally like in the flat wash. For the second sweep I added a little more water. You then continue adding more water to lighten the colour until you have very little pigment on your brush by the bottom of the page to create a very gradual change in tone. As you can see with my example, you can sometimes see the brush strokes which I guess is one of the drawbacks of using a wet on dry technique.

You can also do a graduated wash in reverse from light to dark by adding more pigment to your paintbrush each time but I found this much more difficult and so have not included the results here! I’m sure some of you would be quite happy to see my failed attempts but I’m afraid I filed them in a special place under my desk 😀 ha ha!

I found the variegated wash the most difficult and again, had a fair few failed attempts. In the end, I found the best method was to start with one colour at the top of the page and graduate to the middle and then repeat the process in reverse with another colour from the bottom of the page. I then blend the colours whilst they were still wet in the middle. This may not suit everyone and I may find I develop my technique differently as I become more proficient with the medium. I would recommend experimenting and finding what works for you personally.

You can vary the density of the colour in the flat wash by using a lot of pigment and a little water for an opaque wash or a small amount of pigment and lots of water for a lighter translucent shade as shown in the second photograph. Whatever kind of wash you are doing, it’s a really good idea to use small pieces of cheaper watercolour paper to play around with different washes so you can develop your technique. As I said before, I found I needed quite a few goes at the variegated wash before I was happy with the results.

Since doing my washes, I’ve found a watercolour tips website which suggests that if you are left handed, like me, you might be better off working from right to left (as I sometimes wish I could do when writing!). I will be sure to try this next time as I think it might make things a little easier.

Dry brushing

As the name suggests, this technique involves using a dry brush and wet paint. However, it is a good idea to wet the brush and then dry it off on paper towel so it is a little bit damp before you start. I experimented with a flat brush working with the very edge and then the whole brush in a downward motion to create different effects. I then used a pointed round paint brush and kind of smooshed it onto the paper and then used a vertical wiping motion at the bottom of the paper. I think these techniques would be great for adding texture to clothing or buildings in a painting.

Splatters

Next I had great fun trying different splattering techniques, The first method involved flicking the bristles gently with my finger. I used a flat brush for this and it produced a fine splattering which I could control pretty well. I’ve actually used this before in my Autumn tree painting which I shared as part of my bullet journal set up for October 2019. The second method involved tapping the handle of the brush. For this one, I used a round brush and had to load quite a lot of slightly watered down paint onto the full head. I tried tapping with my finger on the handle and then using another brush handle which I found was easier. Both got quite messy so I would recommend covering any areas of paper you don’t want to work on and using a plastic cover on your table!

Another way to create splatters is by blowing. This can be done using your mouth only or using a straw. With both methods, you need to apply a blob of paint to your page and then blow in the direction you want the colour to splatter. I found that I could get much more control when I used a straw and didn’t need anywhere near as much puff!

Pulling

This technique involves adding a fairly concentrated area of pigment to your page and then using a wet brush to pull the colour in different directions. I created kind of flower shapes by adding a blob of paint and then using a wet brush I lightly touched and pulled the colour outwards from this central point. In the second example I used a more controlled pulling method to create five petal star shaped flowers by placing blobs of paint to mark the very edges of the five petals and then pulling into the centre, again using a brush wetted in clean water. I much preferred creating the looser flowers and definitely need more practise with the detailed work. For the detailed pulling, I found it hard to create an image in my head of where I needed the five petal points to go.

Feathering

I really loved this technique which involved using dry paper but a kind of wet into wet technique to make the paint bloom. For the first one, I painted a line of highly pigmented paint vertically to my paper. Then I touched the paint gently with a wet brush on either side working downwards to create a feathery effect. For the second example, I repeated the process but this time using different colours of paint. It’s a really cool effect isn’t it!

Drips

This technique involves adding a splodge of paint at the top, lifting your paper at an angle and then dabbing into it with a water and paint solution to create a bead. Eventually the bead of paint will become so heavy that gravity will cause the paint to drip down. Depending on how much solution is added and how much the paper is lifted the drip may even run off the page. I used masking tape at the bottom so it created a straight edge but you could leave the paper un-masked and allow the paint to run as far as you want. I found a great little watercolour piece using the dripping technique here which I might try at some point soon.

That’s all the techniques I tried using wet on dry. If you want to find out more from real artists who have played with watercolour a lot more than me, here are some great websites and YouTube channels I came across whilst perusing the internet.

– Anthony shares tips and tricks here for complete beginners and has really good explanations and photos. He goes into depth about washes and how to improve your technique.

– Shelby goes over basic techniques and also provides lots of ideas for using watercolour paint in your bullet journal. Find her at https://littlecoffeefox.com/ I would love to do perfect my techniques and be ready to do some spreads in my BuJo but I’m certainly not at that stage yet!

– Hieu (AKA kelogsloops) who is an aspiring artist from Melbourne in Australia, provides funny but informative demos on this part of his YouTube channel He uses thicker paper than me but as I’m just a beginner, I figured cheaper stuff was good enough for now and better than nothing!

I hope you have enjoyed seeing my wet on dry watercolour work. I really encourage you to give them a go as you might find a new favourite and relaxing hobby during this lockdown period. I’ve got quite a collection of brushes and paints and a couple of blocks of relatively cheap watercolour paper now but you don’t need much equipment to get started. I began with a couple of brushes, a travel tin of Daler Rowney half pan paints and a gummed pad of coldpress watercolour paper.

Let me know if you fancy giving these techniques a go and which you think might be your favourites to play around with.

Happy watercolouring,