Posted in art, ceramics, creativity

Ceramics for beginners: Creating a 3D clay form

My finished hedgehog ready to go in the kiln!

Last week in our ceramics for beginners class, we used a ‘forma’ as a basis for creating a 3D clay piece. I chose to make an ornamental hedgehog which I could have on display in my garden. In this blog post, I’m going to share the process and lots of photos I took illustrating this.

Hand built clay items, i.e. those where the clay is worked by hand and some simple tools, are usually made from slabs, coils, pinch pots or a combination of these three techniques. However, another technique is to use a ‘forma’ to support the making of a 3D object or sculpture.

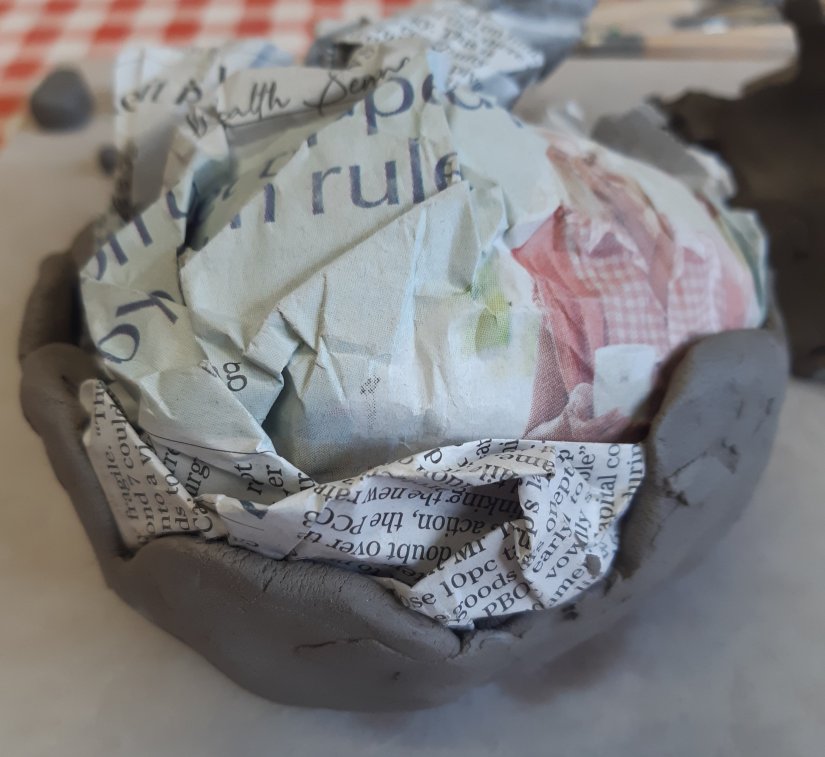
Our forma was a sphere which we made using one or two loosely scrunched up pieces of newspaper. We then created small flat pieces of clay with our fingers and added them around the newspaper, overlapping slightly and smoothing the pieces together. The idea is that if you made the item from solid clay it would take a very long time to dry out to ‘leather hard’ which is where it is suitable for putting in the kiln. By building around newspaper, the clay work is much thinner and as long as you add a hole into your item somewhere, it has a chamber inside for the air to get in. The heat of the kiln burns the newspaper away and you can tip out the ash and be left with a wonderful 3D design which is lightweight.

To begin, you take a piece of clay and form a small, flat round. Then, holding the newspaper sphere in your hand. You mold the shape onto the ball. You then continue to add small flat pieces around the newspaper and start to create the shape required for you object. As mine was to be a hedgehog, I began to manipulate into a kind of oval shape with a flattened base and then squeezed one end to create a snout shape.
The next step was to add a round hole on the base of the form which I did using a pointed metal tool and then dug out the clay using a looped piece. This is to let the air circulate around when the item is in the kiln and is essential to prevent the work from exploding! The hole won’t be seen as it is on the base of the work but I did try to make it nice and neat.

An air hole to allow the very hot air to circulate around the piece in the kiln

After adding a hole at the base and scratching in my initials, tutor’s initials and the session number so that my work is identifiable after firing, I made the features of the hedgehog i.e. a dog’s nose shape, some small balls for the eyes and four little feet. I create two circular indentations to place the eyes and then used the score and slip technique to attach them. If you want to see how ‘score and slip’ works click here for my previous post which contains a great link.

I was a little bit scared to add some texture to my design in case I messed it up, so I did a little practise on a small ball of clay first. Then, I added long, gentle cuts randomly all over the back of the hedgehog using a plastic knife from my modelling tools box.
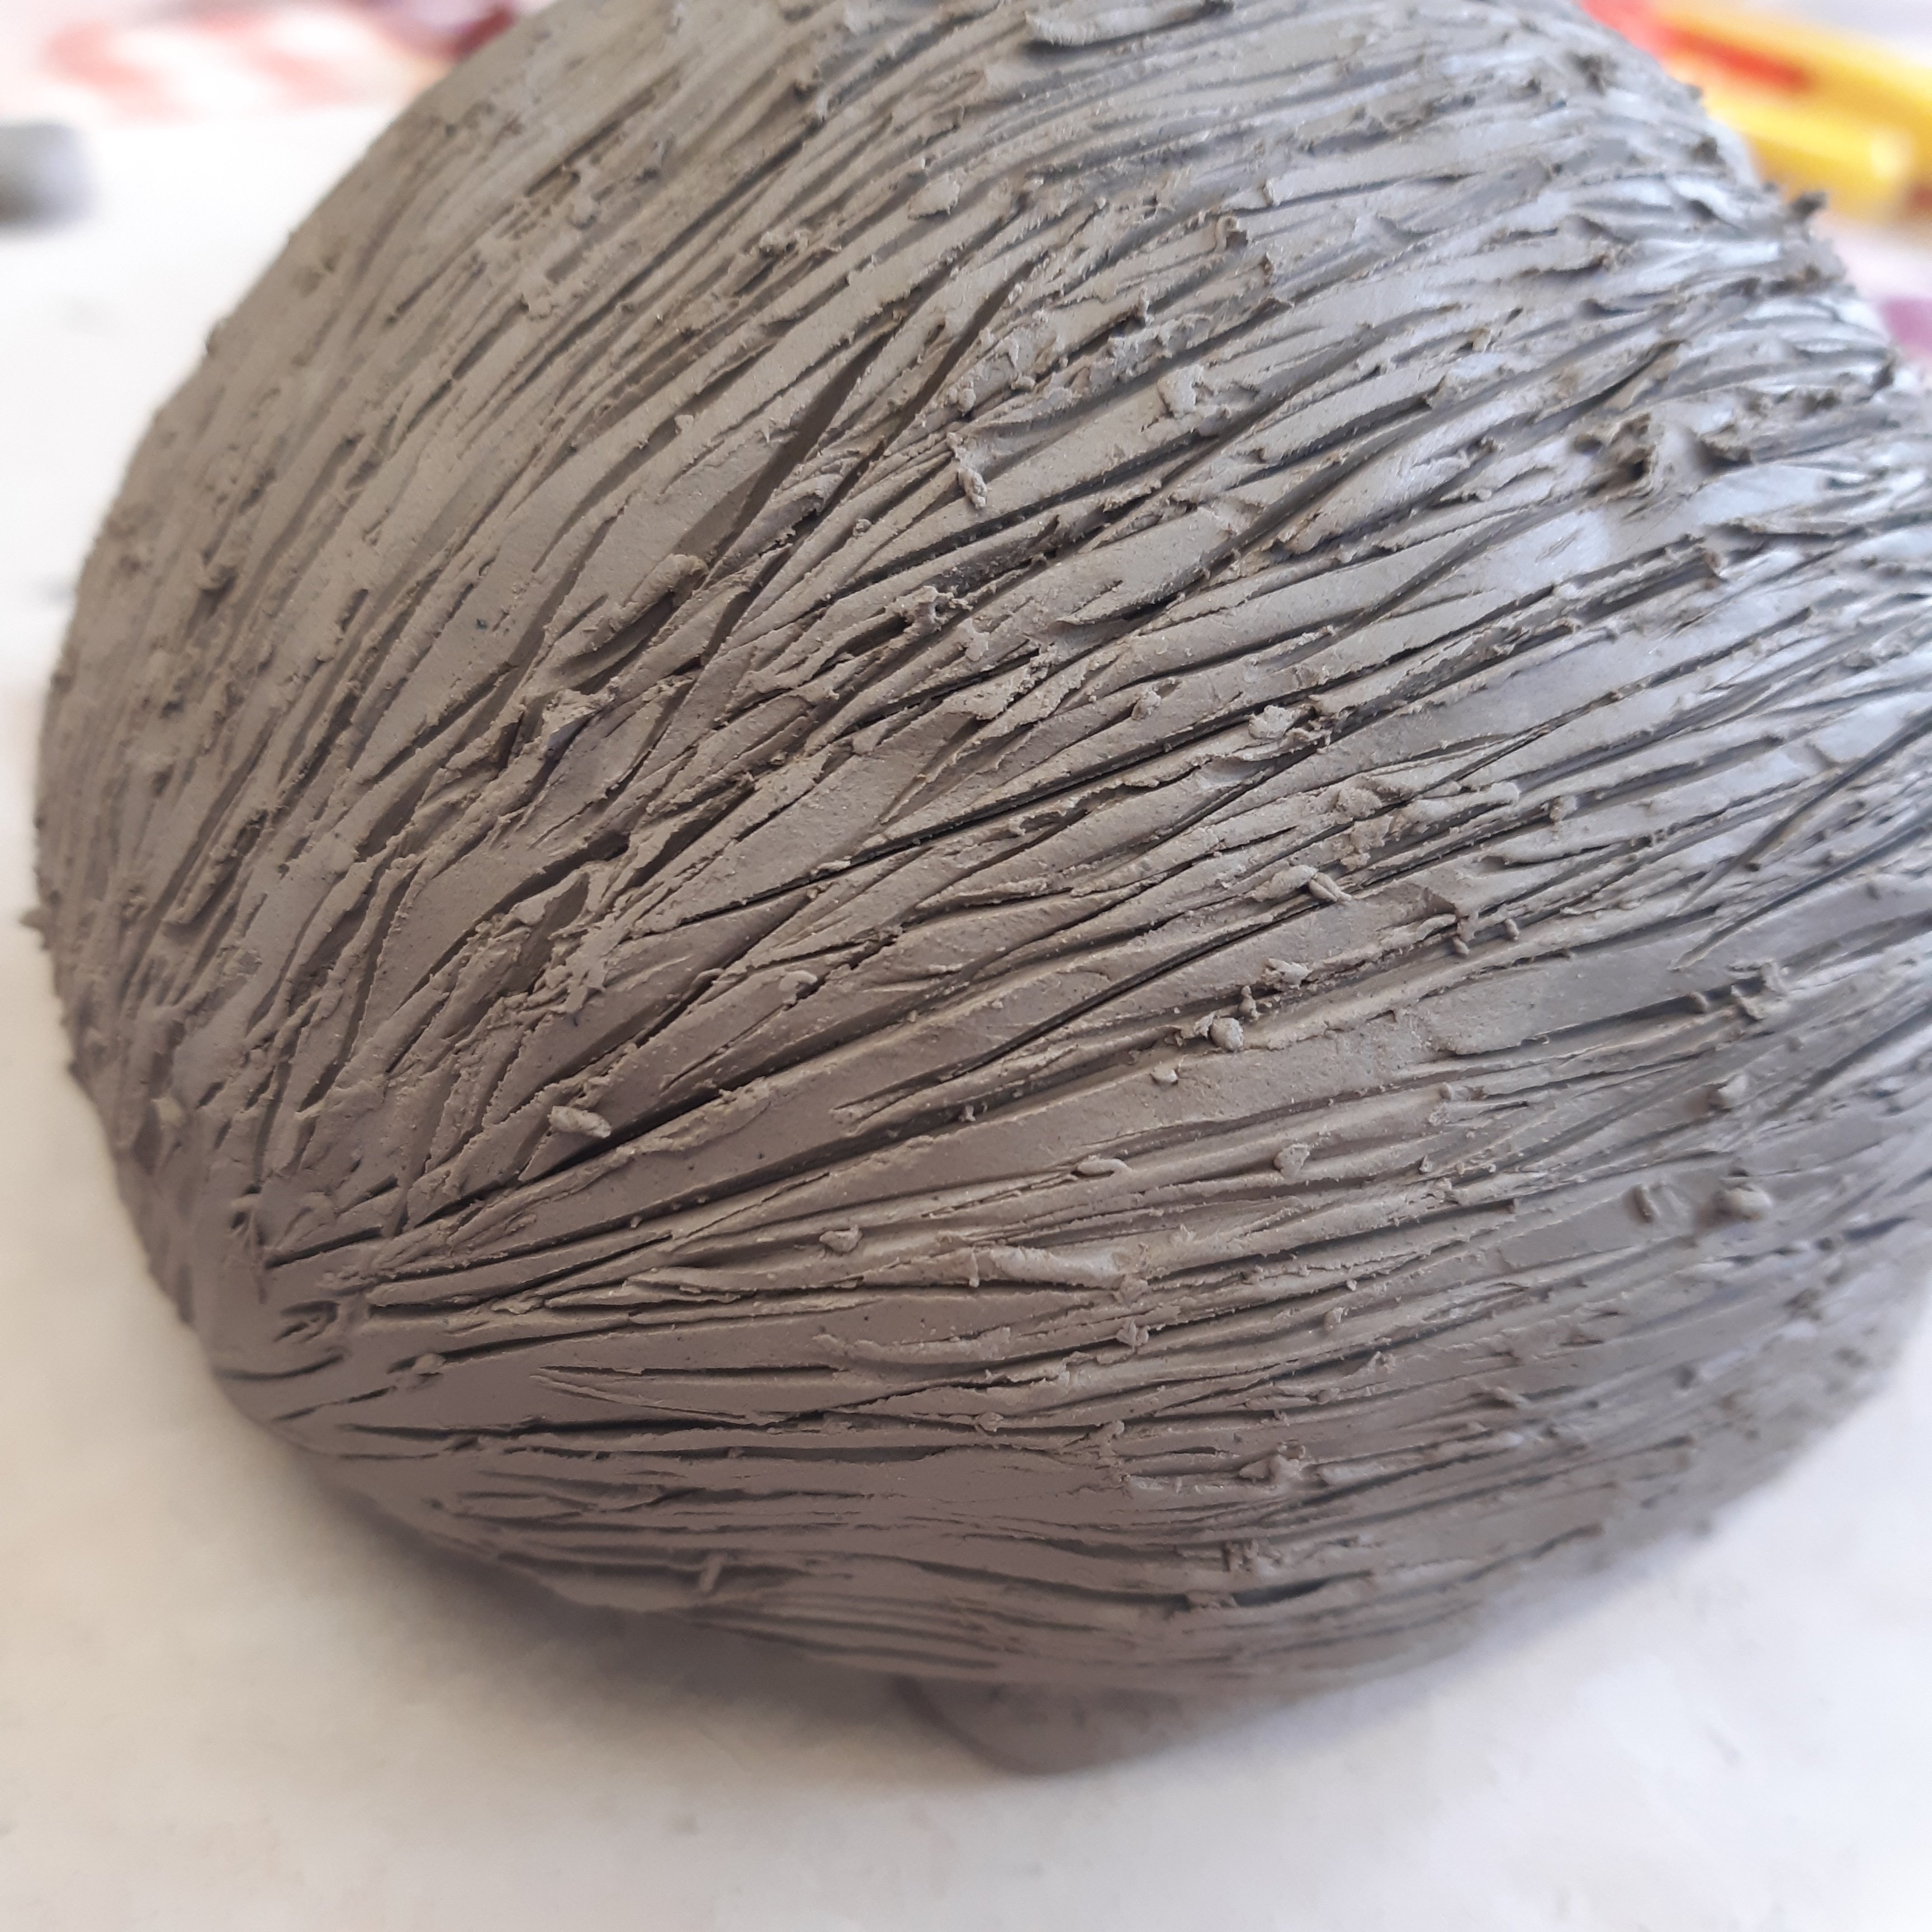
Texture to create the idea of spines on the hedgehog’s back

Finally, made small snips with a pair of scissors in different places to add further texture and a spiny appearance. Again, I was frightened to do this, but I was pleased with the result in the end!

Here’s a front view of the spikes which I think look quite effective. The tutor said that when I add the glaze after he has been fired, it will go into the places where I have snipped and make different intensities of colour which will add to the effect and should look quite striking. I can’t wait to get started with this but he might take a while to dry out before he can go in the kiln. I’m also looking forward to glazing my little plant pot holder from a few weeks ago too.

I hope you’ve enjoyed seeing my hedgehog taking shape and liked reading about the process. If you ever get the chance to do a beginners ceramics course, I can definitely recommend it as it’s great to try something new and both the course participants and the tutor are lovely and so helpful. I always look forward to my time at the arts centre each week and find it really therapeutic in so many different ways.

Posted in art, creativity, mental health, Mindfulness, watercolour painting, wellbeing, wellness

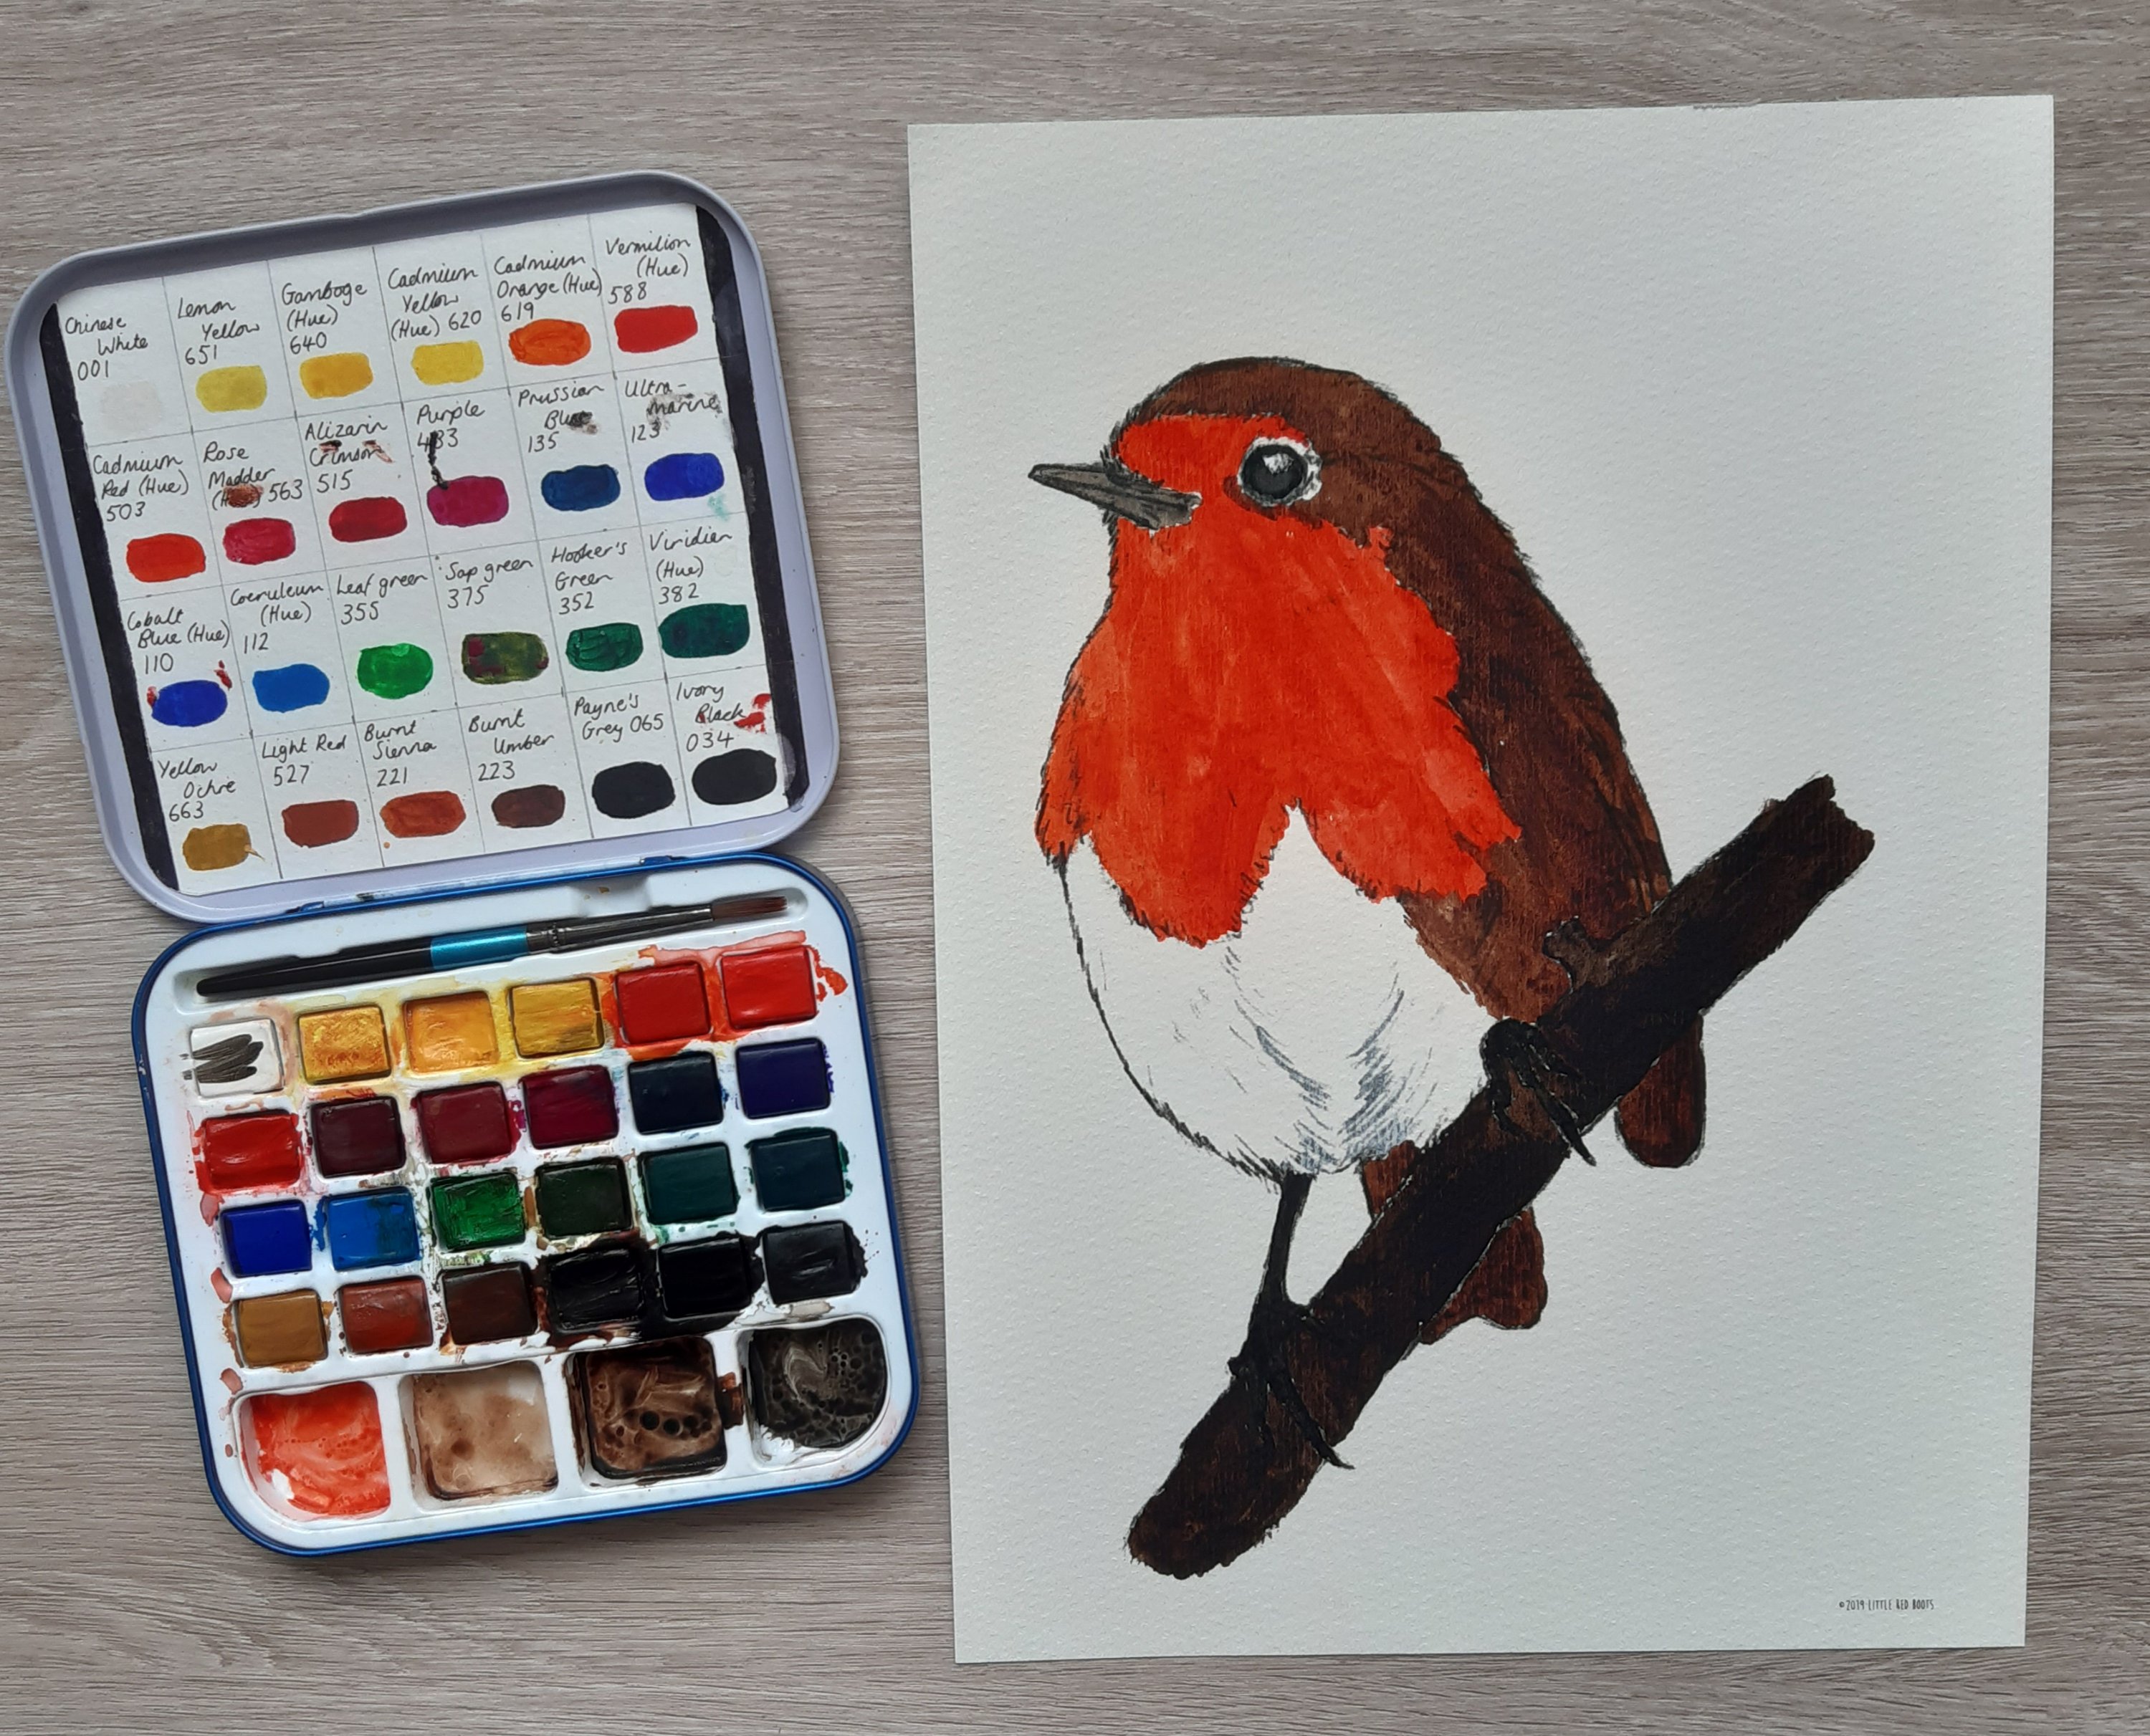
Watercolour design pad: a simple red robin

A few weeks ago, I picked up a design pad containing line drawn images for watercolour painting. As I find drawing really difficult, I though this was an ideal way to practise my watercolouring skills without needing to draw my own pictures.

The pad contains 24 A4 size pages with 12 designs so you get two copies of each image. When I purchased it, I wondered why there was several of each image but as I messed up the first robin, I was glad of a second chance!

The pad contains animals and birds and one floral image.

I chose to start with the robin design as I love birds and we have had a robin visiting our garden each day for the past few weeks nibbling on the fat balls and seed mix I put out.

The paper in the pad doesn’t appear to be proper watercolour paper but I did find it easy to paint on and I was able to get the paper quite wet without it going soggy or wrinkling as it is quite dense.

I thoroughly enjoyed having a few quiet hours mixing and applying the paint and was pleased with the results on my second attempt which you can see below. I might add some highlights to the robin’s feet using my Posca paint pen or a white gel pen but I’m waiting a while and may do a test on a piece of paper as I don’t want to spoil my work.

My finished robin and my very messy paint palette!

I’m trying to find more time for doing creative activities as a way of boosting my mental health and after I’d finished painting I felt so relaxed and happy with what I had achieved. If you love getting creative, I can well recommend doing a little watercolouring as a way to wind down after a busy day as a change from sitting watching TV or mindlessly perusing the internet on your phone.

If you live in the UK and are interested in buying the watercolour pad, I picked mine up in Aldi but have also seen it at a slightly higher price in The Range shop. If you want to find out more about my watercolour set, click here for my previous post.

Posted in art, creativity, Planning and journaling, watercolour painting

Setting up my bullet journal for October

Hi everyone. Hope you’re all well and enjoying the beginnings of Autumn. We’ve finally got some okay weather this morning so I’ve been able to take some bright enough photographs of my BuJo set up for next month and thought I would share them with you.

I decided to keep my spreads relatively simple and to a minimum this time as I found that I was tracking far too much in September and couldn’t keep up with it all and got quite overwhelmed. I’ve just done a quote page, a cover page which features a little watercolouring piece that I did, a double page monthly calendar and a planning page for my blog.

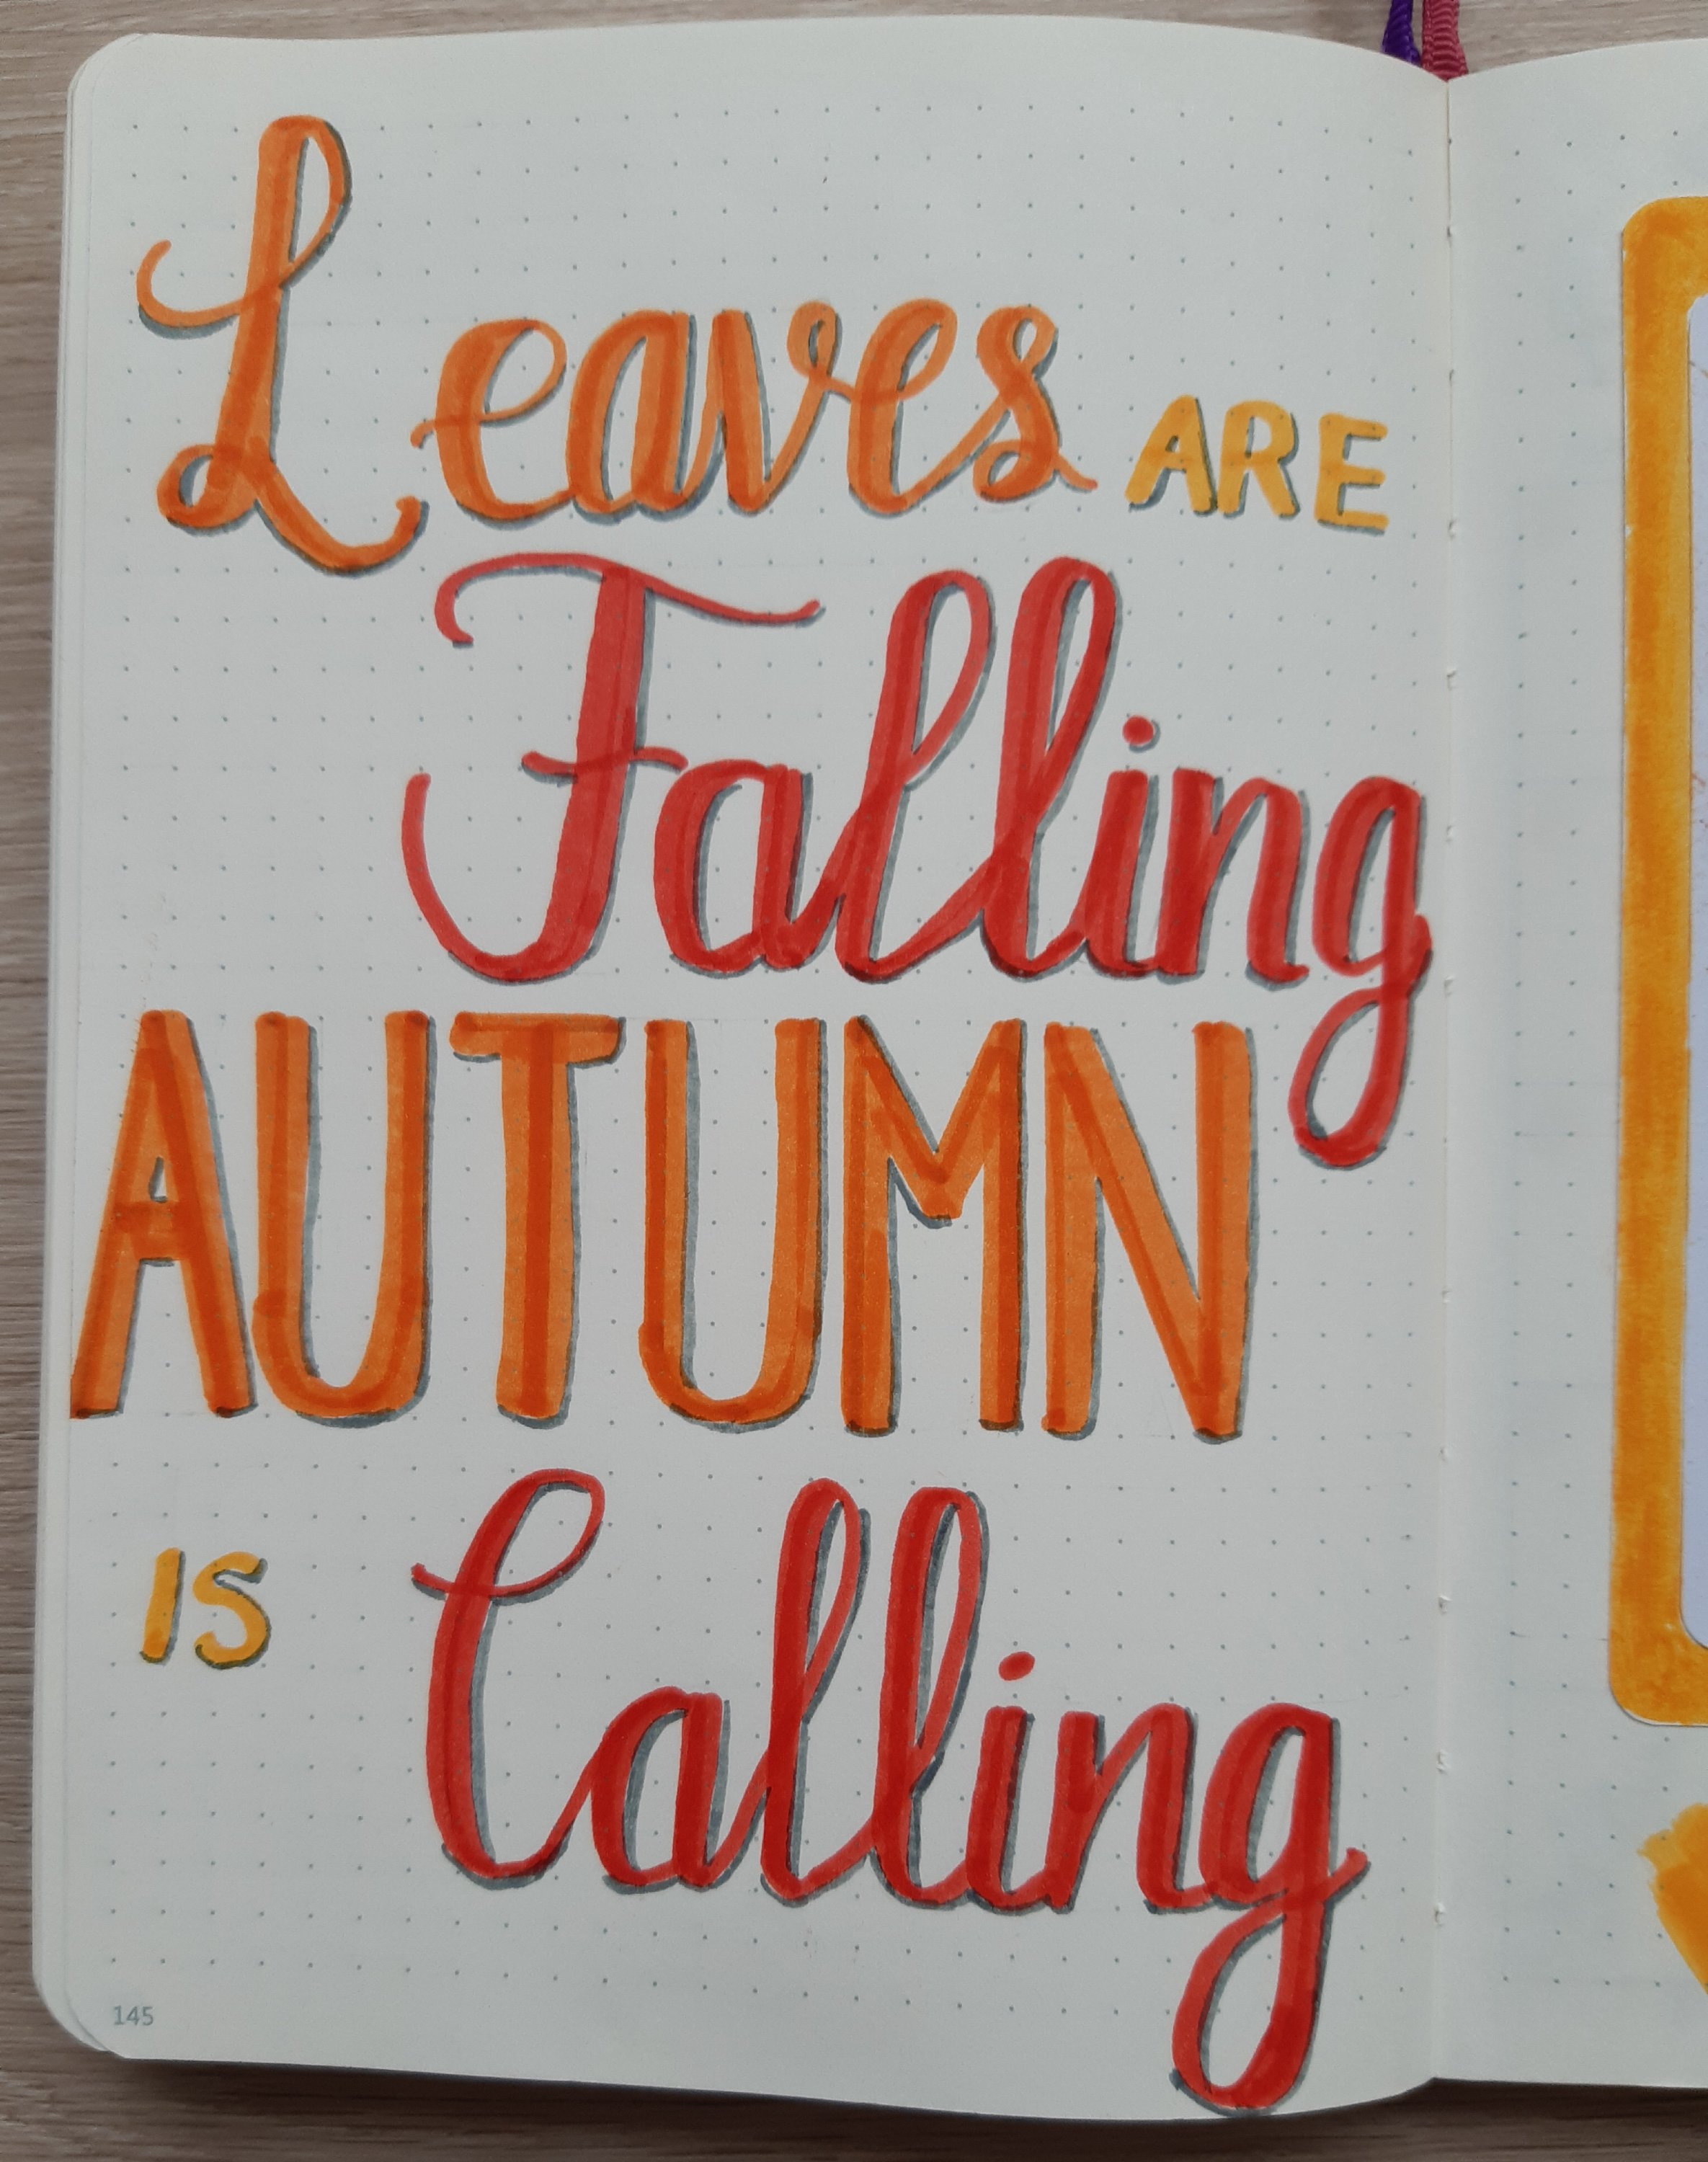
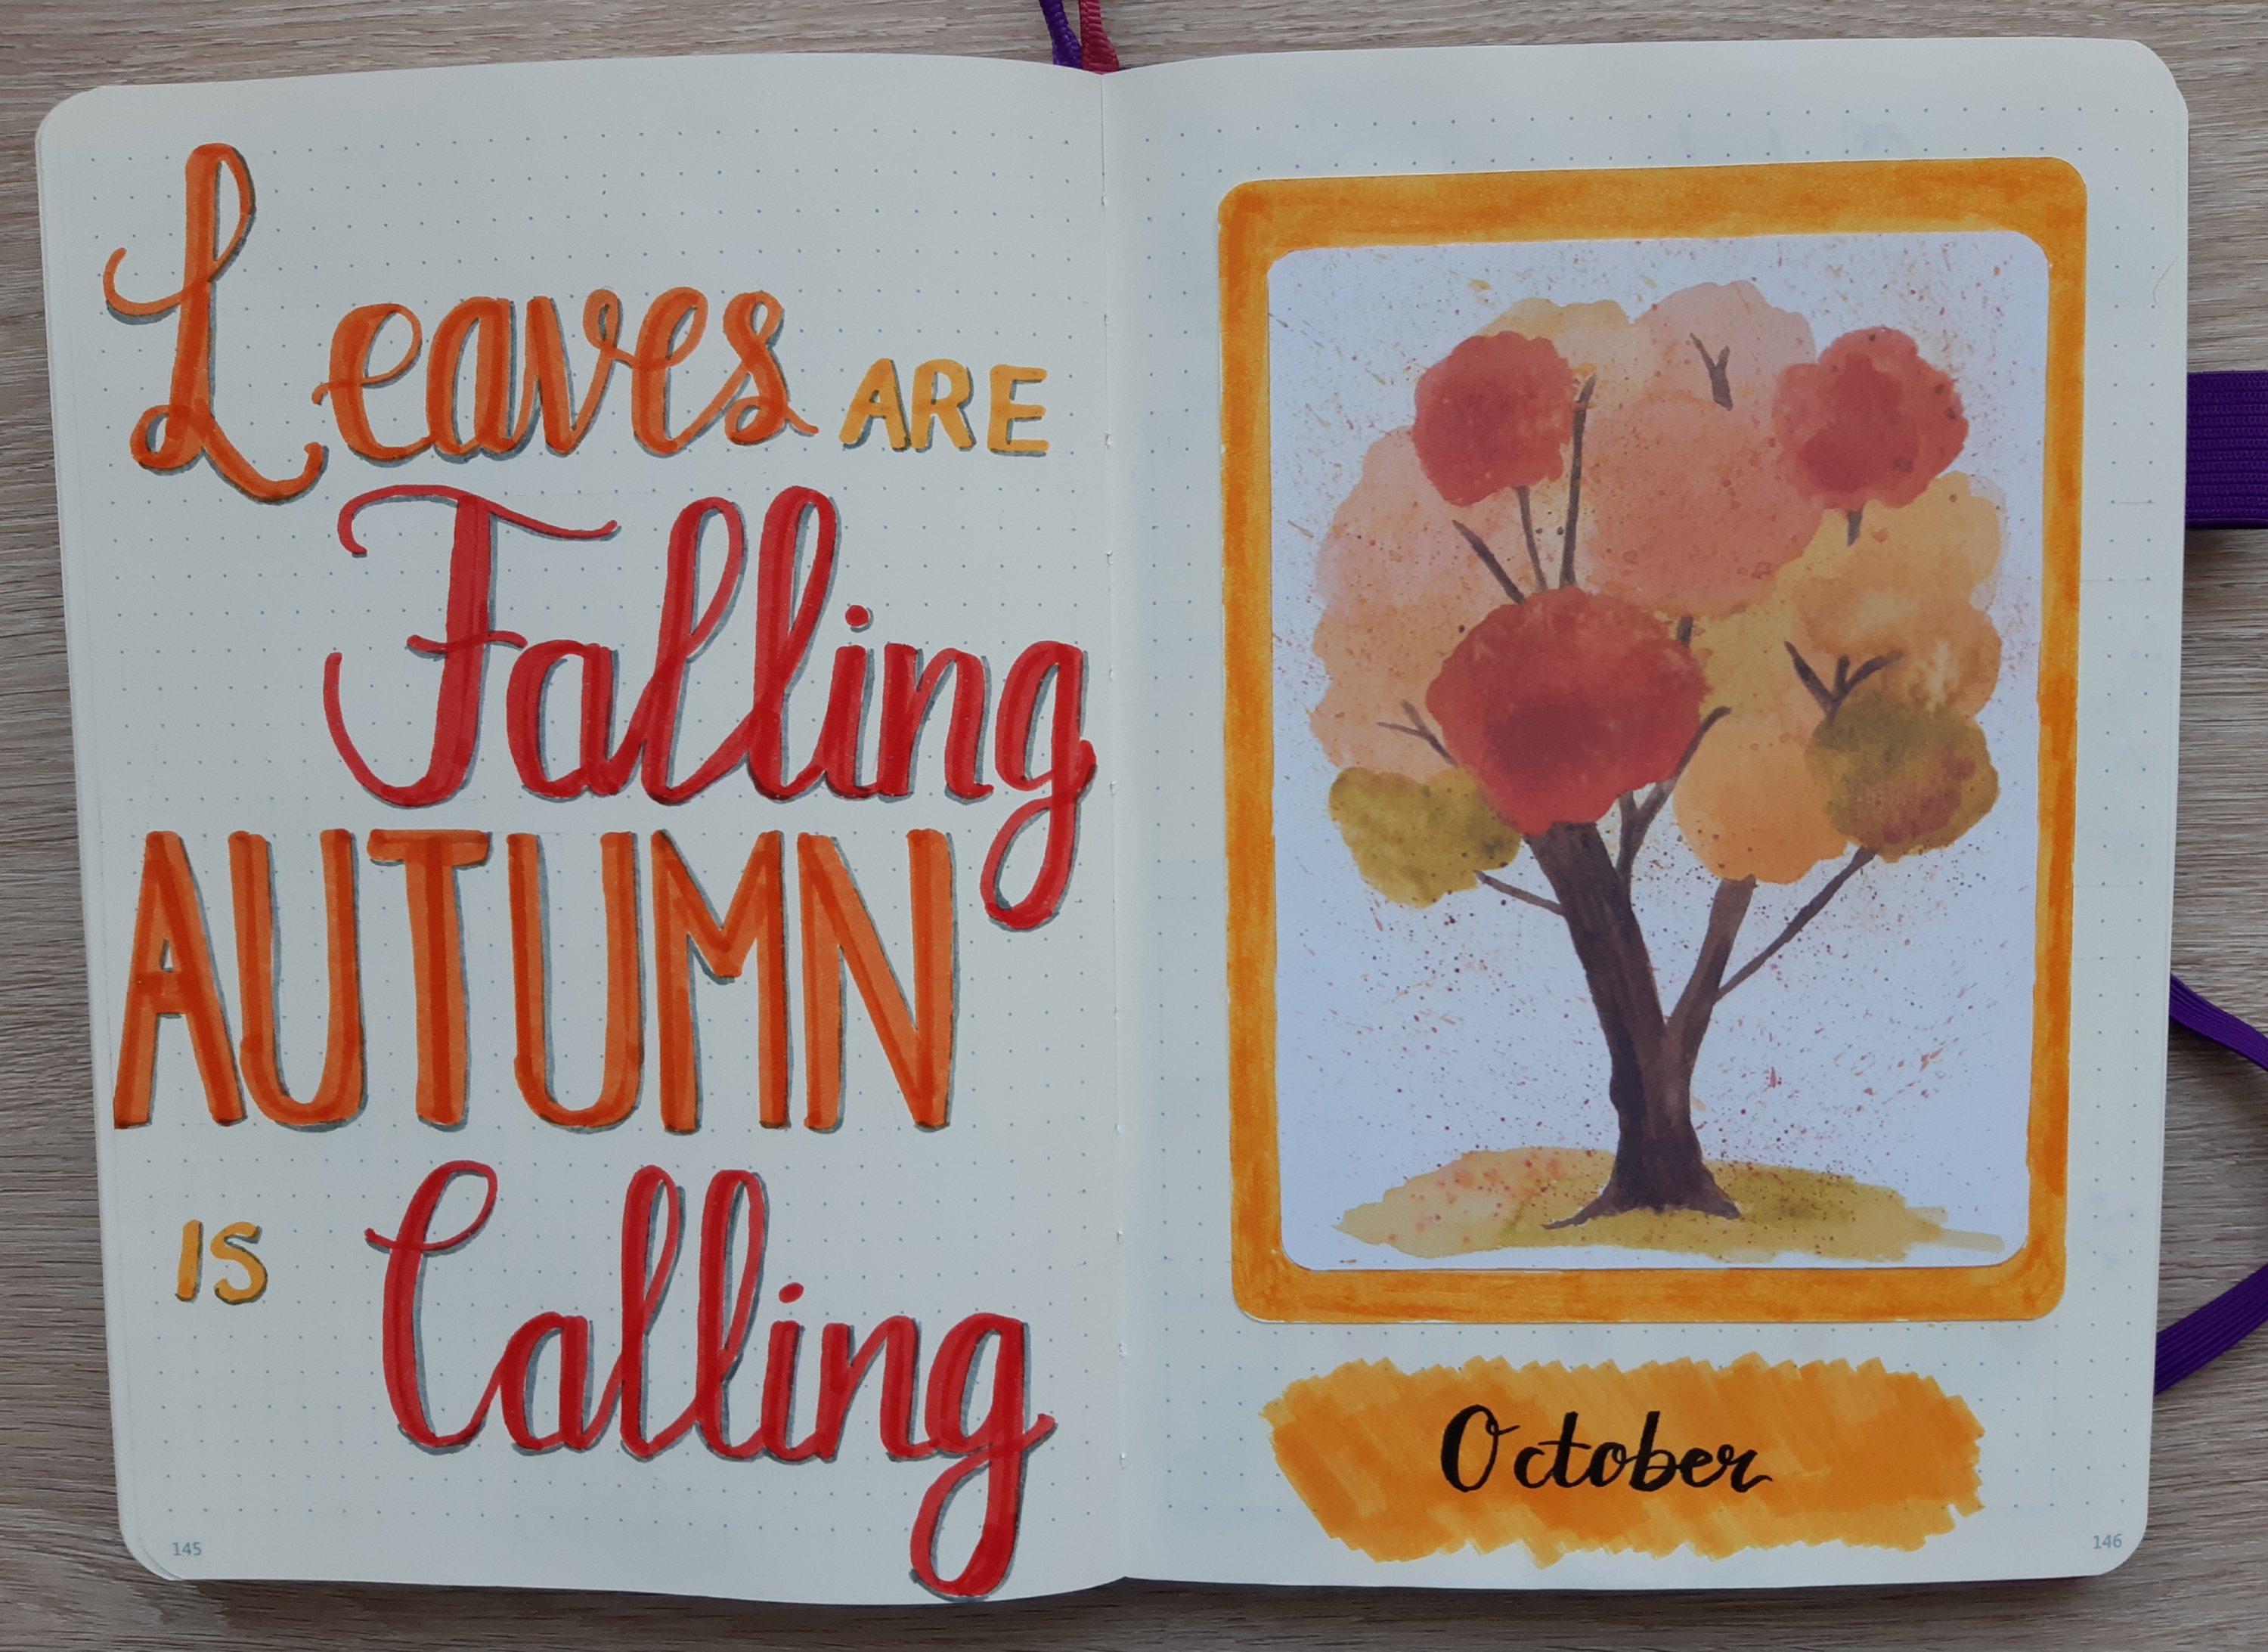
For my quote, I chose a simple Autumnal reference and as I was writing it, I had a vague feeling I’d used it before. I checked back in one of last year’s Bujo and there it was. I figured it didn’t matter and that I must really love it!

3 bright and juicy Crayola supertips plus a drop shadow using the grey tip of my Tombow dual brush pen

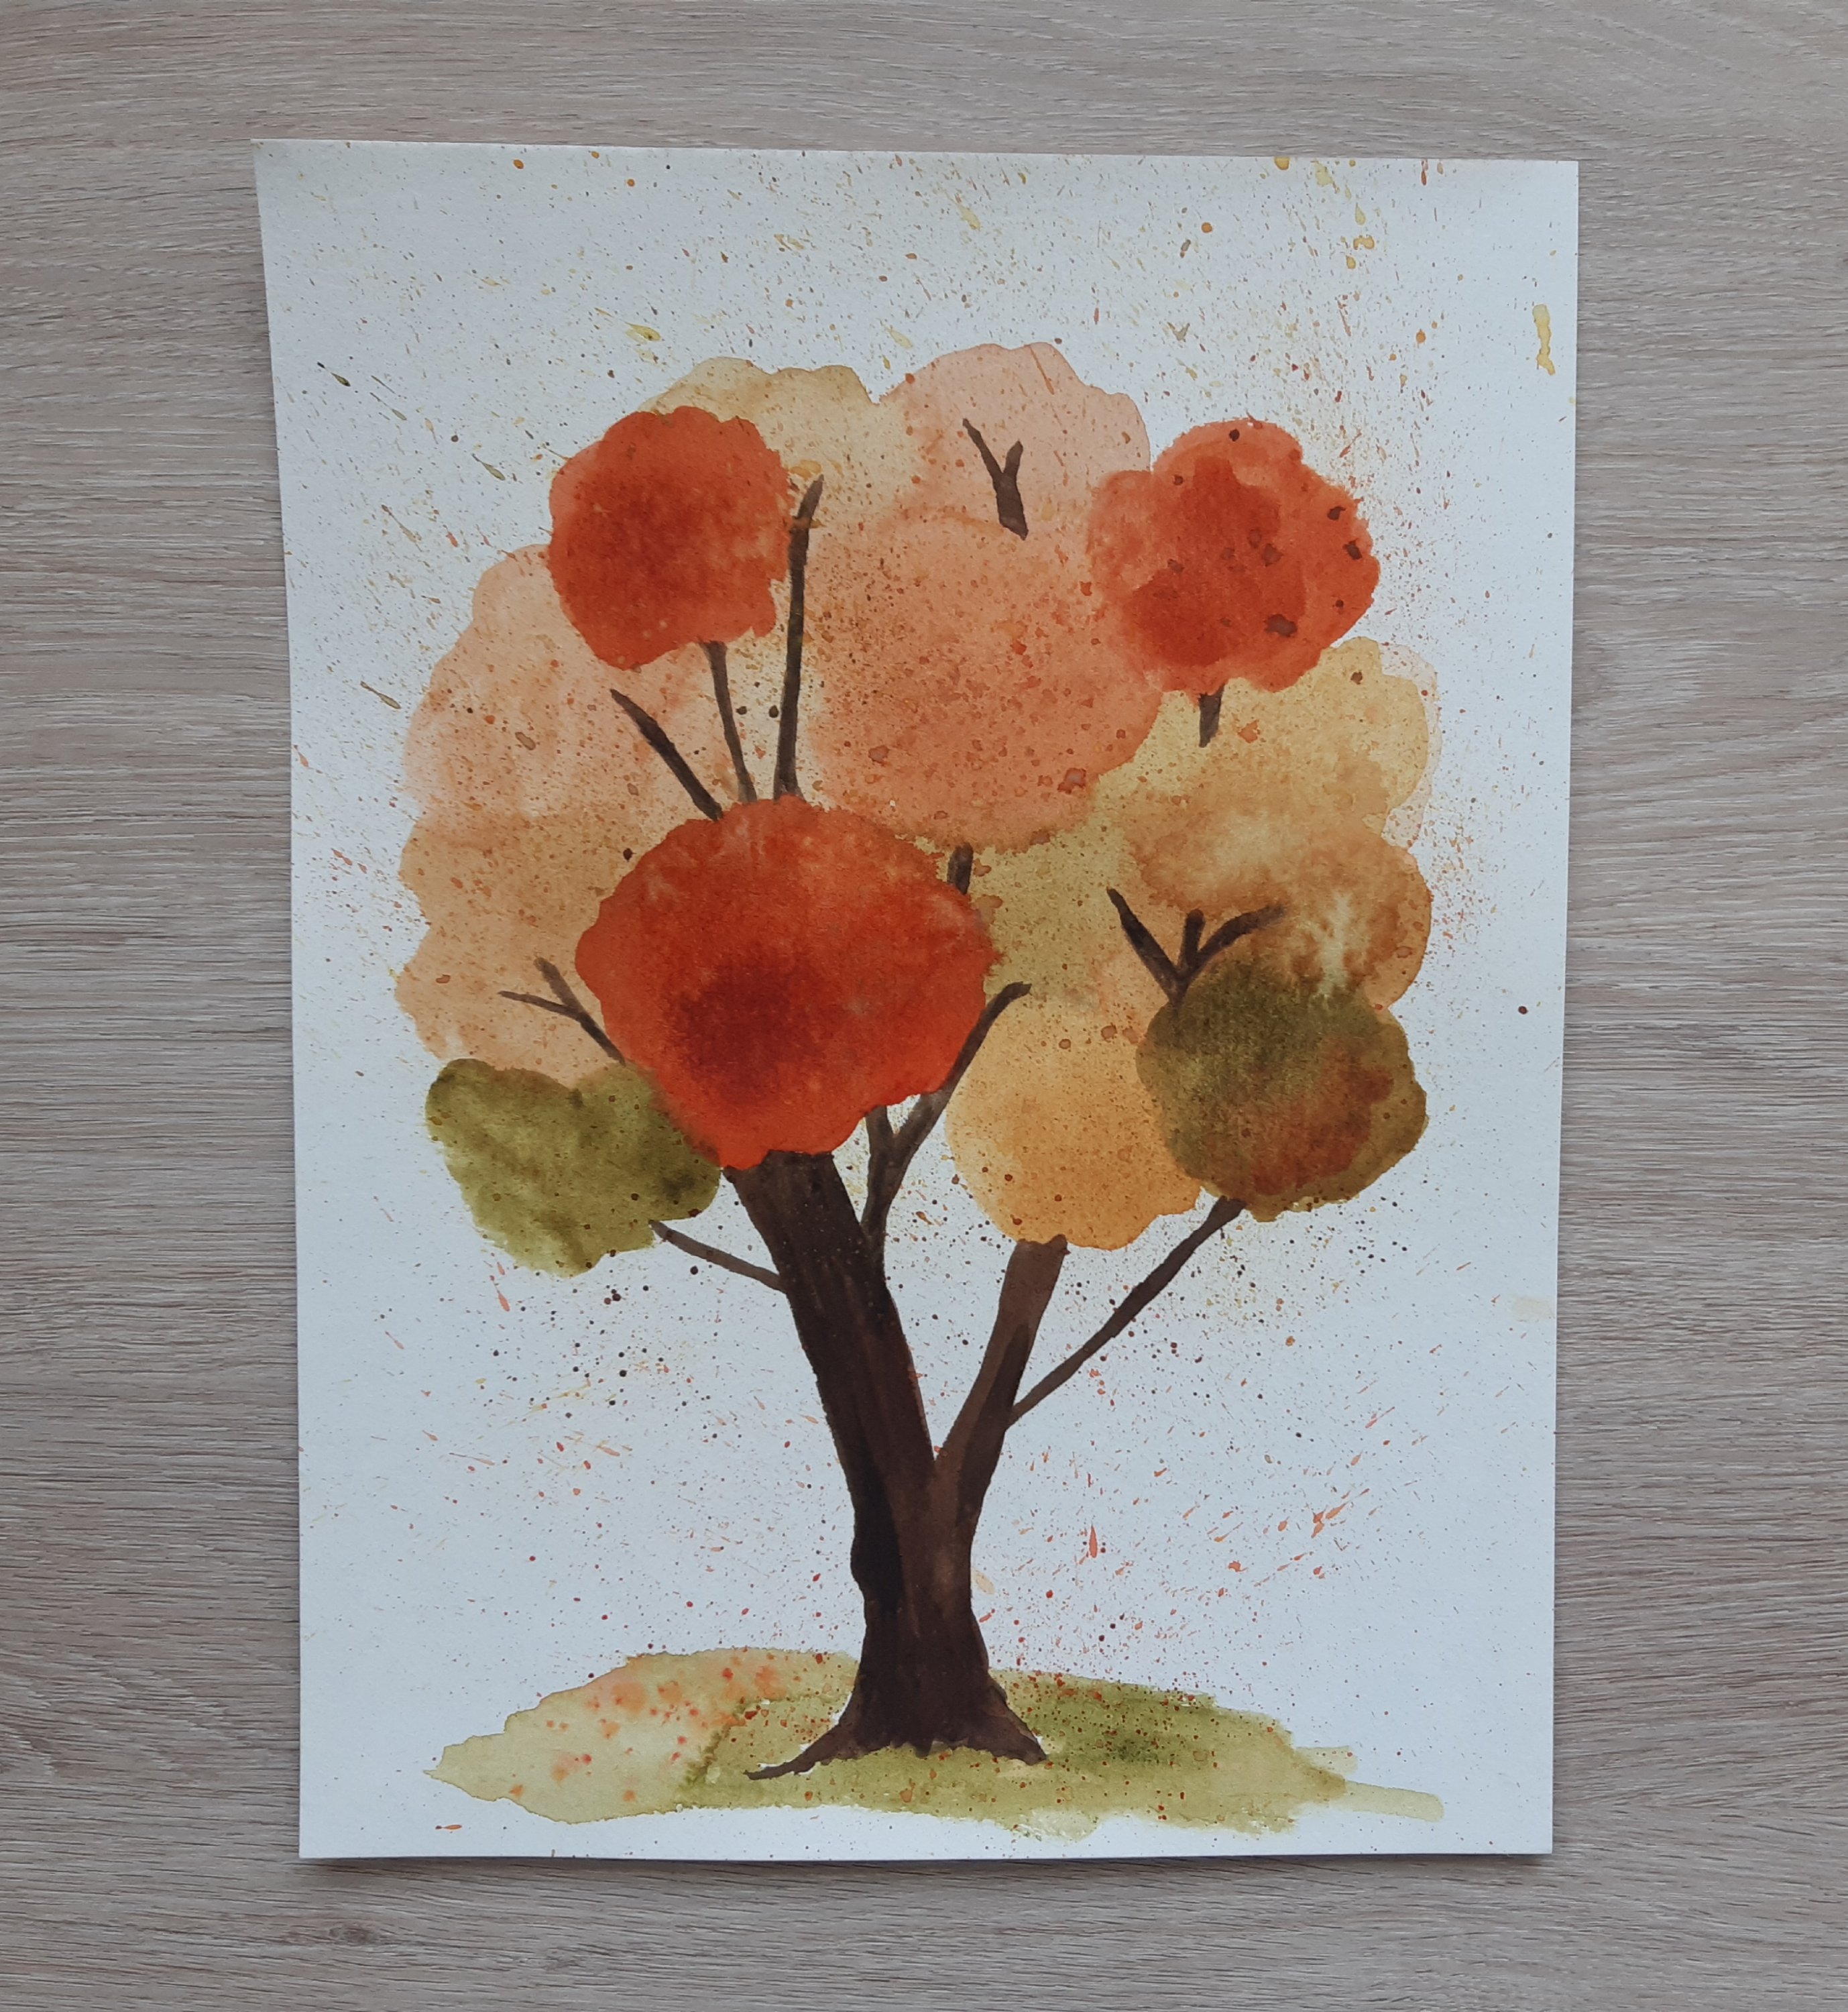
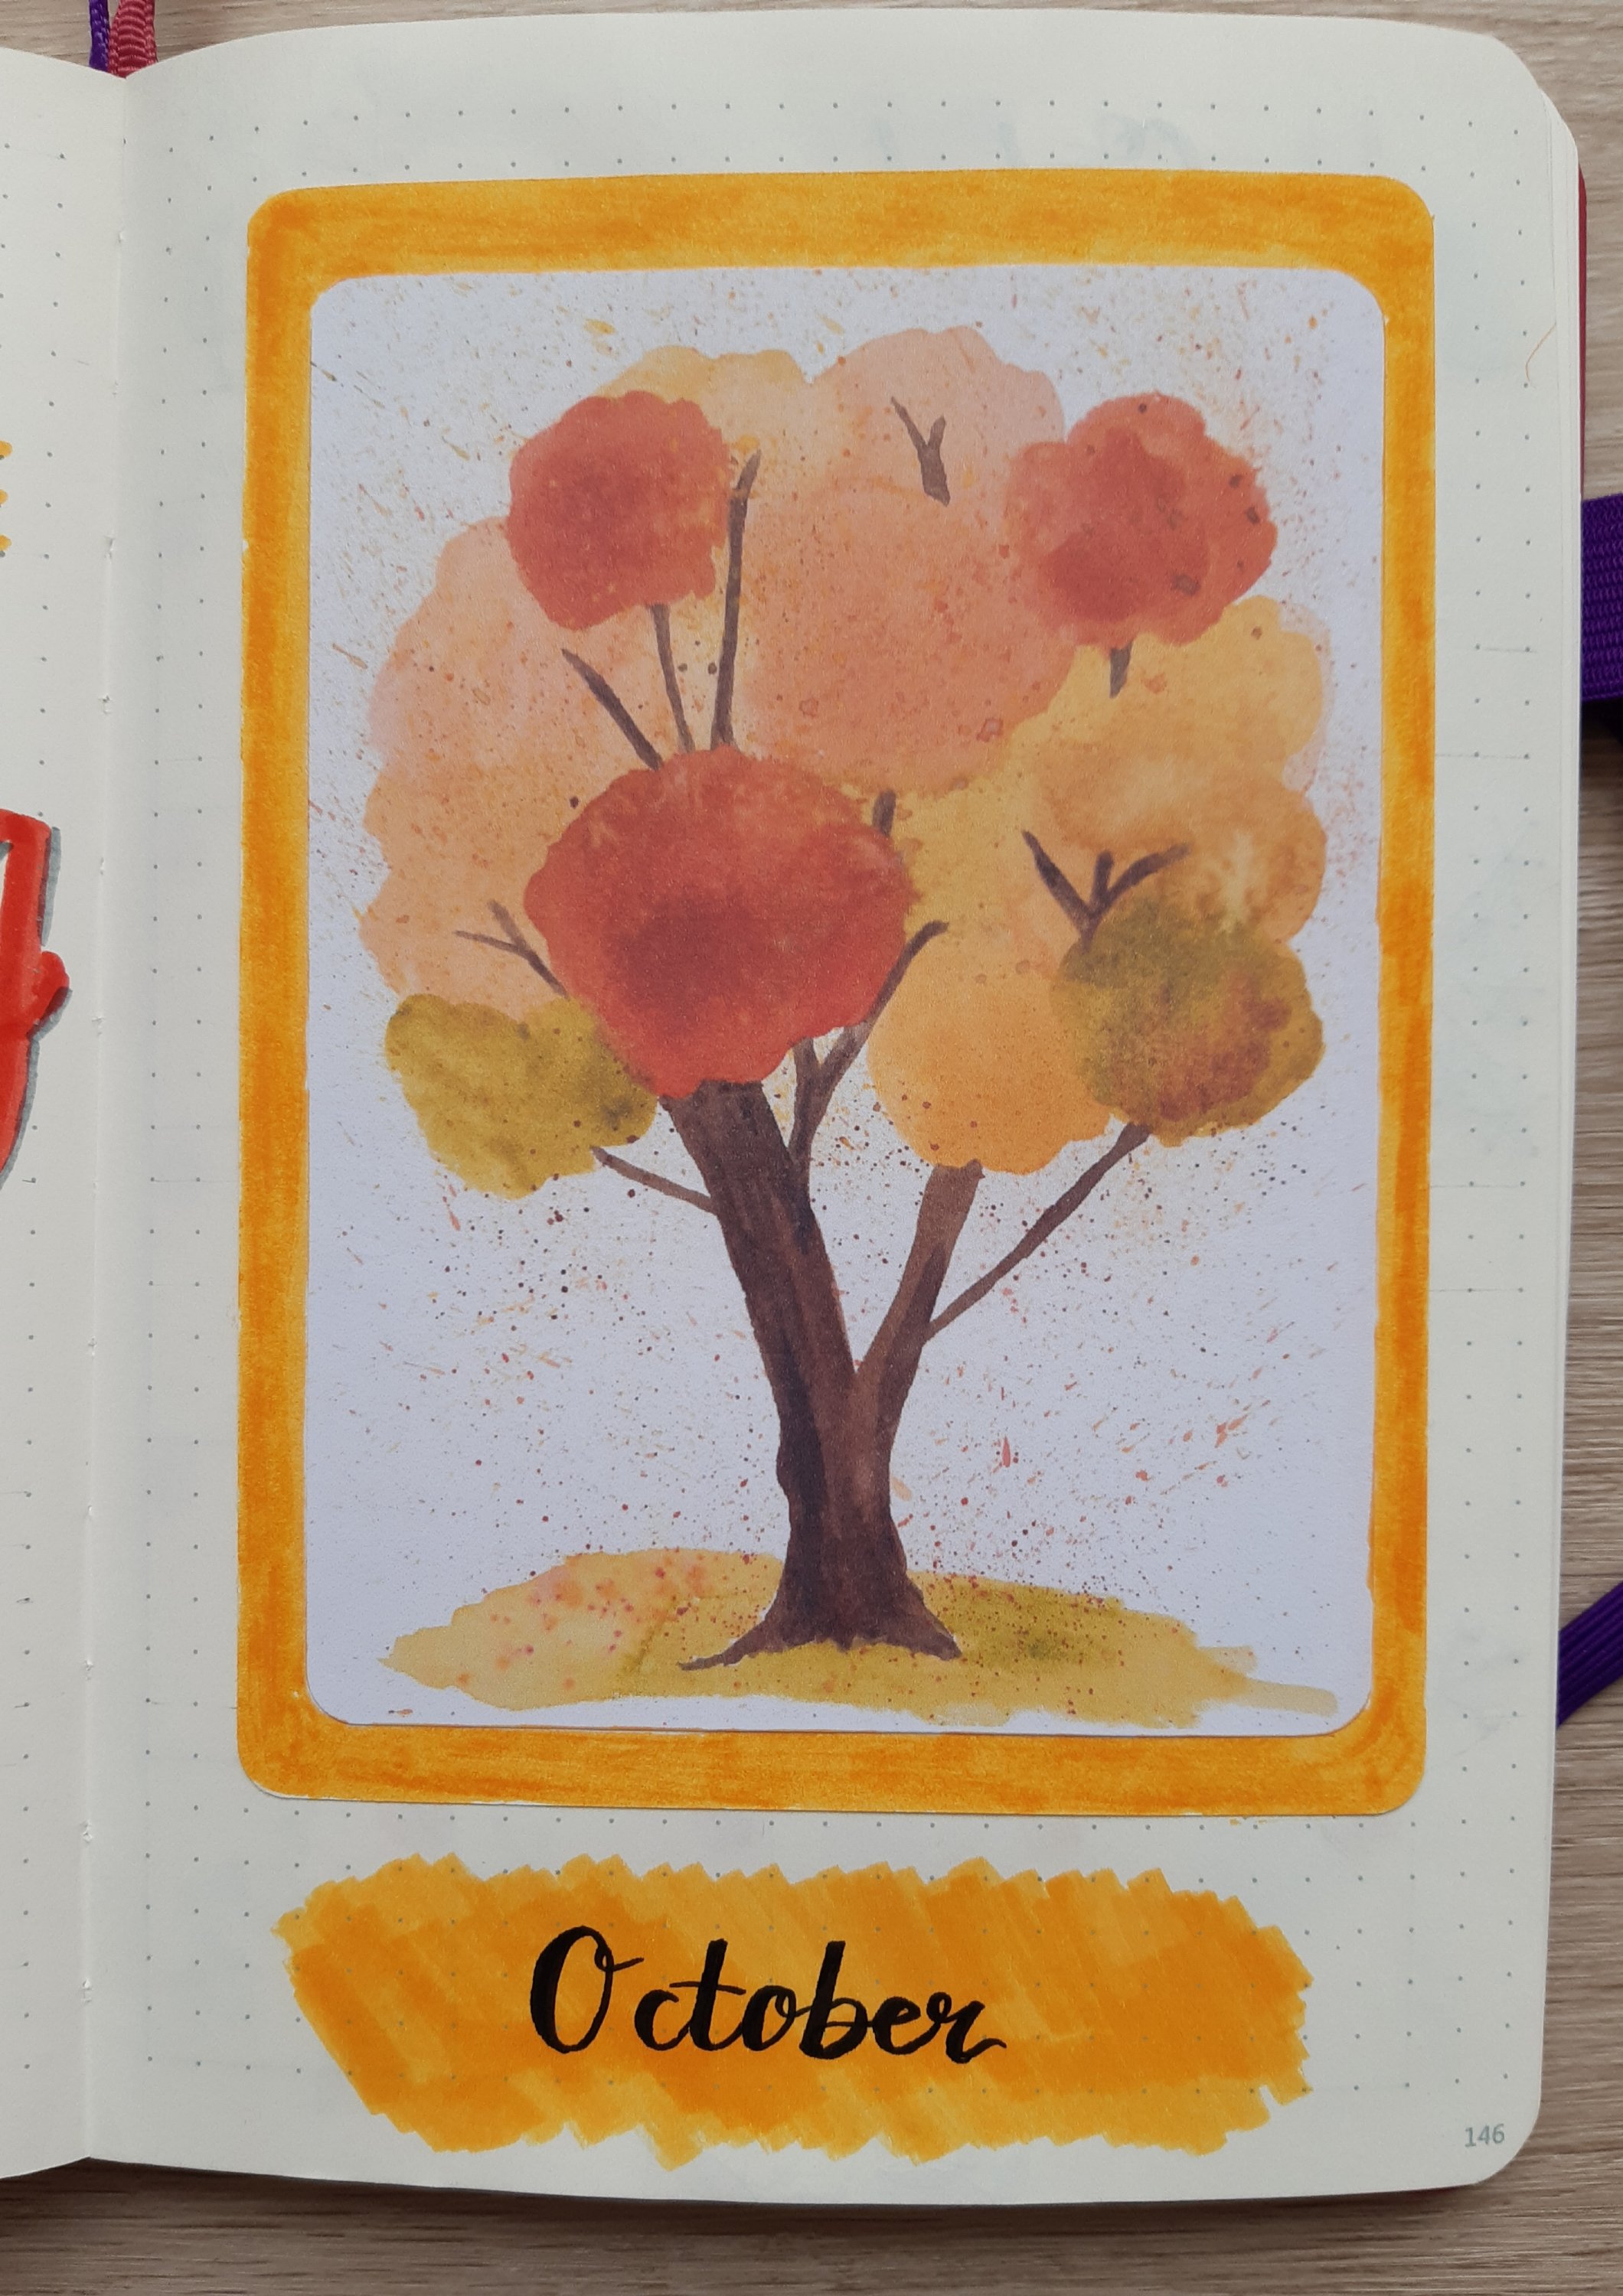
This watercolour was created using my new Daley Rowney Aquafine Travel Set. I followed an online tutorial and although the results don’t look the same as those done by the professional artist that created the step by step, I’m pleased with the results as I’m a total beginner. If you want to have a quick look at the tutorial, you can find it here.

Autumn tree produced on an A4 sheet from a watercolour pad

I then spent about two hours working out how to scan the image into a format that I could shrink to stick into my BuJo. After much perseverance (and a glass of wine which was most helpful ha ha!) I got it sorted. I ended up sticking a piece of paper over a mistake I made with my brush lettering but I think it looks okay now I’ve made it into a border for my picture.

October cover page

And here’s the two pages together. I think the bright colours look lovely. What do you think?

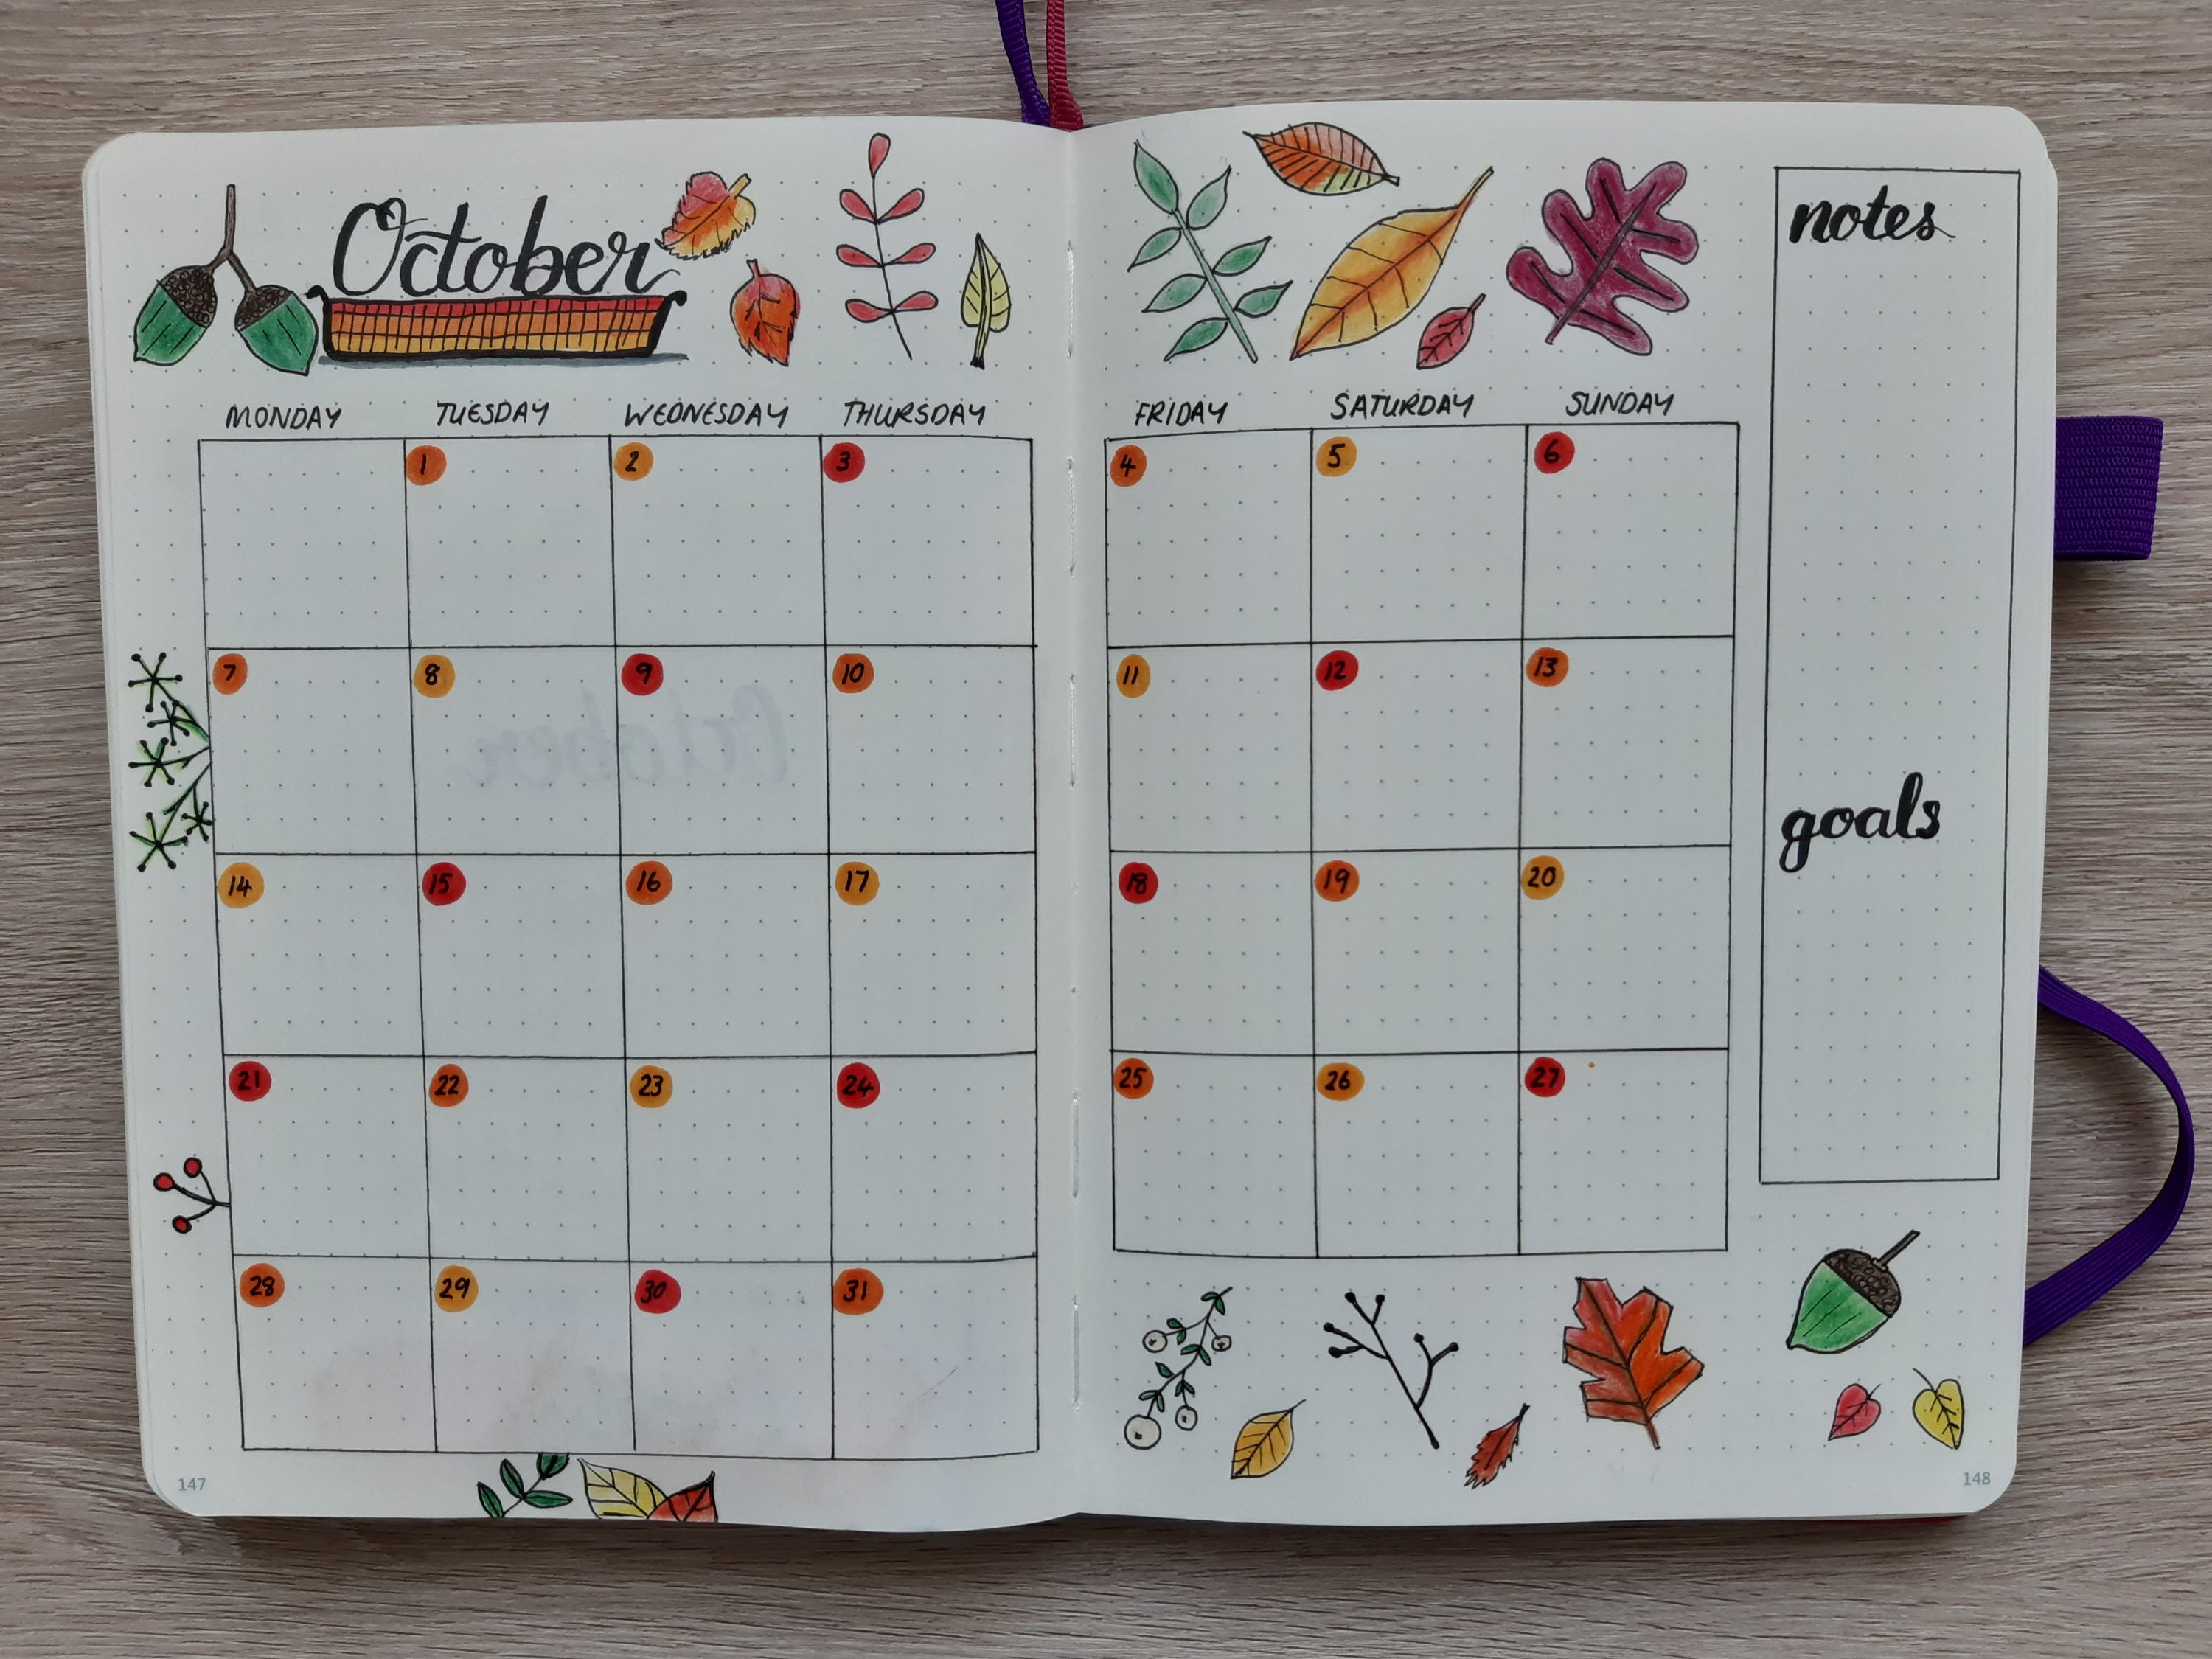
For my monthly calendar, I chose to decorate with some Autumn leaves and berries. I’m not wonderful at drawing but I think it looks okay. I used coloured pencils to shade them in but the only problem I seem to have it that when I write on the next few pages of my notebook the colour transfers. I’m not sure if there’s a solution to this, maybe I press on too hard? If anyone has any ideas, I would be grateful to hear them.

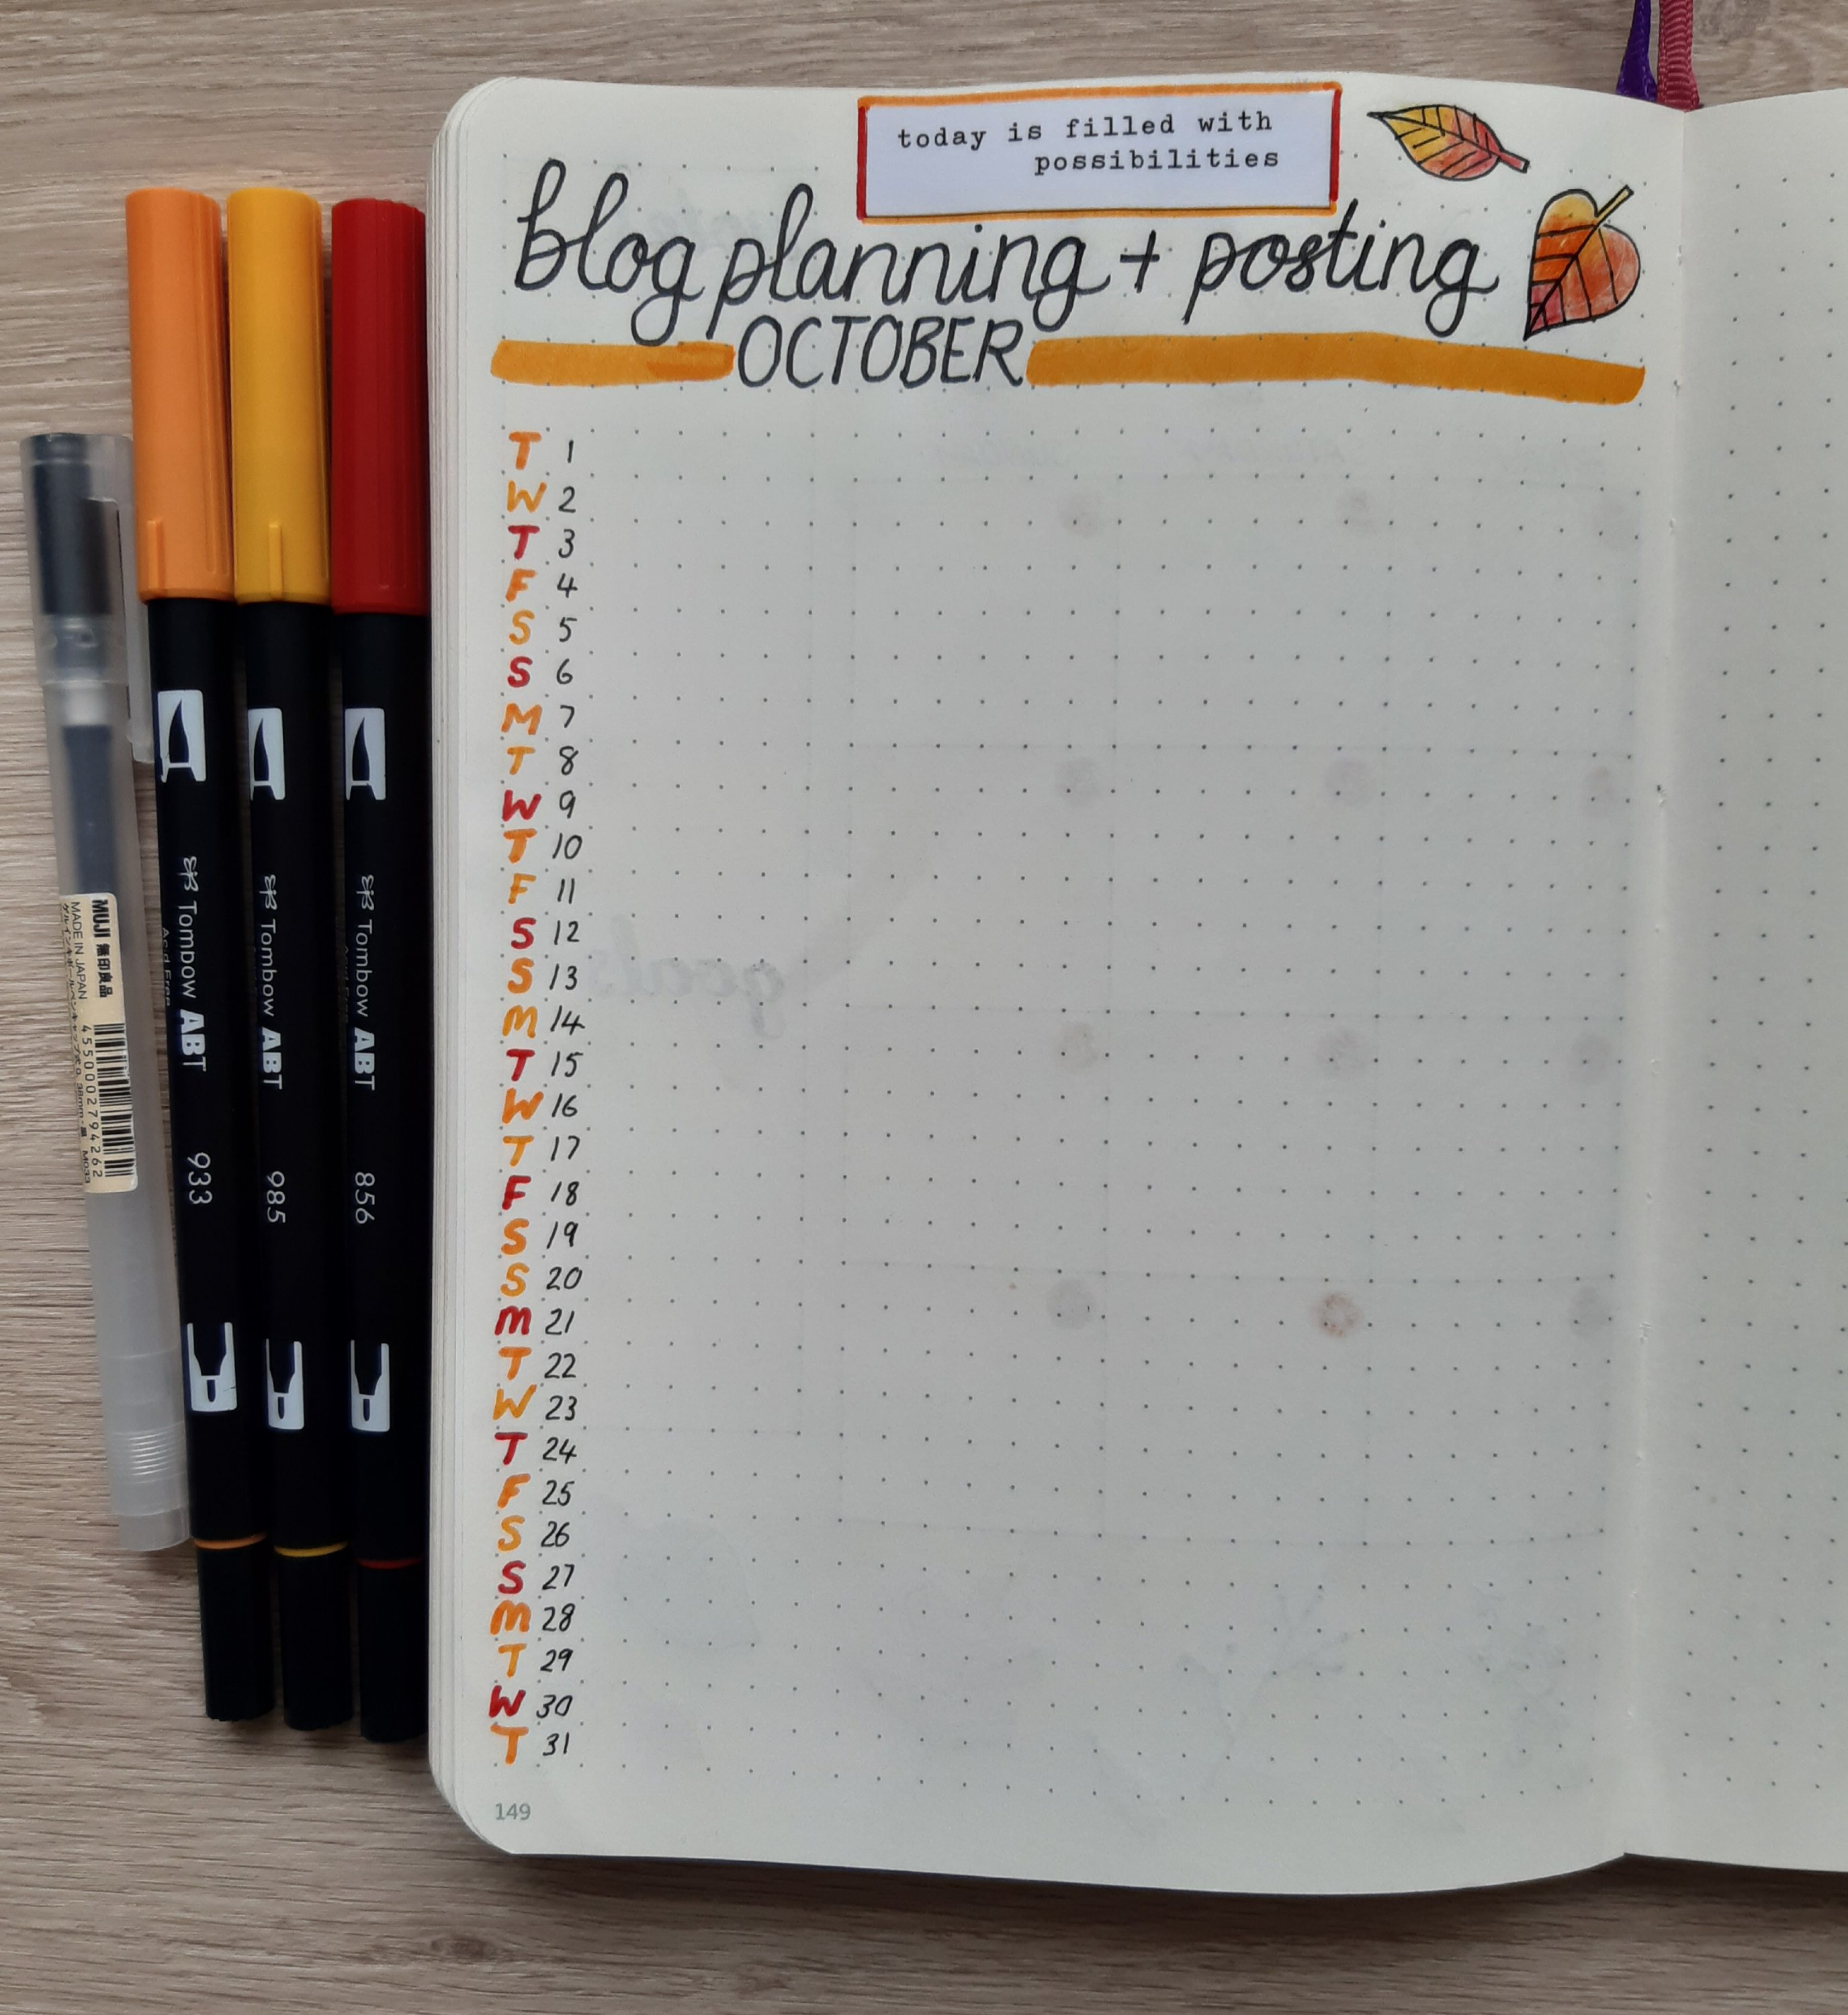
And finally, my blog planning page. On here I’m going to record days when I’m planning, reading researching as well as the titles of my actual posts.

I hope you’ve enjoyed looking at my spreads for October. I would love to hear about your chosen themes for the month and what you have planned for the Autumn. Let me know in the comments if you get the chance.

Posted in art, creativity

Ceramics for beginners: making a plant pot base

The finished pot, ready to be air dried and then fired in the kiln in about one week’s time

At the beginning of the month, I started a ceramics for beginners class. Working with clay is something I’ve been wanting to try for a while and I was so excited to find a fully funded course where I could develop the basic skills, have fun working on some exciting projects and meet some lovely people who enjoy getting creative.

Following on from week one which was our enrolment, paperwork and getting to know you session, we spent the second session learning the skills involved in creating a pinch pot, making spirals and using a press to form tiles. This week, we actually got to make a finished product that we could put in the kiln and then glaze. I decided to try my hand at making a small plant pot to put a potted succulent inside.

In order to make a nice and even pot, I decided to create a circular base and build up coils around the circumference. The previous week we’d learnt the score and slip technique which is used to join pieces of clay together. Click here to see a great tutorial I found online which shows this technique in action to make a simple clay pot.

The photograph below shows the circular piece which I created with a pastry cutter and the first rolled length of clay for the sides. After making these pieces, I then score lines around the edge of the base and along the thin roll of clay for my first layer. After the scoring, you dip your clay covered fingers in water and wet both pieces. The two pieces of clay are then pushed together. This creates a good join.

Scoring lines made using a plastic modelling tool

After making and adding each coil of clay, I blended them in to the base using my fingers to create smooth sides. This took me a long time but I was determined to get a good looking pot by the end of the three hour lesson!

Two coils of clay smoothed into the base to build up the sides
Four coils blended

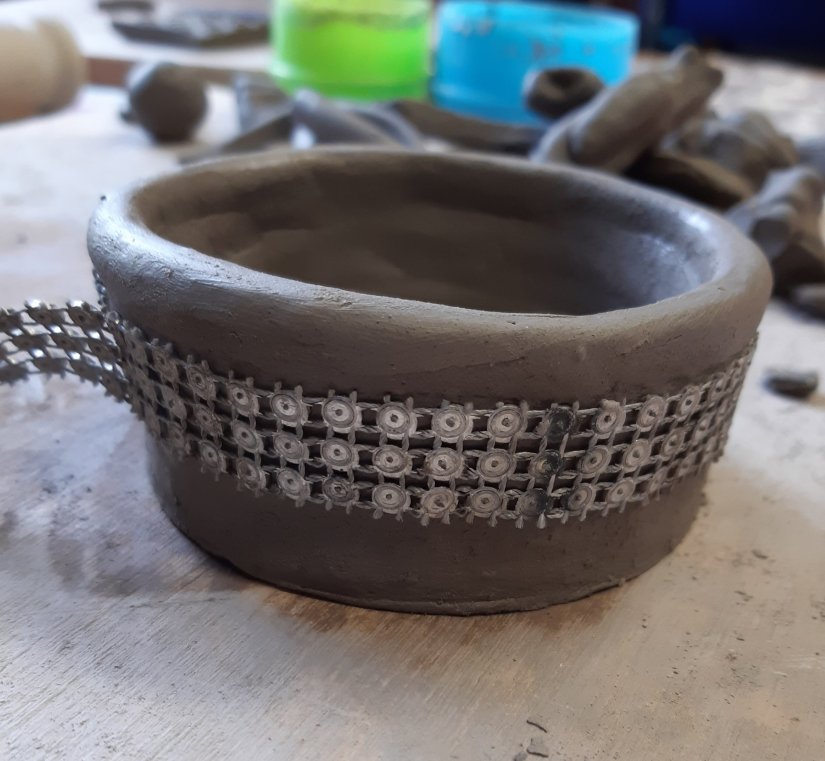
By the time I’d made four thin sausages of clay of the same width, scored and slipped each and blended them, I’d had enough of that technique and decided it was time to have some fun with adding texture. used a jewelled strip, wrapped it around gently pressed it in. I repeated this several times until I was happy with the effect.

Attaching a jewelled strip around the outside

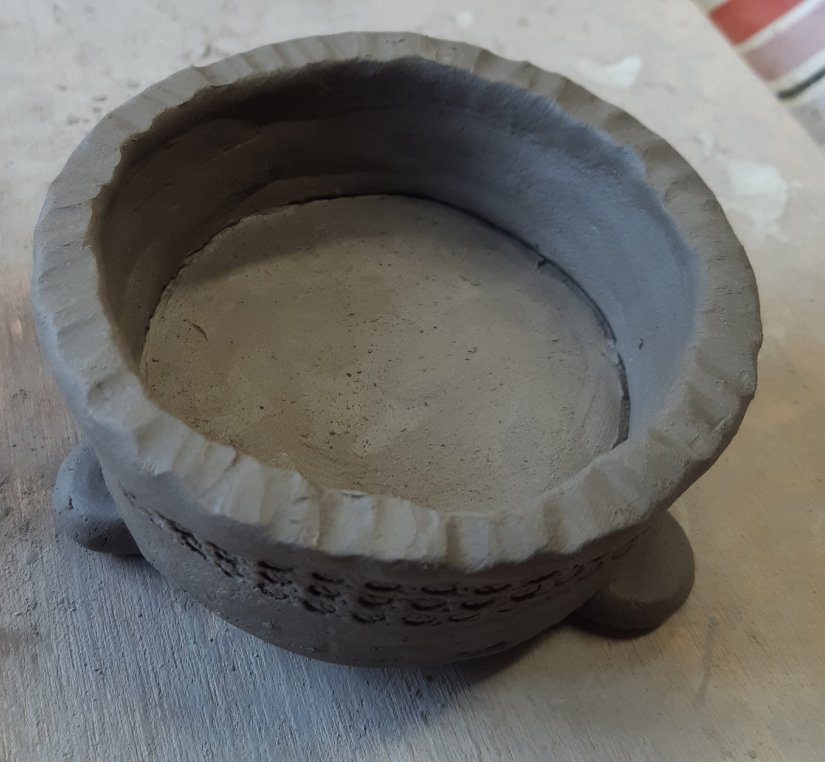
Finally, I created further texture around rim of the pot using a piece of metal dowel to make small dimples and added a trio of little feet (which I made prior to constructing the pot) to the design.

With added texture and some small feet added using the score and slip technique

And here’s my finished pot, ready to be left to air dry before going in the kiln. I’m quite pleased with the results as it’s the first pot I’ve ever made. I’m looking forward to glazing it in a few week’s time and just need to decide on a colour.

My finished pot!

Have you ever had a go at making anything with clay? If so, what did you make and did you enjoy it? I found it to be a wonderful and relaxing experience. I only used half of the clay that I was given for the session so the tutor wrapped some up in cling film for me to use at home. I’ve just ordered some modelling tools and I have plenty mark making craft materials in my stash to experiment with.

I hope you’ve enjoyed reading about my ceramic pot making experiences. Watch this space to see how it looks when it’s been glazed and re-fired. Hopefully I’ll be able to find the perfect potted succulent that fits inside.


Posted in art, creativity, life hacks, Planning and journaling, stain removal, stationery, stationery supplies

Stationery mishaps – pen stain removal

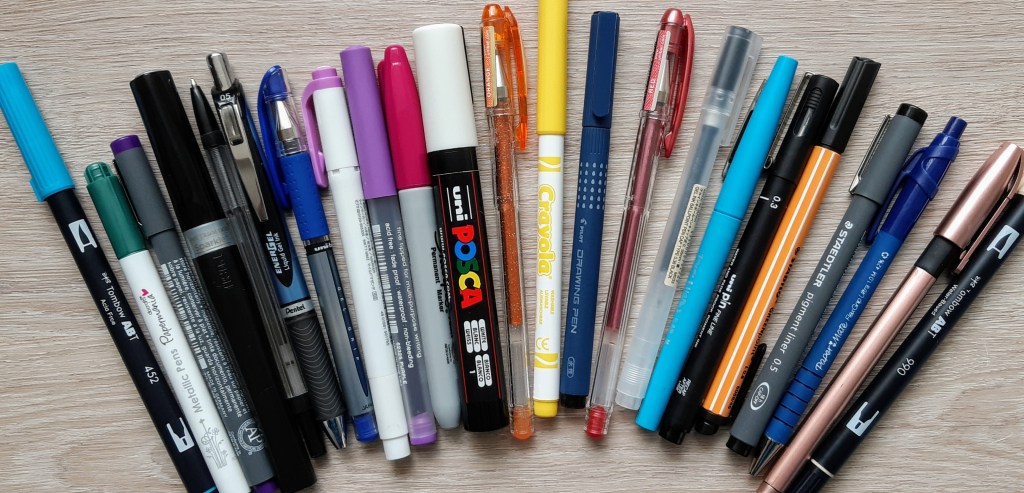
A very small selection of my pens 🙂

Hi guys. Hope you’re all well. This may seem like a bit of a random post from me but the idea for it came to me yesterday after I had a bit of a stationery mishap. Basically, I attended my first class of beginner’s ceramics which I recently signed up for and after finishing the vast amount of paperwork required for the course funding, I accidentally drew a great big line of black ballpoint pen across the left boob area of my light mint green top! I let out a shriek of horror as I know that this kind of pen has a tendency to stain.

When I returned home, I got to work Googling stain removal solutions and I’m excited to report that the pen is now gone and my top is saved. So, I thought, why not do a blog post for the rest of you stationery addicts out there who may, in the future, need a little support with getting pen out of your best clothes.

Please note however, that these are ideas collected from the internet and that I can’t accept responsibility if they don’t work or if they cause further damage to your garments. My aim here is to share what’s worked for others in the hope that you might be able to rescue your much loved items in a similar way.

Ballpoint pen

Stains made with this popular and usually cheap pen can be very difficult to remove. That’s why it’s best to tackle the offending mark as soon as possible. Start by determining the pen type as not all of those which have a ball contain the same type of ink. Traditional ballpoints like Bic and Papermate Flexgrip, use a fast drying oil-based ink which needs to be removed using some kind of solvent. Water-based inks, such as a Pentel roller ball, are fairly easy to remove. Whereas, gel pens are highly pigmented and, again tend to be pretty hard to get out of clothes and furnishings.

The most fabric friendly way to remove oil based ink, is using an alcohol based product. You can often find many of these in your home such as aerosol hairspray, rubbing alcohol, hand sanitiser or wipes. I used a little bottle of Body Shop hand gel which I keep in my handbag. Place the garment over an absorbent material such as a clean cloth, a number of paper towels or white napkins. Thoroughly saturate the area with the pen stain, wait around 5 minutes (probably panic about your precious garment if you’re anything like me) and then use a clean, dry cloth to blot out the stain (I used more paper towels here as this was all I had available to me). Repeat with more solvent and further areas of cloth if necessary. Wash the area with detergent or if you can see the stain has completely gone already, you can just launder as normal.

For water-based pens, if you tackle the mark straightaway, you can simply use soap and warm water to get the stain out with a gentle rub. If, however, the stain has been on the item for longer, and has set. You can use an old toothbrush to add a little friction to rub the stain out. I think this one would be useful on more hardwearing fabrics such as denim jeans.

Gel ink, according to manufacturers, if almost impossible to remove, but the best way to have a go at getting it out, is using normal detergent, stain removing gel (e.g. Vanish) or liquid hand soap. Add a small amount and rub the stain directly, rinsing with running water. Then try to blot out the rest of the ink between two piles of paper towels, white napkins or several clean clothes.

Felt tips and markers

Like the ballpoint pens, it’s important to establish what kind of ink you’re working with. If they’re washable, then the stain should come out with a standard wash but more highly pigmented and marker pens might benefit from the same alcohol based treatment which can be used for ballpoints. If the pen states that it contains permanent ink, the stain will be very difficult to get out but, according to a leading detergent specialist, it’s not completely impossible.

The trick is to treat permanent marker stains with products that can break down the oils and alcohols in the ink, exposing the colourants, and allowing you to treat the discolouration in much the same way you would any other stain – through washing! Alcohol is a solvent and is very effective and efficient at breaking down oils and other alcohols found in marker pens.

Persil.com/uk (for further info and a step by step click here)

Highlighter pens

According to my perusal of the Internet, you can try one of three methods. The first two involve using alcohol such as hand sanitiser or hairspray and the third involves using cows milk. As I’m aspiring to be vegan one day, I’ve transitioned to plant based milk and so I have no idea if this works and don’t have such stuff in my fridge but I’ve seen a variety of sites which recommend it. Apparently, you dip the stain in a bowl of the stuff and rub gently with your fingers, then rinse with plain water. Repeat if you still see a stain and then wash as normal. If anyone knows why milk works and if plant based does the job too I would love to hear from you in the comments as I’m a regular user or highlighters such as mildliners and often get covered in them with being a leftie!

Well, I think I’ve covered the main types of pen here but feel free to make further suggestions in the comments of other tricky pens or methods you’ve tried which have worked (or sob about the ones which didn’t!). Hope this post helps you and if not I’m really sorry! Remember, I can’t take responsibility if your favourite garment is wrecked I’m afraid.

Bye for now, Laura (a self confessed stationery addict) xx