
I’d been wanting a cutting machine for ages and always spent time looking at them during each visit to Hobbycraft. However, both the cutter itself and the materials seemed very expensive and I wondered whether it would become extremely costly. I primarily wanted to use it for making customised stickers to go in my bullet journal and to create die cuts, shapes and stencils for my traveler’s notebook journalling and figured that I could do this instead of buying things online.
When my husband asked me what I would like for my birthday, I mentioned the Cricut Joy and the starter kit I’d seen online. Again, we talked about cost but I decided I really wanted to get one so we searched for the best deal and my husband made the purchase. I set my machine up just over a week ago and I absolutely love it. I’ve also become somewhat addicted to watching YouTube videos showing beginner friendly projects too!
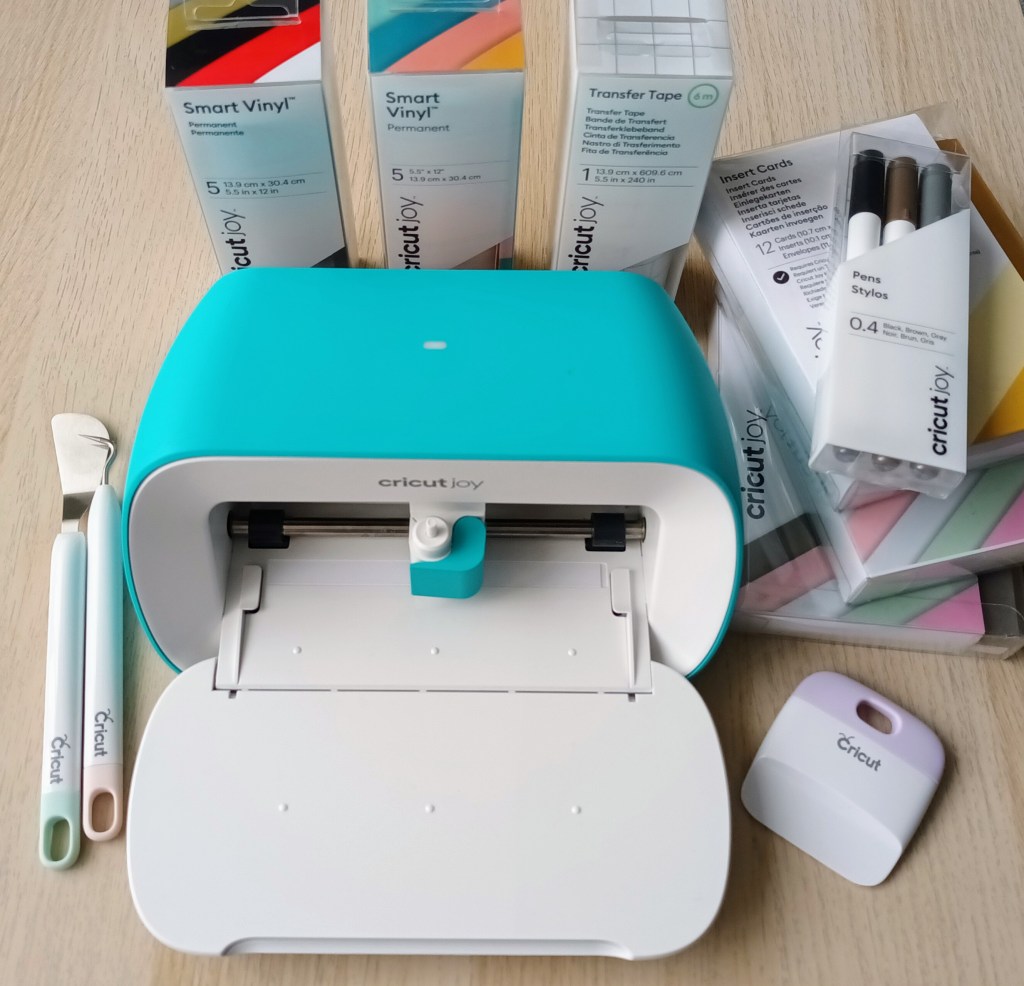
Today, I thought I’d share my initial impressions of my Cricut Joy and what I’ve learnt so far. I’ve already bought a few more items from Amazon – two more insert card sets, a longer standard grip mat and I put my £5 off at Hobbycraft birthday voucher towards a tool set (spatula and scraping tool) which I feel is an essential having done a few projects. I also bought another set of 5 permanent vinyl pieces which is known as the ‘Beachside Sampler’ and contains tulip pink, mint, teal, coral and tangerine colours.
What is the Cricut Joy?
The Cricut Joy is a small cutting, drawing and writing machine that can be used to create a range of personalised items such as greetings cards, labels, decals, stickers, iron on designs for fabric, paper flowers and much more. You can work with a range of materials including cardstock, smart vinyl, paper, infusible ink, faux leather and faux suede, adhesive backed paper, iron on vinyl and foil.
First impressions
The Cricut Joy is the first cutting machine I’ve owned and was the cheapest and smallest option so I felt it was a good one for me to try as a beginner. The Joy itself is super compact and so it doesn’t take up much storage space in my craft room which is a big bonus for me. It’s also fairly light (although heavier than I thought it would be for its size) and portable, so would be good for crafting on the go.
The machine itself comes with the cord, power pack and plug. You also get a welcome envelope which includes a weblink for setting up your Joy and downloading Design Space. The package also contains one standard grip cutting mat, a sample of vinyl and a piece of deluxe paper, plus one 0.4 black pen which can be used in place of the cutting blade. The instructions are very straightforward and easy to follow and I was good to go after just a few minutes and I’d created a vinyl label and a speech bubble message with the card . I was pleased that I chose the starter kit as it included a set of insert cards (plus the mat required for cutting them), a weeding tool for removing bits of paper from the cut work, a set of 5 permanent smart vinyl pieces, some transfer tape for easier aligning of designs on your products and a small set of three 0.4 pens for use in the machine. Without buying the extra bits and pieces you wouldn’t really be ready to do any projects with your new toy unless you used cardstock you already had!
The Cricut Joy connects to your computer, tablet or phone using bluetooth and everything is done through the Cricut Design Space app. There are no buttons on the machine and as soon as you plug the Joy in the light comes on to show it’s ready to use. Having downloaded the Design Space App, I spent a few minutes looking through a range of different designs, fonts and projects. I learnt pretty quickly that if you want to make good use of your machine and use a range of designs, font and even 3D projects, you really need Cricut Access which is free for the first month and then costs £7.49 a month or £71.88 a year until cancelled. You can purchase designs separately which would be best for a light user but as I intend to use my machine regularly, I’ve opted to pay monthly.
Making insert cards
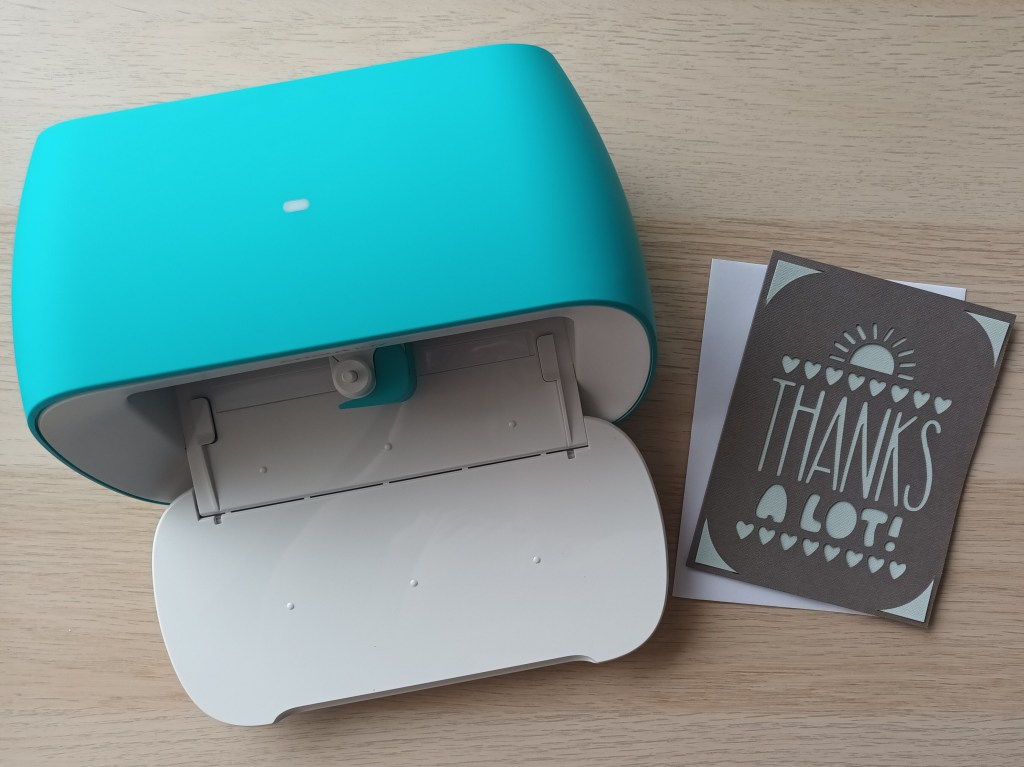
Making cards is super easy and there are so many designs to choose from. The first one I made was a thank you card for my husband in which I wrote about how much I loved both of my birthdat presents – The Cricut Joy and a simple DIY bat detector for use in our back garden where we see a small number of the cute, little creatures collecting moths at dusk.
I also made my friend a birthday card using the cream set with matte gold inserts. Unfortunately, it was a last minute thing and I forgot to take a photograph of the finished project.
Personalising my water bottles
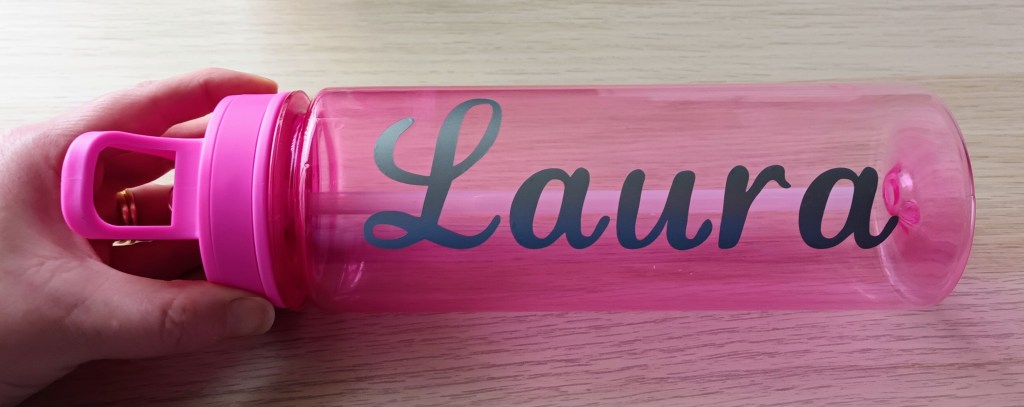
I thought a good, beginner friendly vinyl project would be to personalise the water bottles I have for the gym and on my craft room desk. I decided to put my name on my gym bottle and then add the word hydrate on my glass container. Unfortunately, when I examined them both, the plastic one had a small crack in it (probably from rolling off the passenger seat in my car) and some of the iridescent effect on the glass one had worn off so I ended up replacing them (yet more expense but I wanted them to look good when I’d finished them.
I chose a simple font for my name and decided upon silver vinyl. The Cricut Ioy was quick to cut the text out and my weeding tool was useful for removing the middle from the a letters.
For my glass bottle, I chose a lovely peachy colour vinyl and a cursive font. However, you’ll notice that the finished item has mint vinyl on it, and that’s because the peachy vinyl got torn when I was removing the excess where the thinner parts and flourishes were. I was really disappointed as I didn’t have enough material to try again, but I’ve learned that you need to be super careful when peeling away the surrounding vinyl. I also had issues with getting the word firmly stuck to the transfer tape and had to repeatedly go over bits of it with the scraper tool.
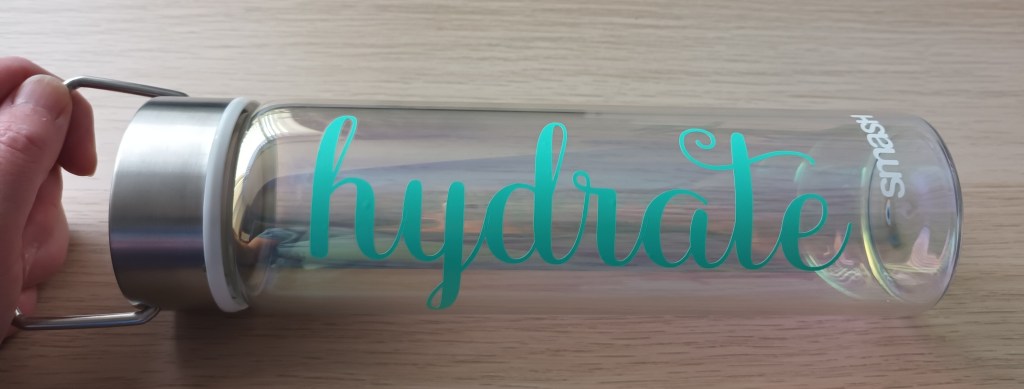
I’m thrilled with how they both turned out, and I couldn’t wait to photograph them and share them both with you. I wonder if anyone will notice my personalised gym water bottle when I go to Pilates tomorrow?
Creating stickers i.e. what I mainly wanted my cutting machine for
At the beginning of today’s post, I mentioned that one of my main reasons for wanting a cutting machine was so that I could make stickers for my BuJo and travellers notebook journals. However, I’ve since discovered that the Cricut Joy does not support print and cut like the larger cutting machines do. There are quite a few videos on YouTube which share a hack for it but it looks like quite a lengthy process so I wanted to wait until I had more time and had become more familiar with the design software. I’ll probably share another post when I’ve got to grips with what you have to do.
Final words…
I hope today’s post has been useful for anyone who is tempted to buy a cutting machine for their crafting. Even if you’re not a craftaholic like me, hopefully you enjoyed seeing my designs. I’m really loving my Cricut Joy so far and exploring what it can do. I’m looking forward to trying out lots more projects and techniques in the near future.


Sounds like a good investment for you.
LikeLiked by 1 person
I’m sure it will be when I get used to the app software.
LikeLiked by 1 person